Sixi 2 robot arm
11. Calibrate a Sixi robot

Step 1 Turn off main power
Make sure the arm is not holding anything or the added weight could cause the arm to drop downwards.
If taking the weight off is difficult, hold the robot hand before turning off power.
Turn off power at the red switch on the control box.
Step 2 Move the arm to home position
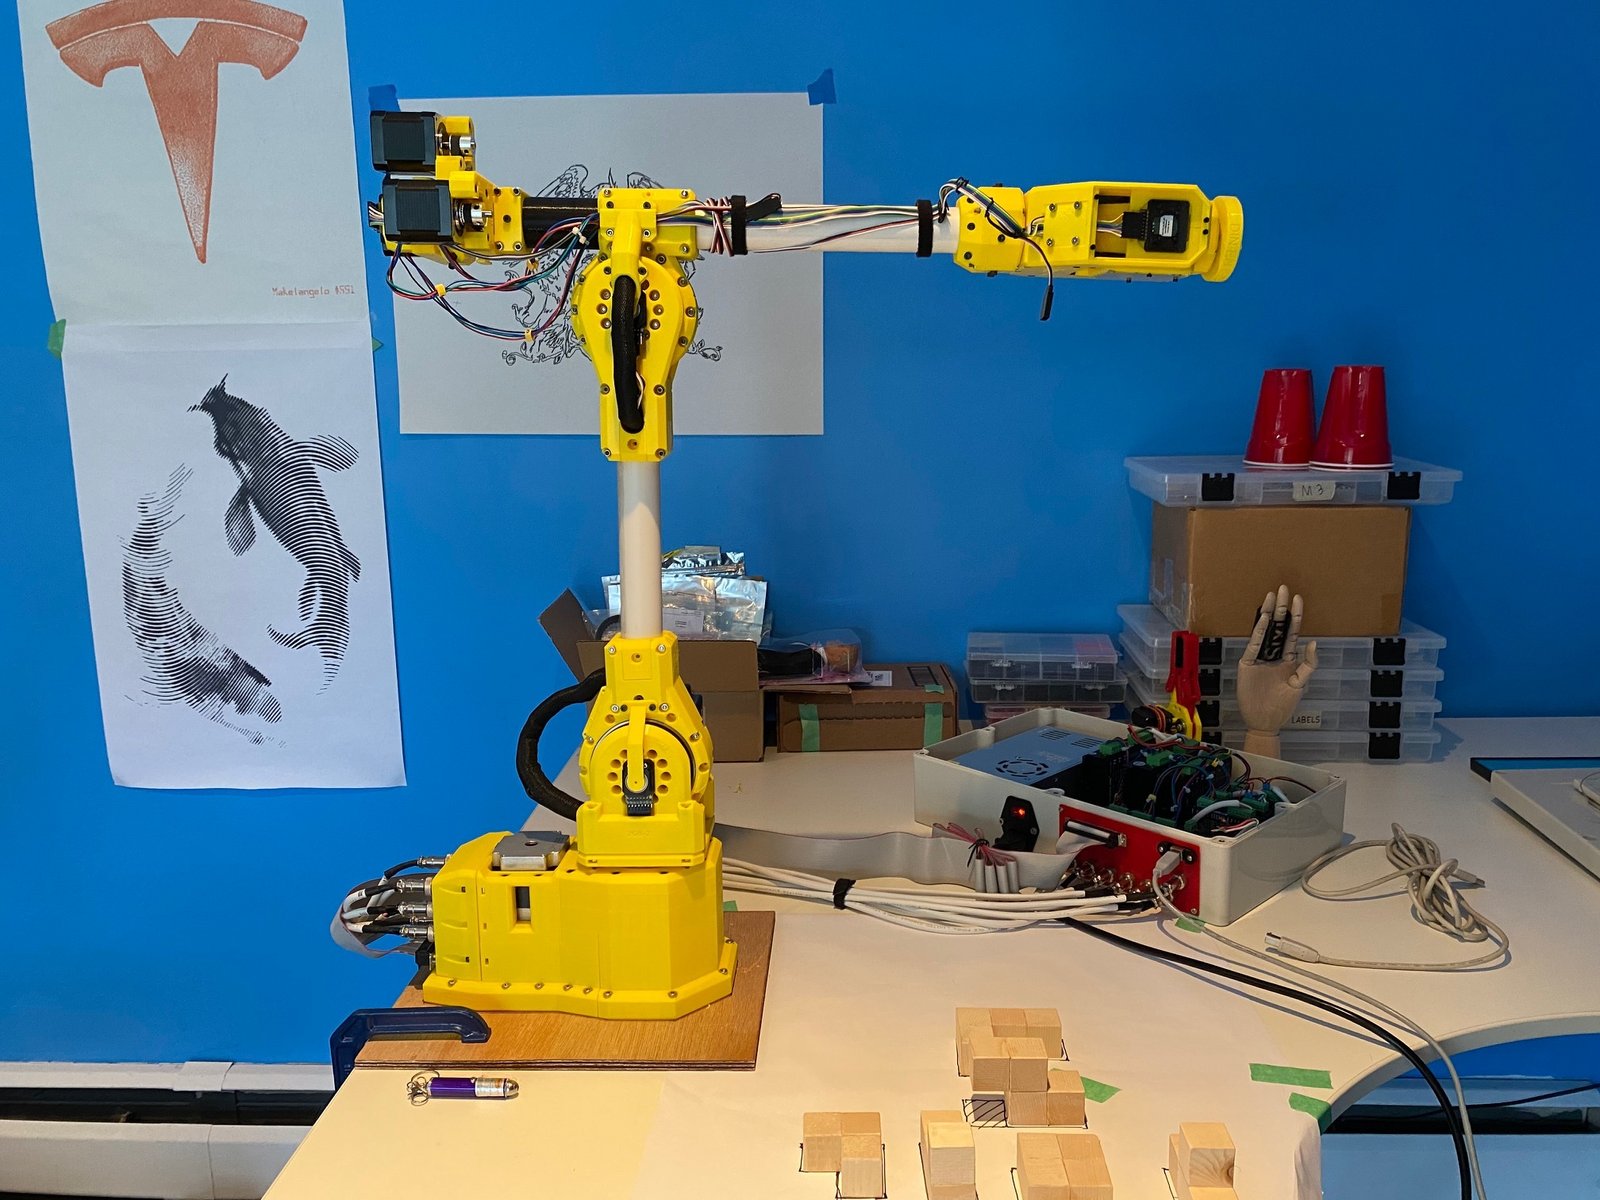
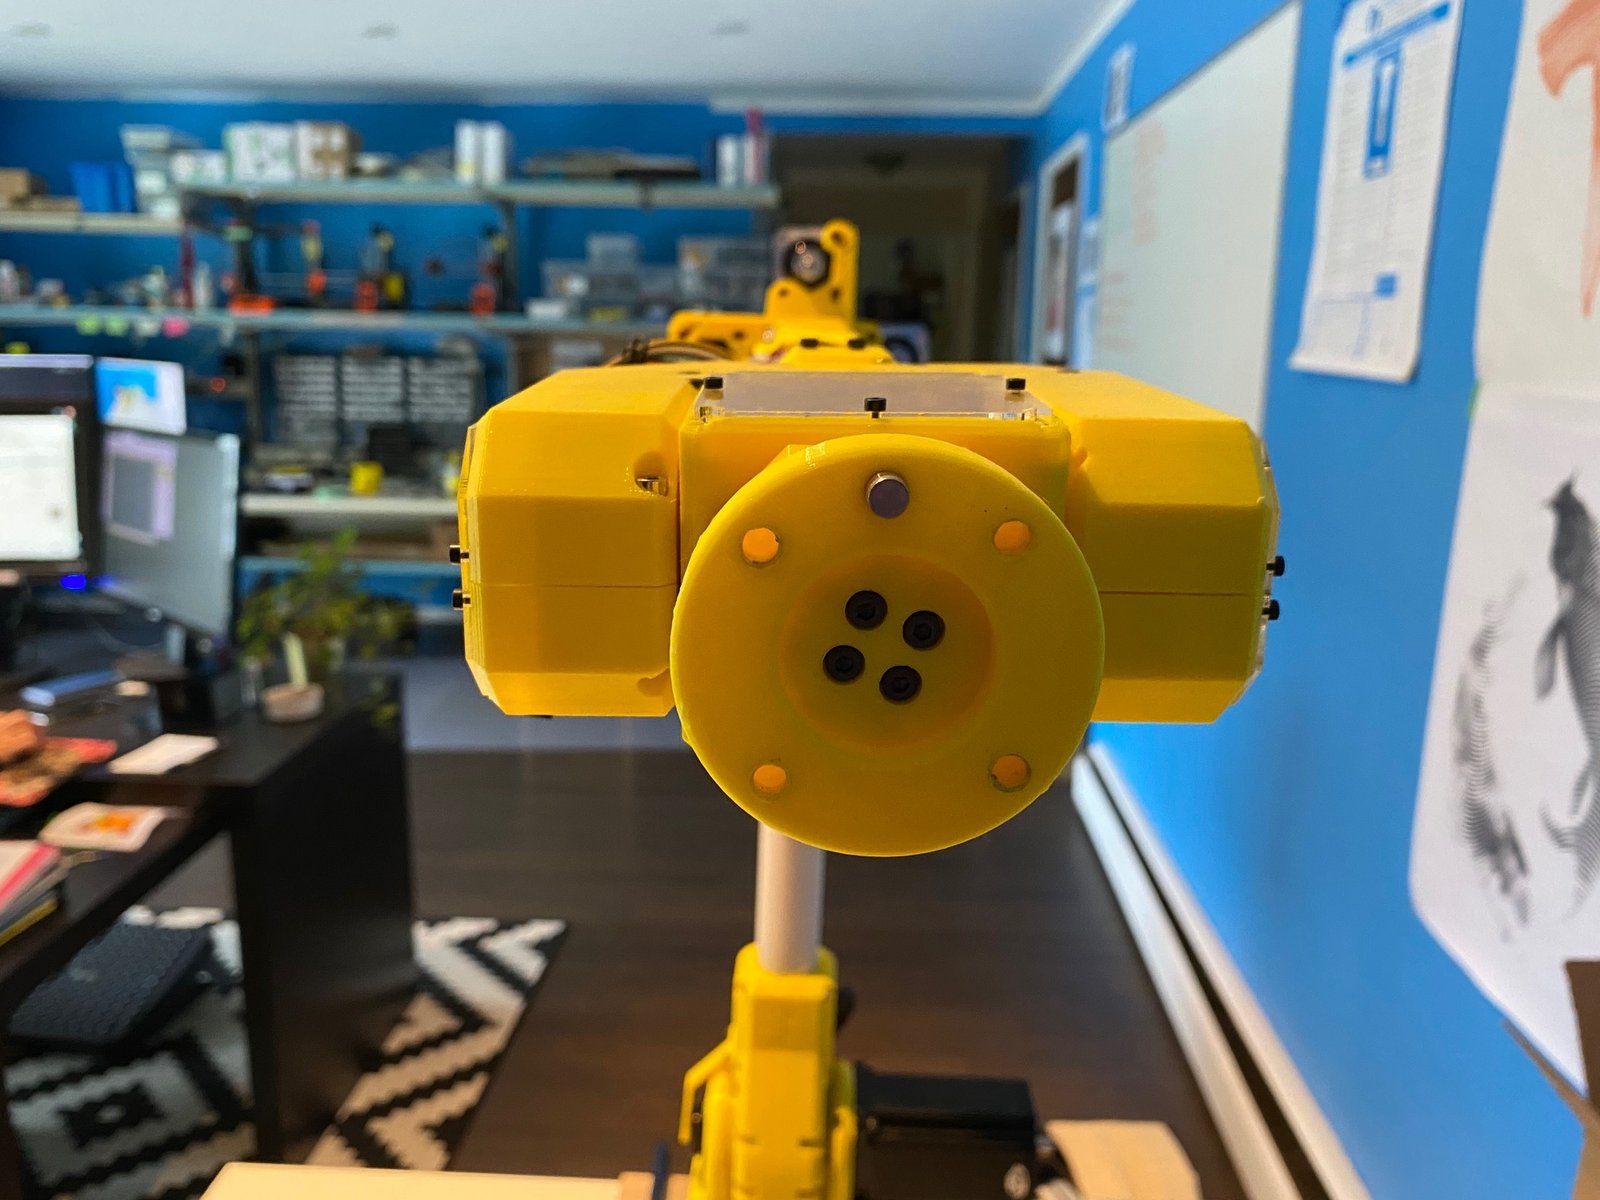
Click the large image to open full size.
Move the arm into "home" position, where all sensors would nominally report x=0, y=-90, z=0, u=0, v=0, and w=0.
turn power on. robot will hold in this position.
Step 3 Save the offset adjustment
Use the Arduino software from step 10 to connect to your Sixi robot.
In the text field at the top of the serial window, type D19 P0 (P + number zero) and click Send. (D19=toggle D17 stream) Confirm the D17s have paused.
type D23 and click Send. (D23=Calibrate Sixi) This copies the current angle values to the live home position. D17 will now report D17 0 -90 0 0 0 0 -
type M503 and click Send. (M503=report settings.) The reply should match the last D17 value before D23, because the home position is subtracted from the raw values to get the adjusted position.
Type M500 and click Send. This saves the new home position. If you do not M500 and reboot, the home position will not be changed.
- Warning:
We need a much better way to accurately align the robot. Close is OK We want better.
Step 4 Make small moves
send G0 F5 A1. This sets the feedrate to 5 degrees/s and acceleration to 1 degree/s. Be prepared to turn off the main power if a move makes you nervous for any reason. Better safe than sorry!
Send G0 X5. This should turn the X motor (the bottom joint) 5 degrees clockwise (if the clock is facing up). Send G0 X0 to return to home position.
Send G0 Y-95. This should turn the Y motor (the bottom joint) 5 degrees clockwise. The elbow will retreat from the direction the hand is pointing. Send G0 Y-90 to return to home position.
- Warning:
Caution! Do NOT send G0 Y0. Y0 is 90 degrees forward. There is a high chance your arm will drive down into a table or obstruction.
G0 Z5 will turn the elbow down toward the base.
G0 U5 will turn the wrist clockwise (the clock faces towards the elbow).
G0 V5 will turn the wrist down towards the base.
G0 W5 will turn the hand clockwise (the close faces towards the wrist).
Step 5 Connect with Robot Overlord
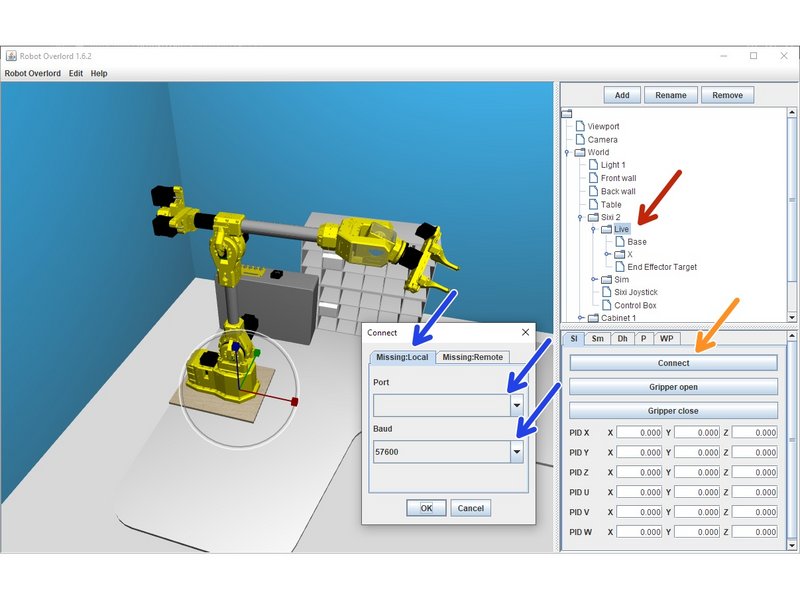
Click the large image to open full size.
Run the Robot Overlord app (https://github.com/marginallyclever/robo...)
Select World > Sixi 2 > Live from the top right panel. The bottom right context panel will change. Make sure Arduino serial window is closed, as only one USB connection can exist at a time.
Click Connect in the context menu.
Choose Local, choose your USB port, and make sure the baud rate is 57600. Click OK to connect with those settings.
If the software connects successfully, one of the simulations will "snap" to match the live position.
- Warning:
CAUTION! The live robot may immediately begin driving towards the simulated position. Best to have the simulated arm in a known safe position.
If the real robot and the live version in the software do not match, return to a previous step and recalibrate the home angles.
Step 6 First Robot Overlord moves
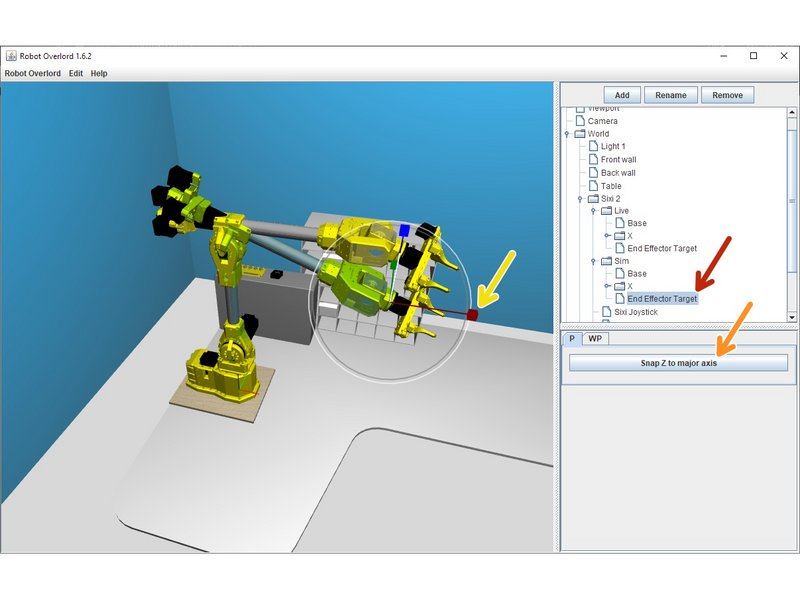
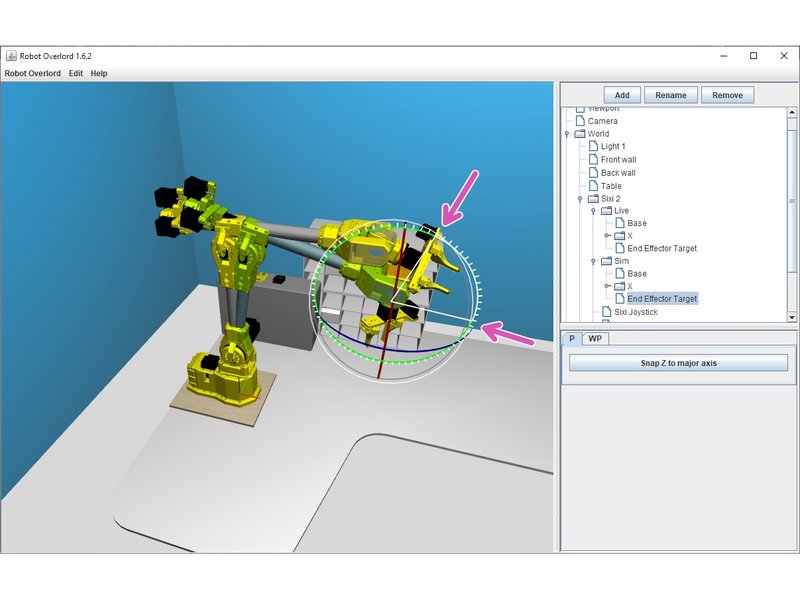
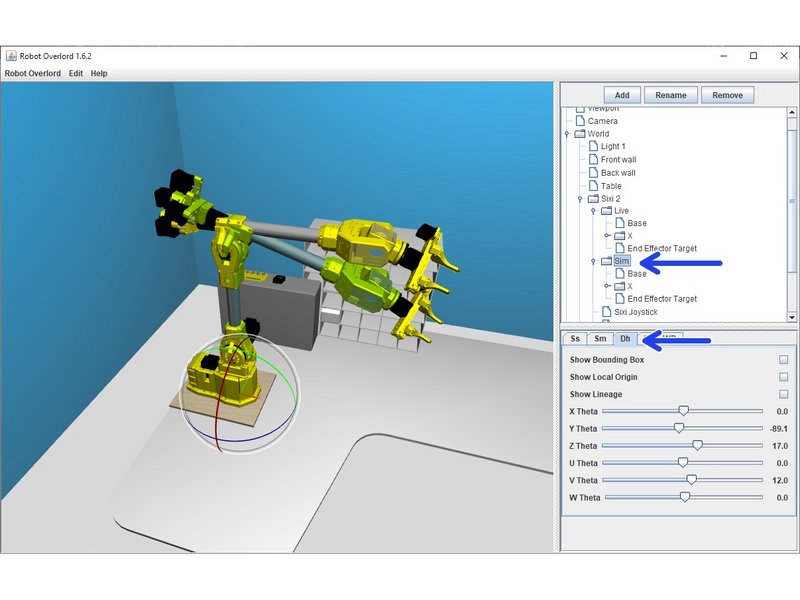
Click the large image to open full size.
Select World > Sixi 2 > Sim> End Effector Target. Handles will appear in the 3D scene at the hand.
Gently drag the handles to move the target. The live robot will drive towards your simulated target at all times while connected.
Snap to world axis will first turn the hand to face the nearest world axis, then the remaining two axies. Good for pointing straight sideways or up/down.
Use SHIFT to switch to rotation mode.
World > Sixi 2 > Sim > Dh will allow you to directly access joint angle values if you prefer this method of driving.
Use F1, F2, and F3 to change the frame of reference to world, camera, and local, respectively. Try them out and see for yourself!