Sixi 2 robot arm
10. Upload Sixi firmware
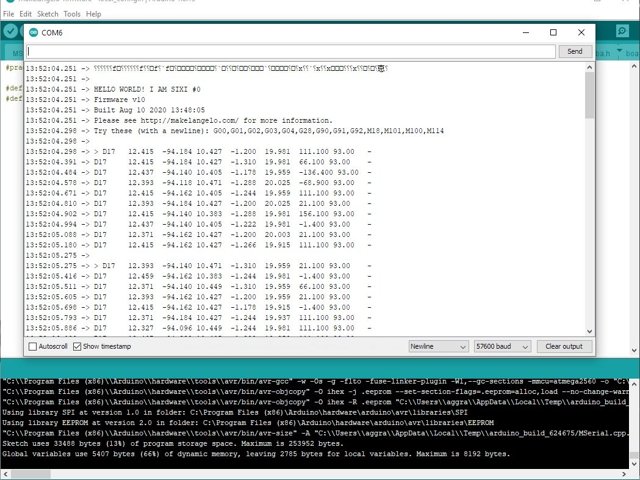
In this guide we will use Arduino to upload the code that runs the Sixi 2 robot.
Step 1 Download firmware
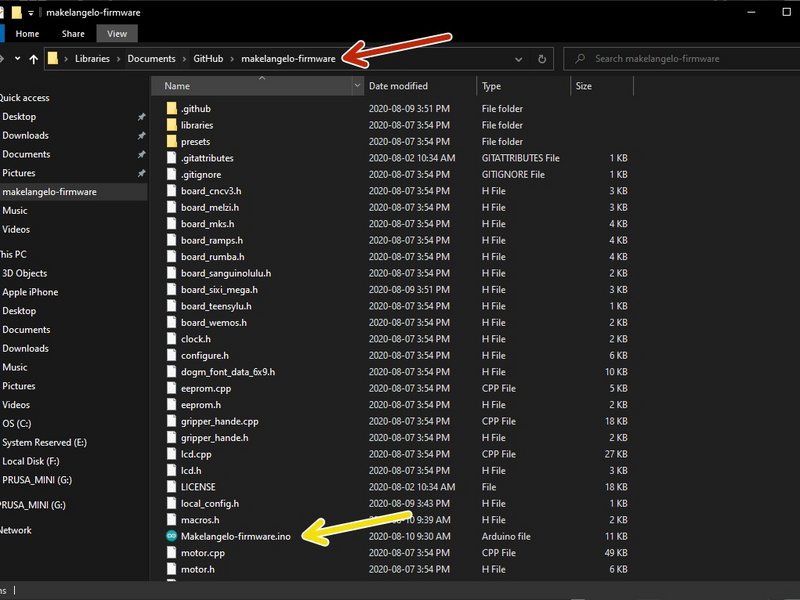
Click the large image to open full size.
Download the stable master from https://github.com/MarginallyClever/Make...
If you have downloaded a ZIP file, extract it into a new folder that MUST be called Makelangelo-firmware.
Step 2 Open the firmware in Arduino
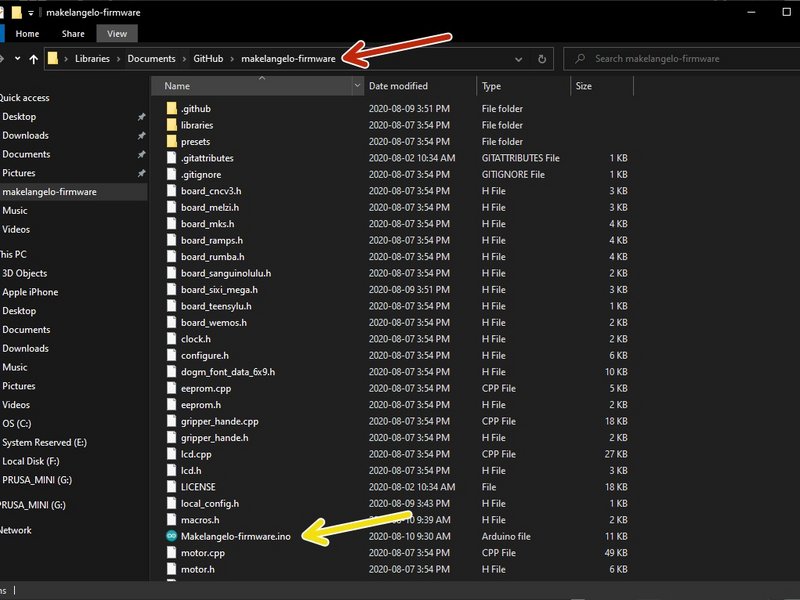
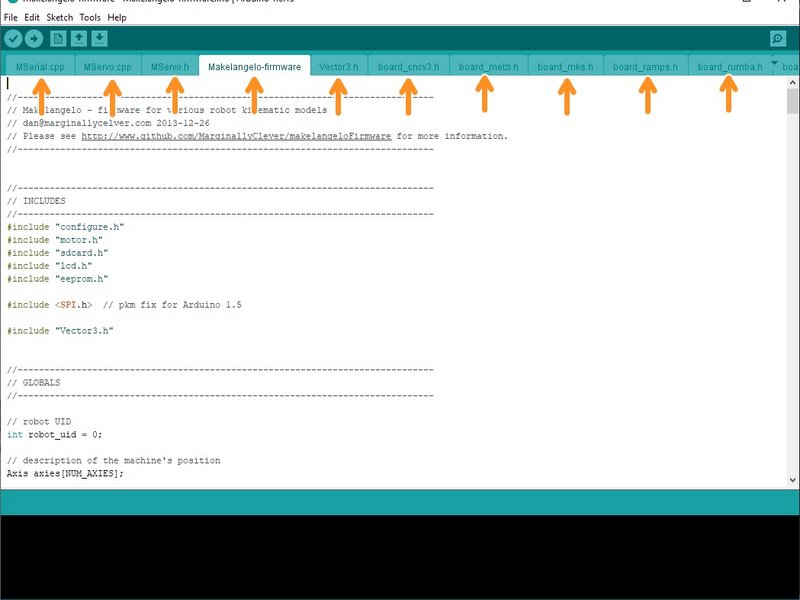
Click the large image to open full size.
Go into the folder called Makelangelo-firmware and open Makelangelo-firmware.ino with the Arduino app.
The Arduino app is available from https://www.arduino.cc/en/Main/Software
You may be asked to update some features of Arduino. Please follow the prompts and get up to date.
You should see many tabs at the top of the app. If you have only one tab then Arduino has created that folder and moved the ino file into the folder. Quit Arduino, move the rest of the files into the new folder, and re-open the file.
Step 3 Confirm code settings
Click the large image to open full size.
close Arduino.
In the folder with Makelangelo-firmware.ino, find the subfolder presets/ and in there find the file sixi.h
copy presets/sixi.h to ./local_config.h
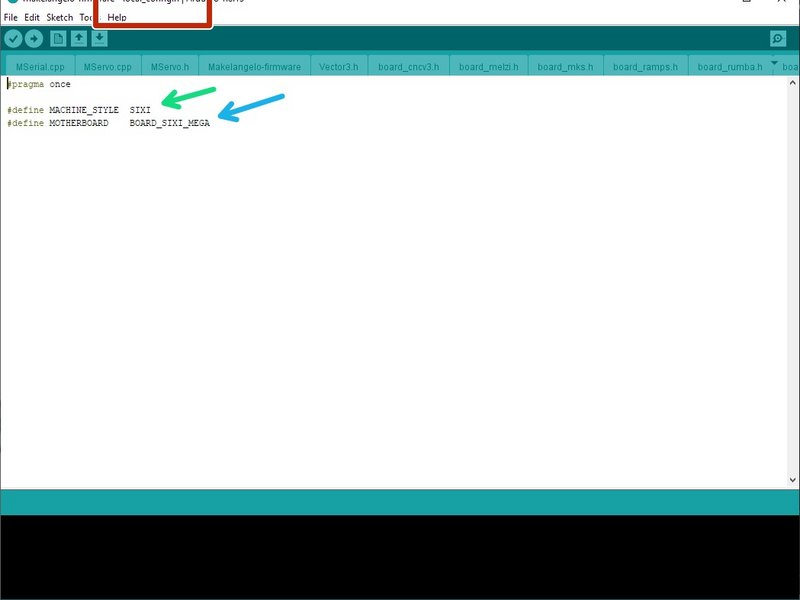
Reopen Arduino. there should now be a tab that called "local_config.h". click the tab and confirm that there is a line which reads #define MACHINE_STYLE SIXI
confirm there is a line which reads #define MOTHERBOARD BOARD_SIXI_MEGA
Step 4 Connect your robot to the app
Click the large image to open full size.
Connect the USB from your computer to your robot.
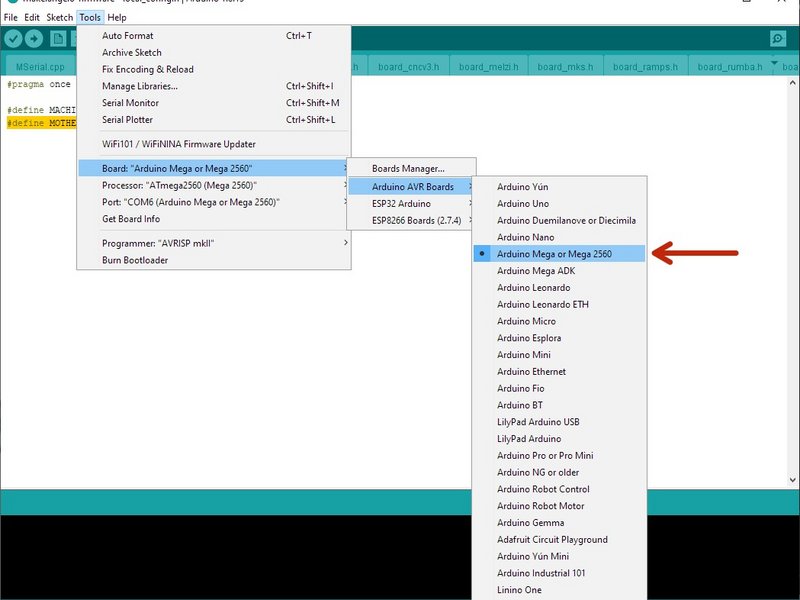
In Arduino, set Tools > Board to Mega 2560
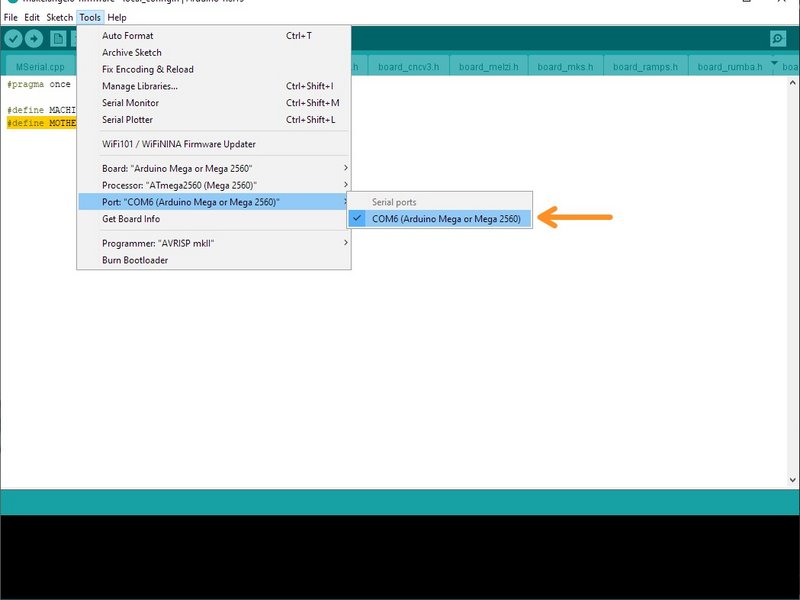
set Tools > Port to the port that says Mega 2560. This name is slightly different for OSX and Linux users.
If you do not see any com port, don't panic. Read the next step.
Step 5 If you don't see any Windows COM port
- Note:
If you already see the COM port, you can ignore this step.
- Warning:
Suddenly disconnecting power while your PC is talking to your robot scares Windows. It will hide the COM port until after a reboot as a precaution.
Step 6 Upload the firmware to the robot
Click the large image to open full size.
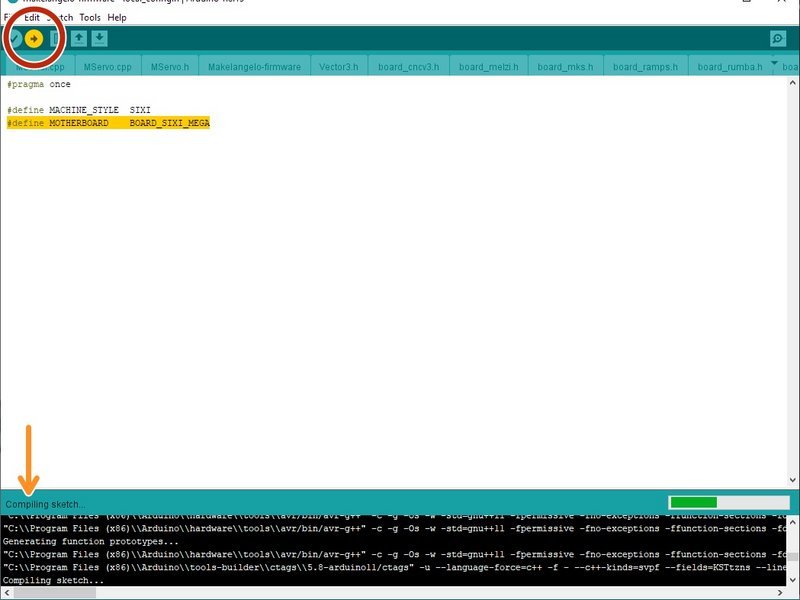
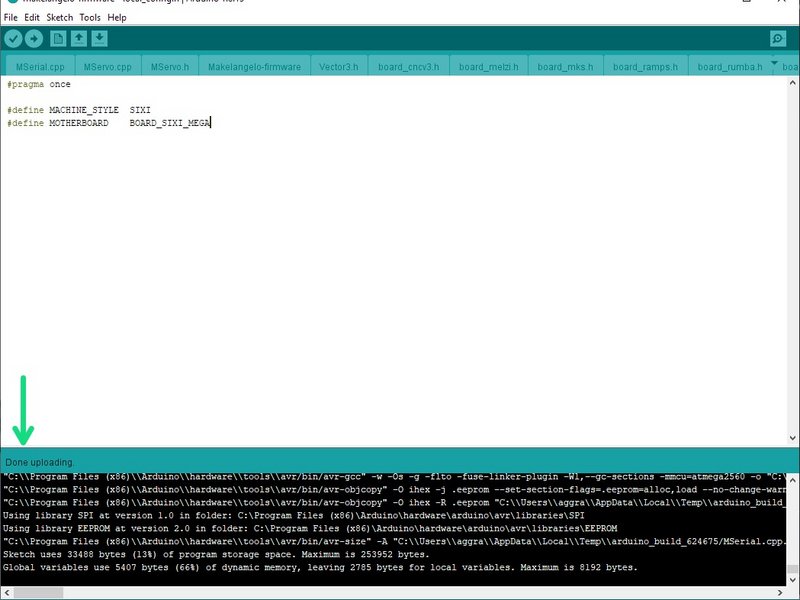
Click the upload button. The app will say "Compiling..."
and then "Uploading..."
When finished OK, it will say Done uploading.
For all other results, please copy all the text in the orange text in the fail message and post it to our support forums at https://www.marginallyclever.com/learn/f...
Step 7 Confirm code is uploaded.
Click the large image to open full size.
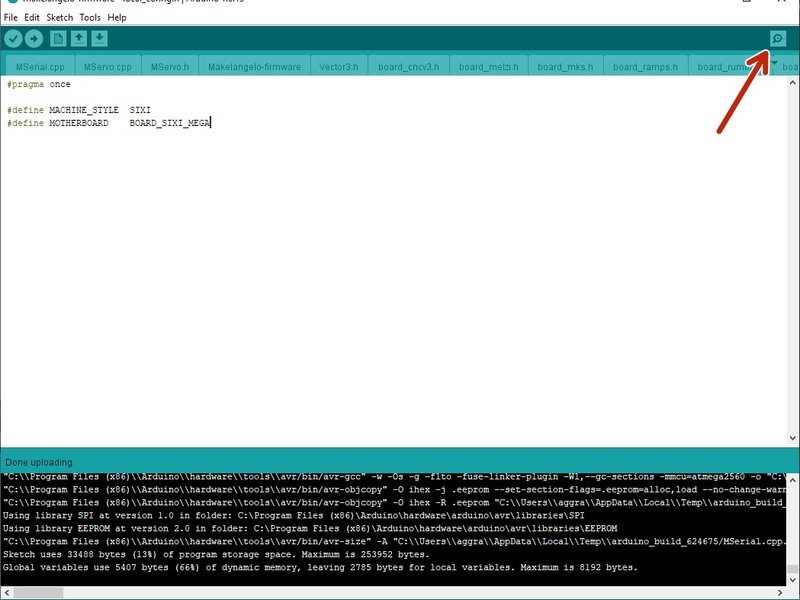
Click the Serial Window icon in the top right (looks like a magnifying glass)
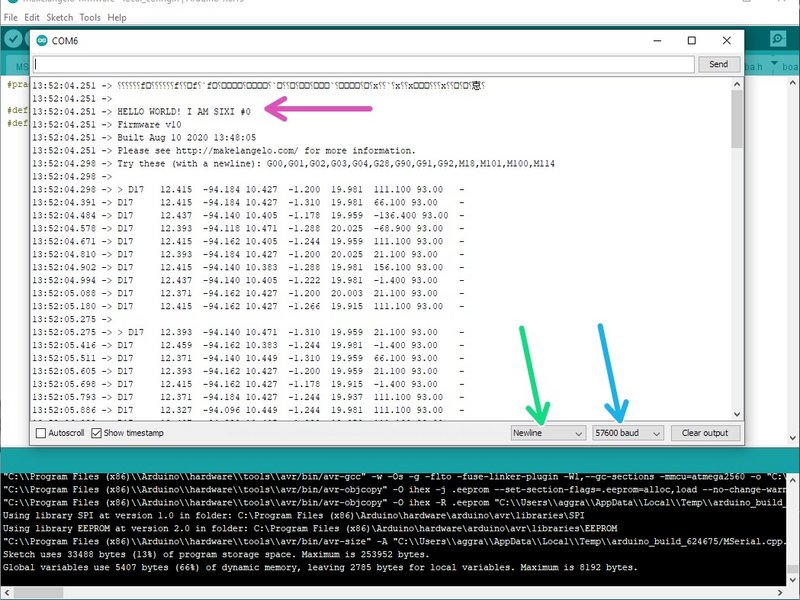
Confirm that in the bottom right of the window the dropdowns says "newline".
Confirm that in the bottom right of the window the dropdowns says "57600 baud".
Confirm that text appears and the first line says "[some noise]HELLO WORLD! I AM SIXI"
Complete
Congratulations! The code in your Sixi's brain is now reloaded. If this is your first time, proceed to step 11. Calibrate your robot.