Sixi 2 robot arm
5. Elbow Gearbox Assembly
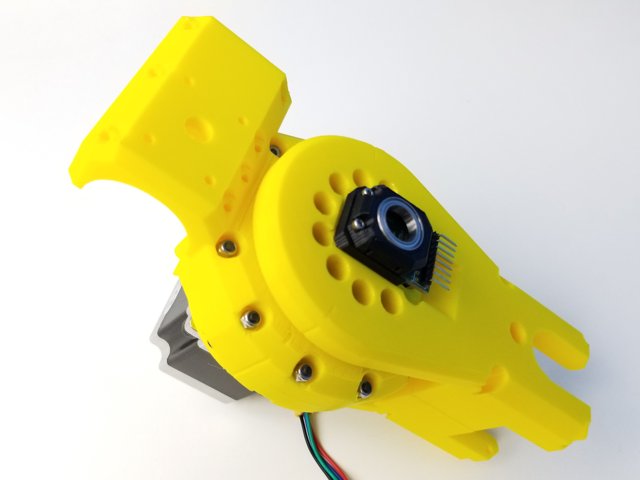
Step 1 Tools and Parts Required for this Chapter
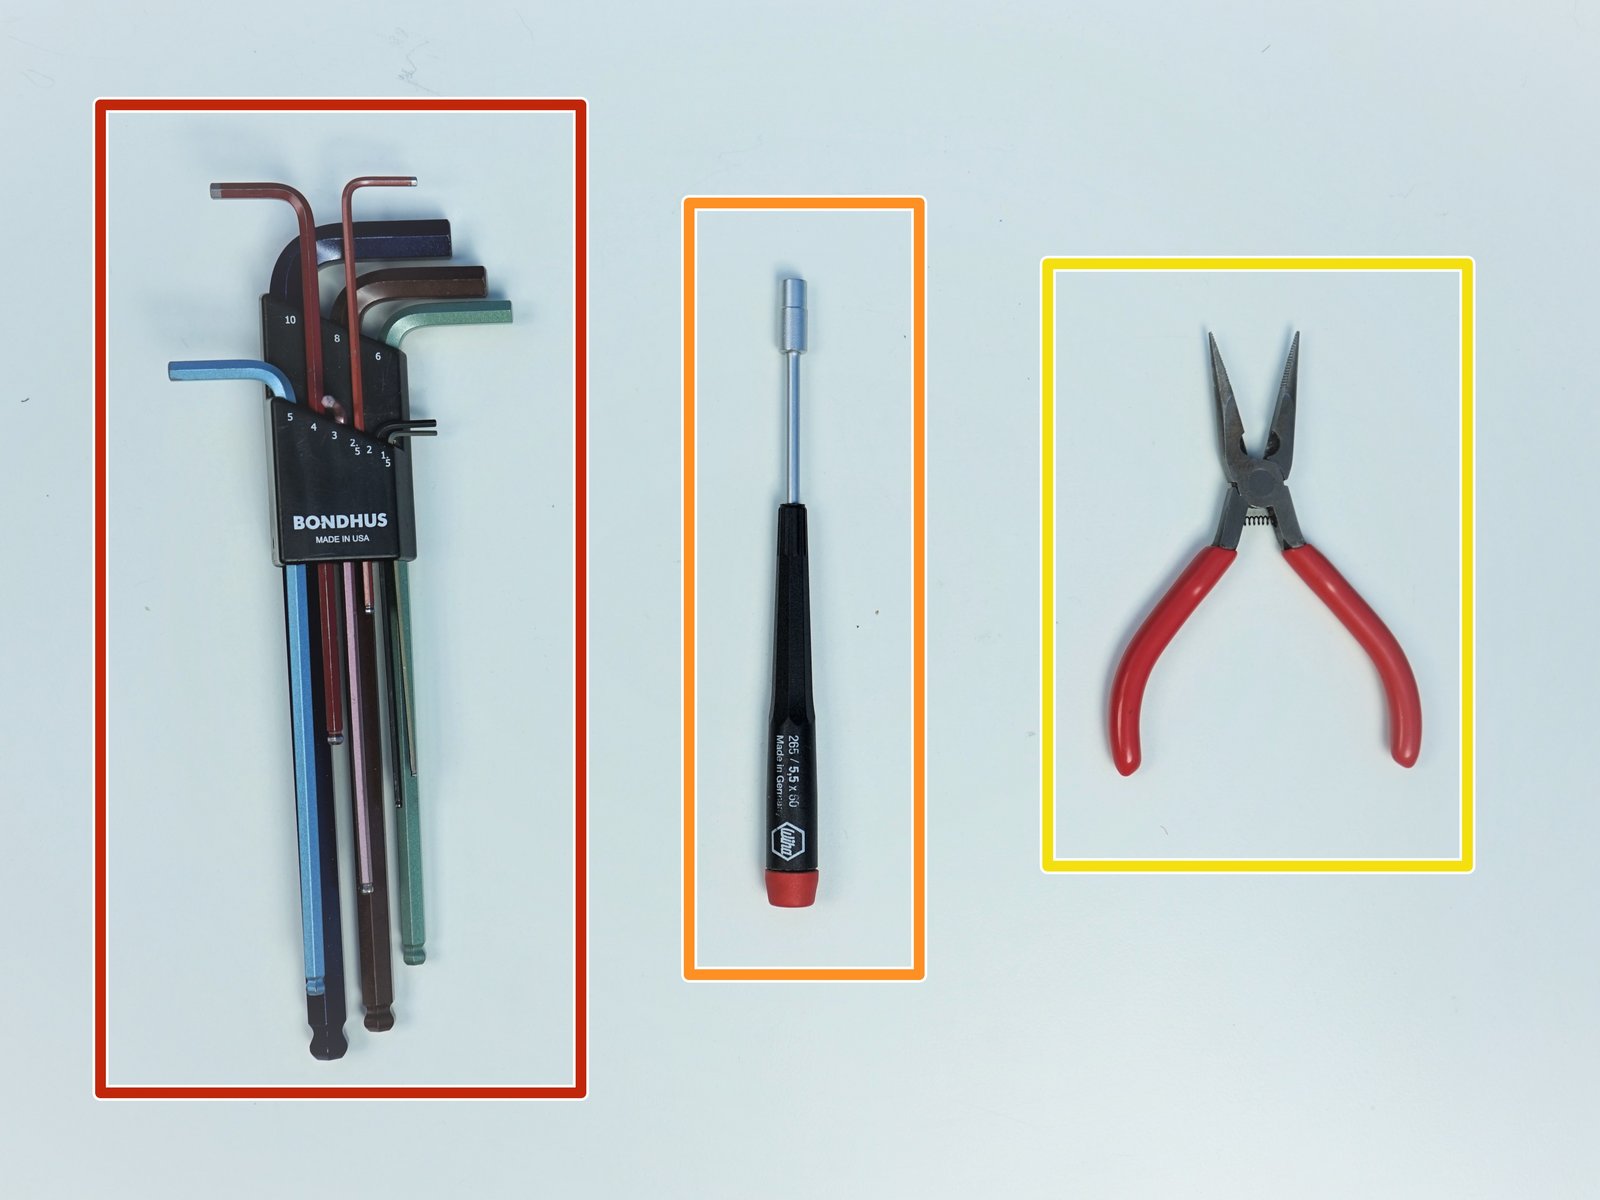
Click the large image to open full size.
[3D] - Package #3
Alan Keys
Socket Head Driver - 5.5mm
Plier [Opt.]
Step 2 Clamped Rotors - Parts and Notes
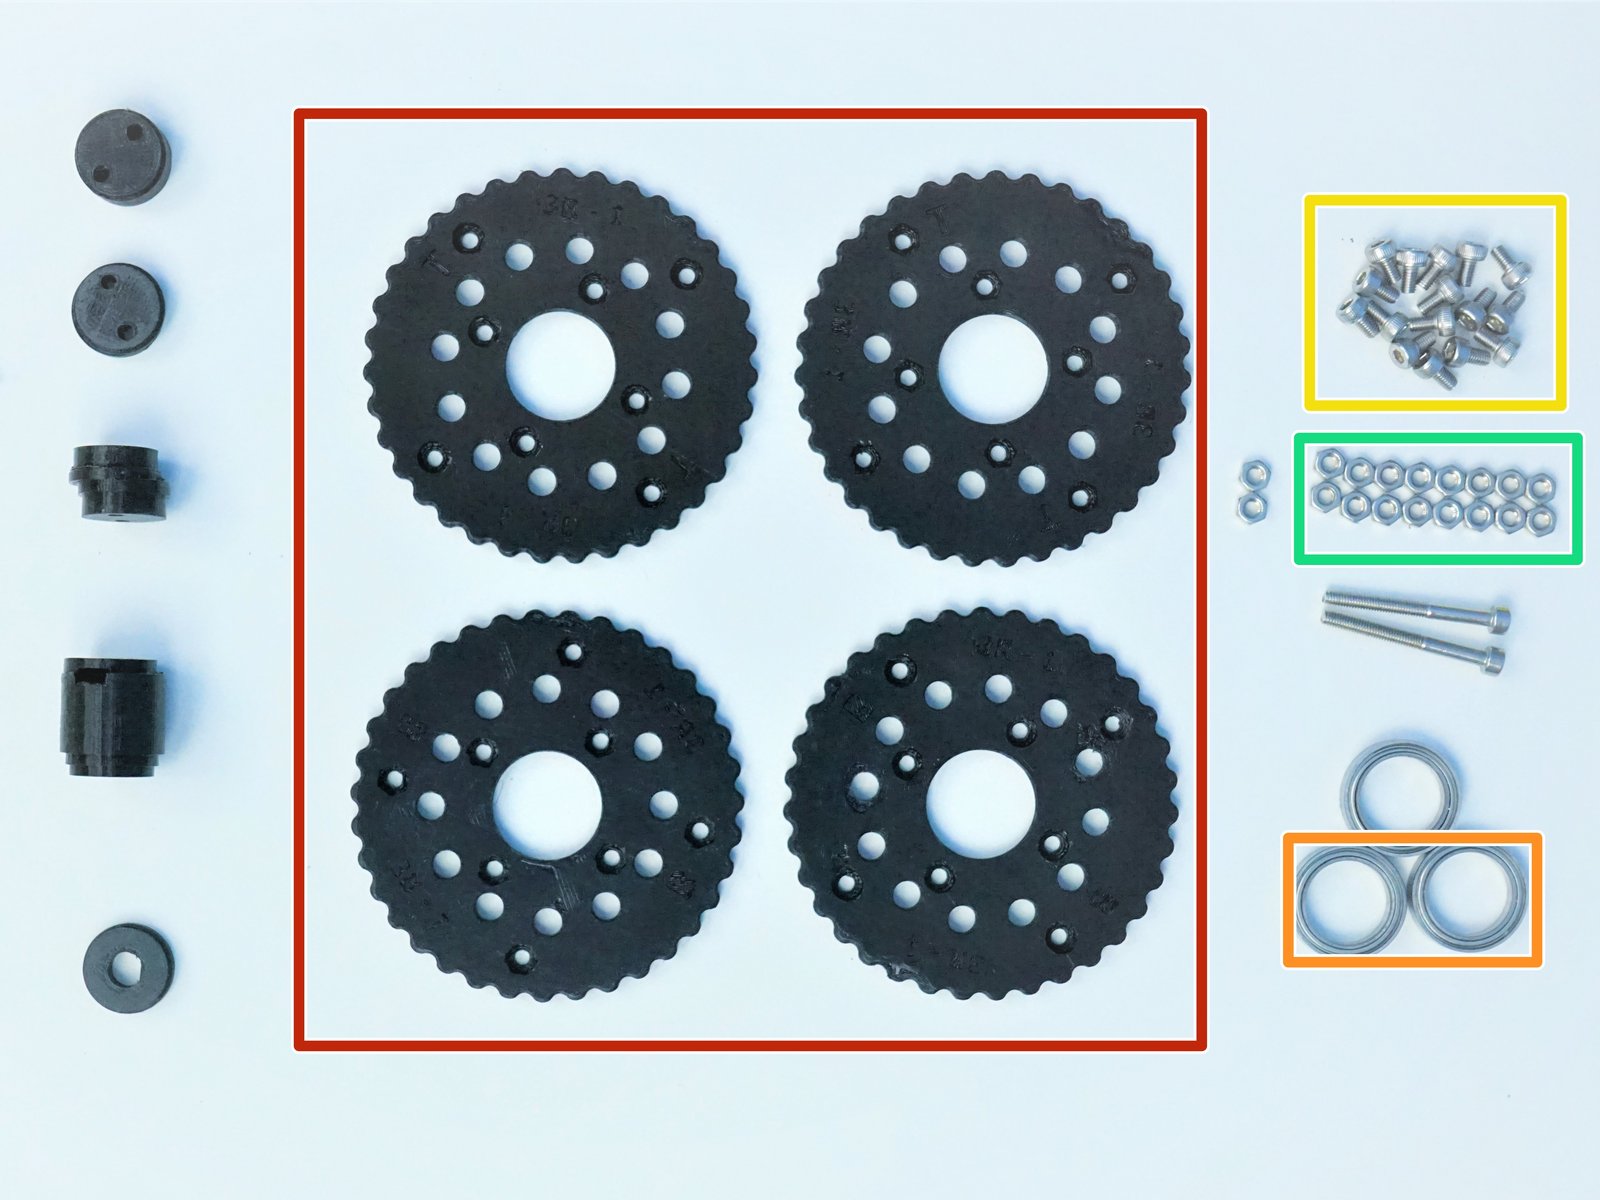
Click the large image to open full size.
- Note:
Prepare the following components:
[3D] - 3R Elbow GB Rotors
6702 Bearings [15x21x4mm] (x2)
M3x5mm Screws (x16)
M3 Hex Nuts (x16)
- Note:
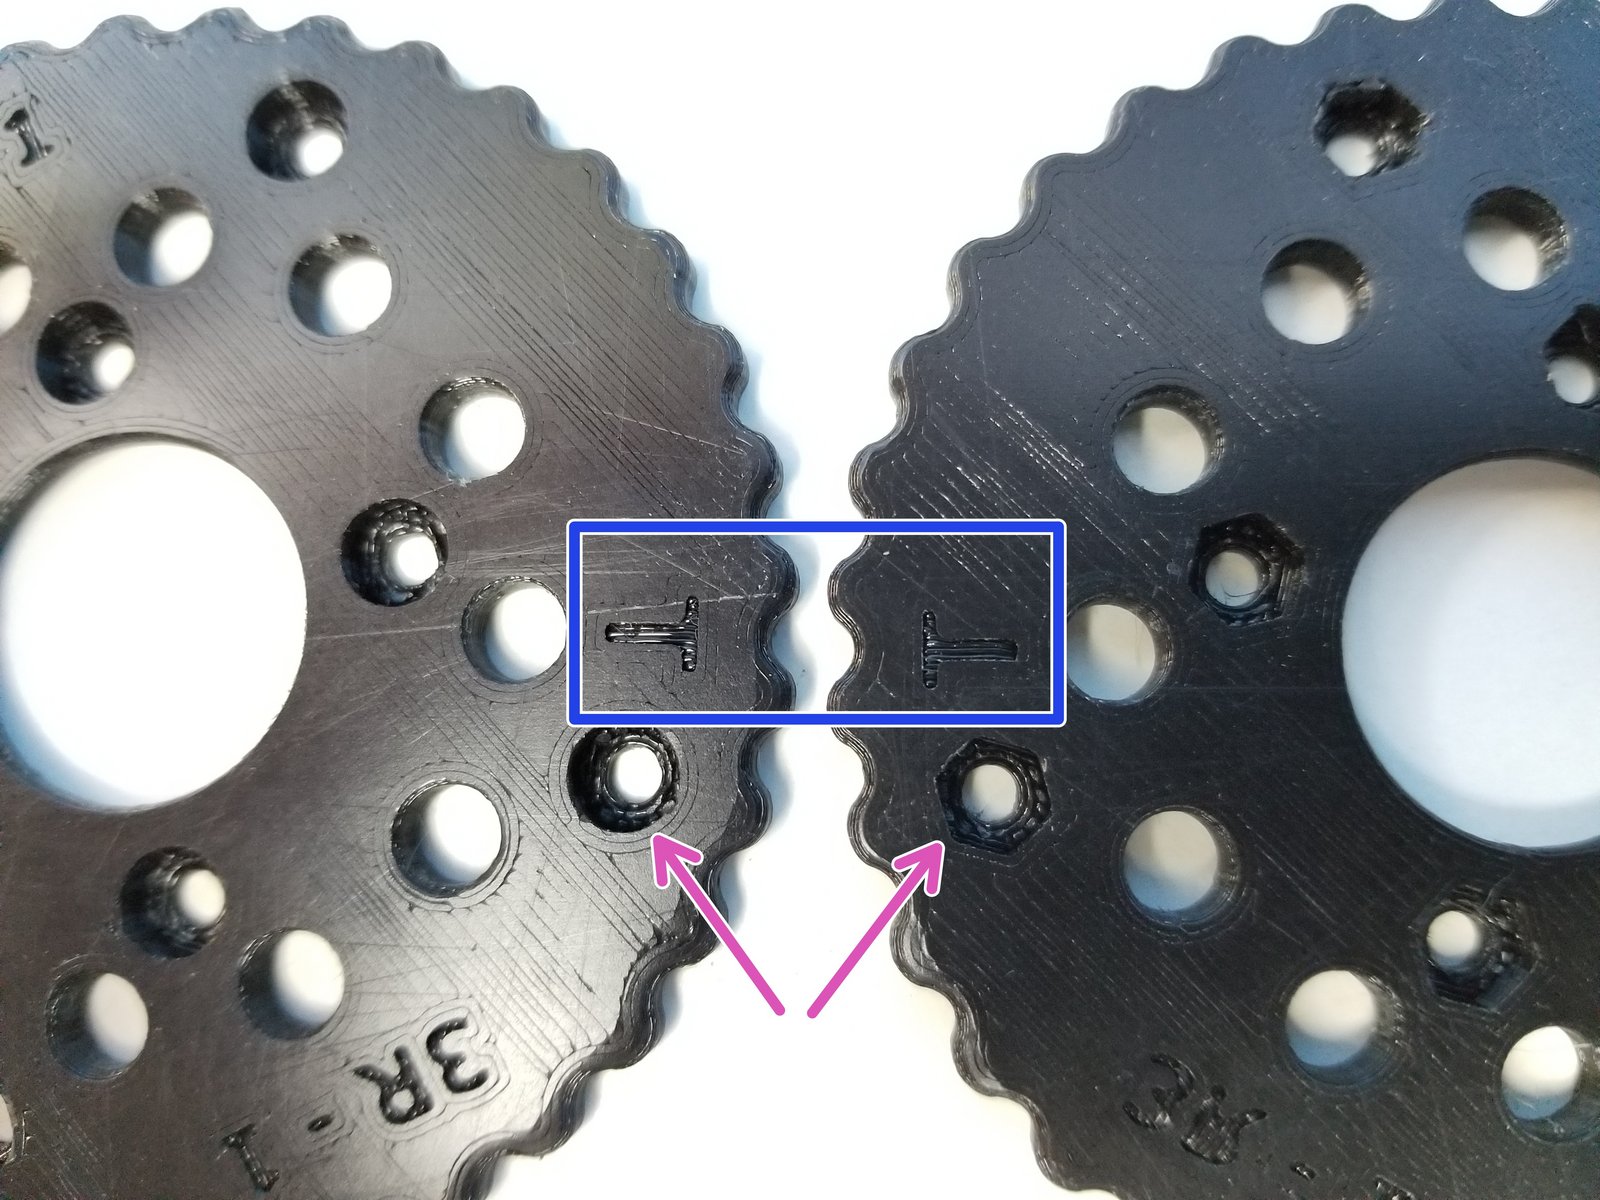
NOTE:
Elbow Gearbox Rotor consist of 4 similar looking parts, Be aware of T Label and B Label
Also Be aware of the Nut Insert vs. Screw Head Insert
Step 3 Clamped Rotors
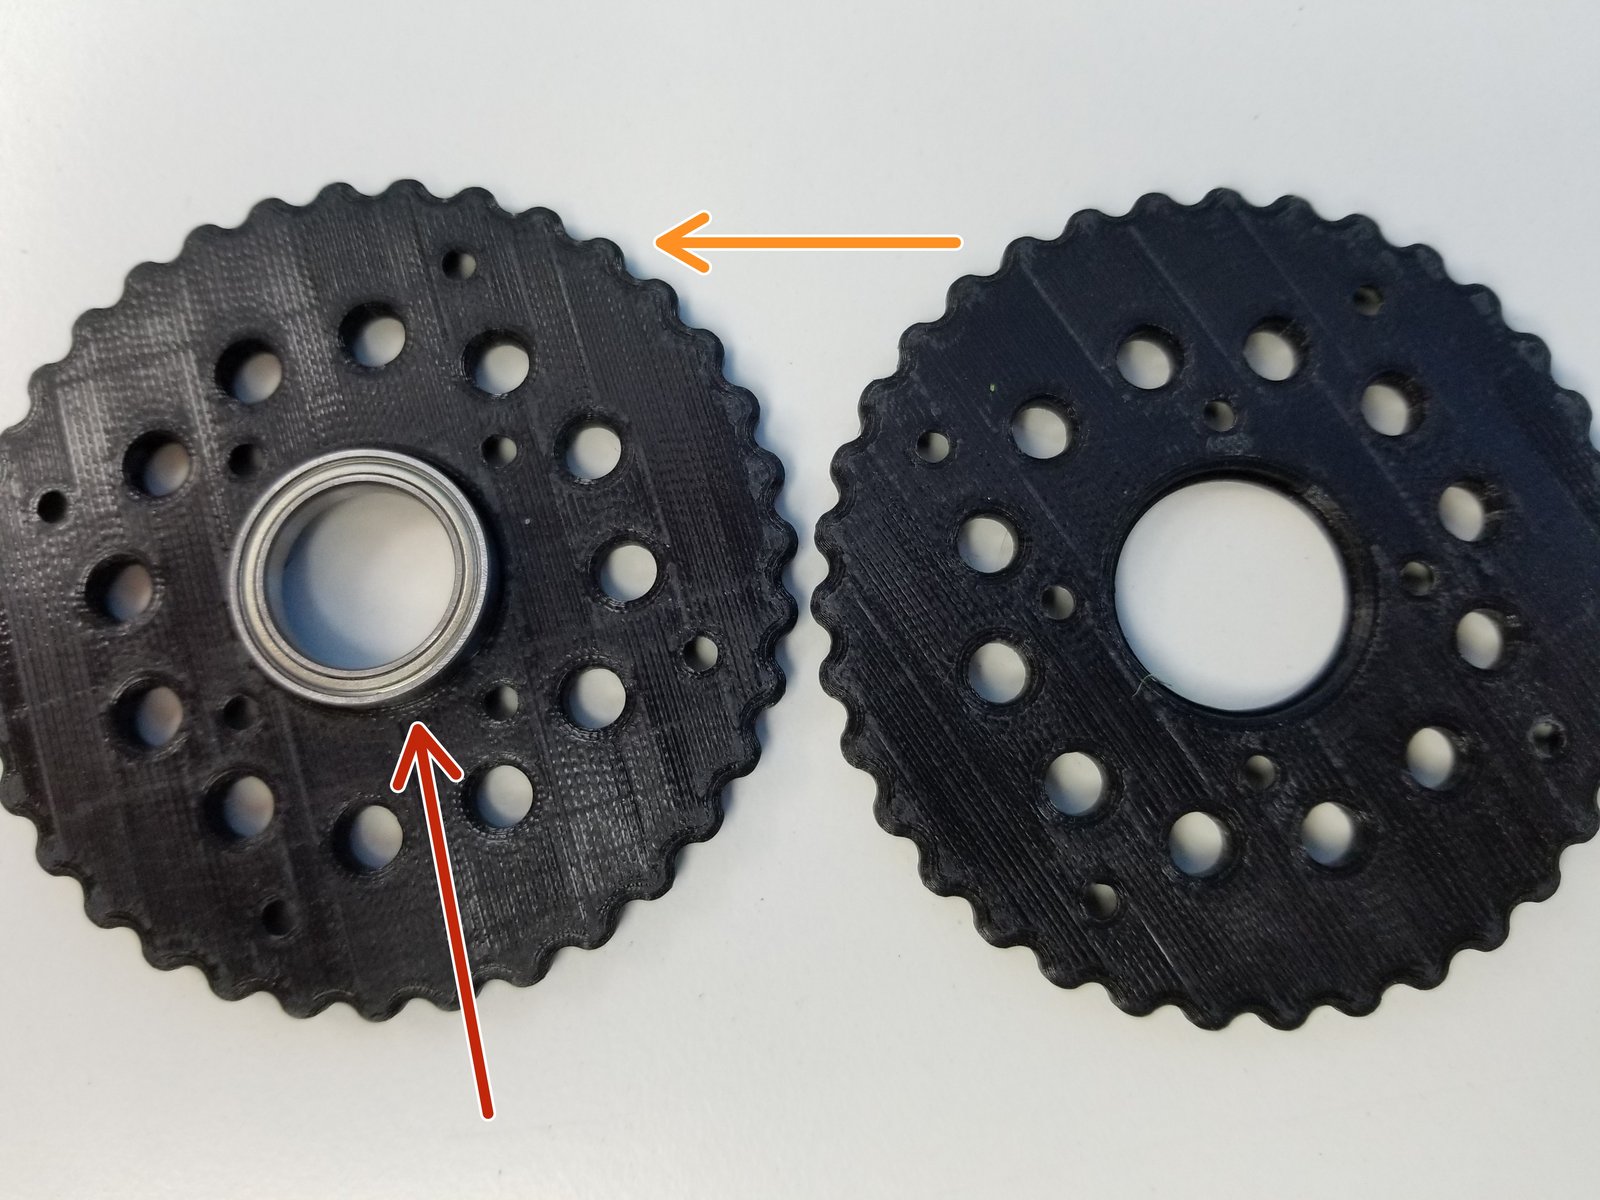
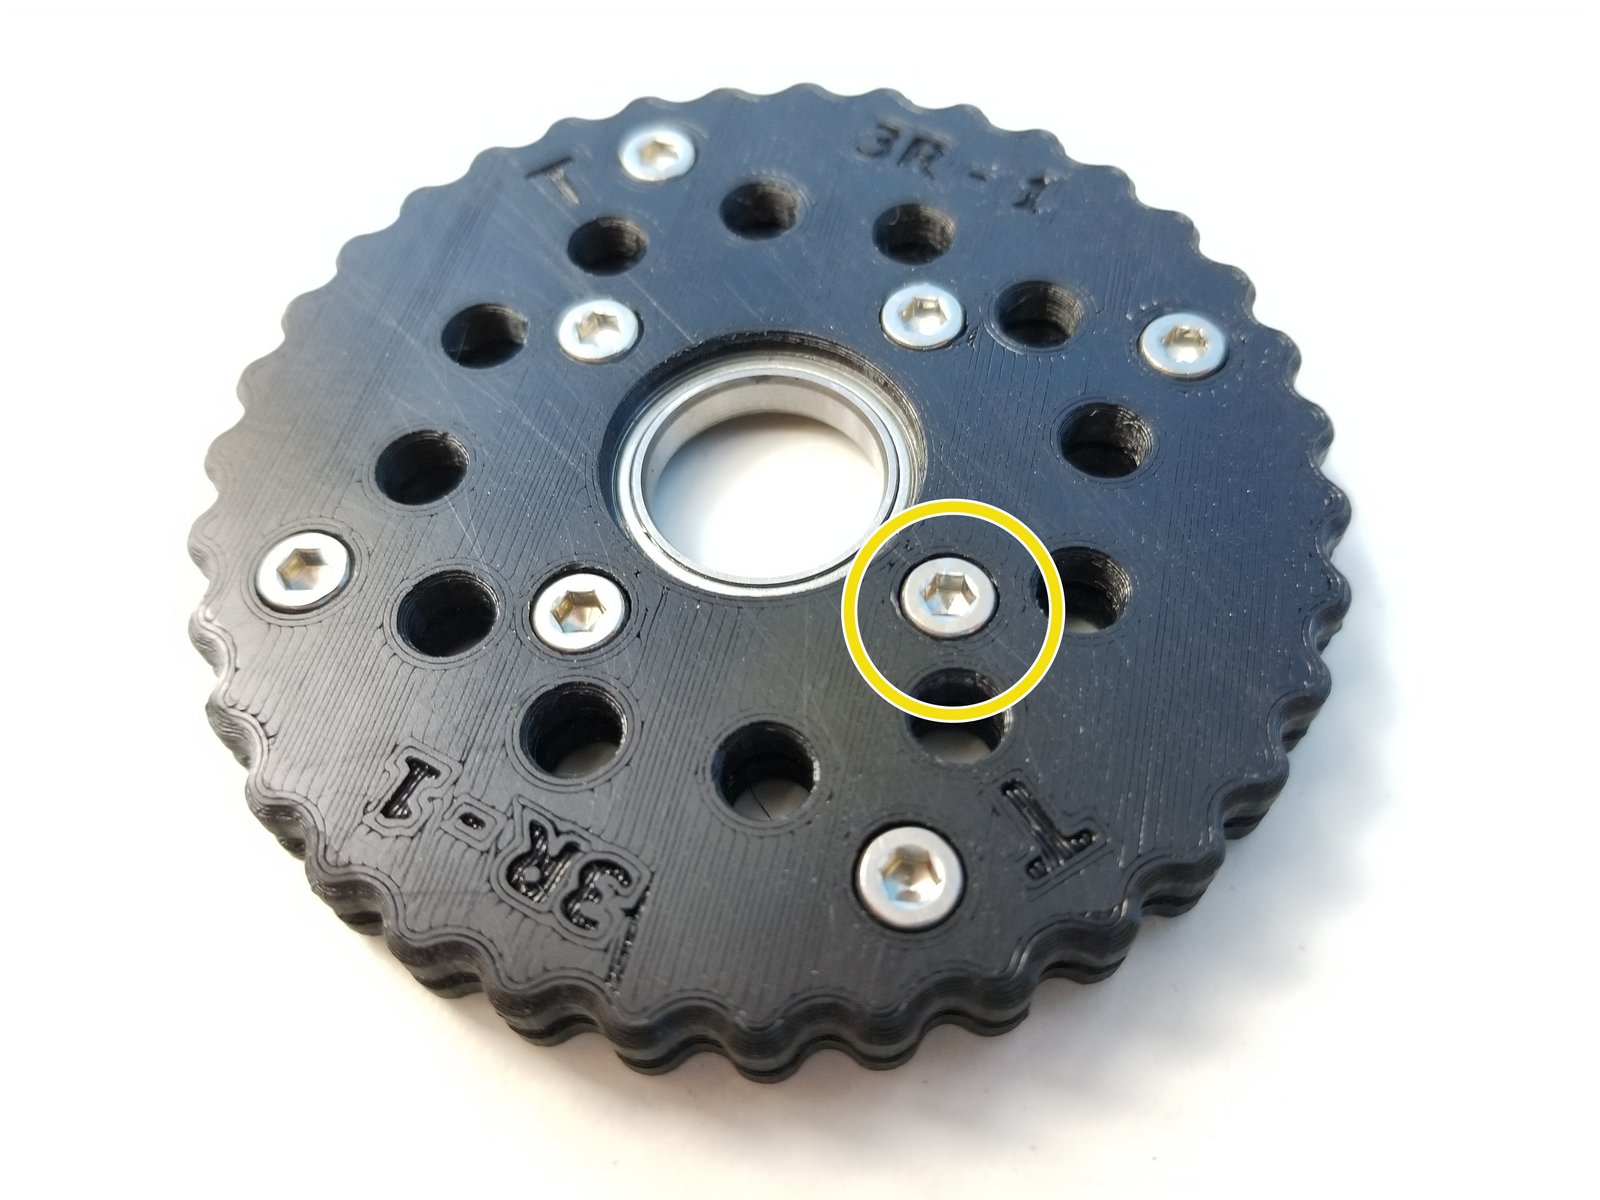
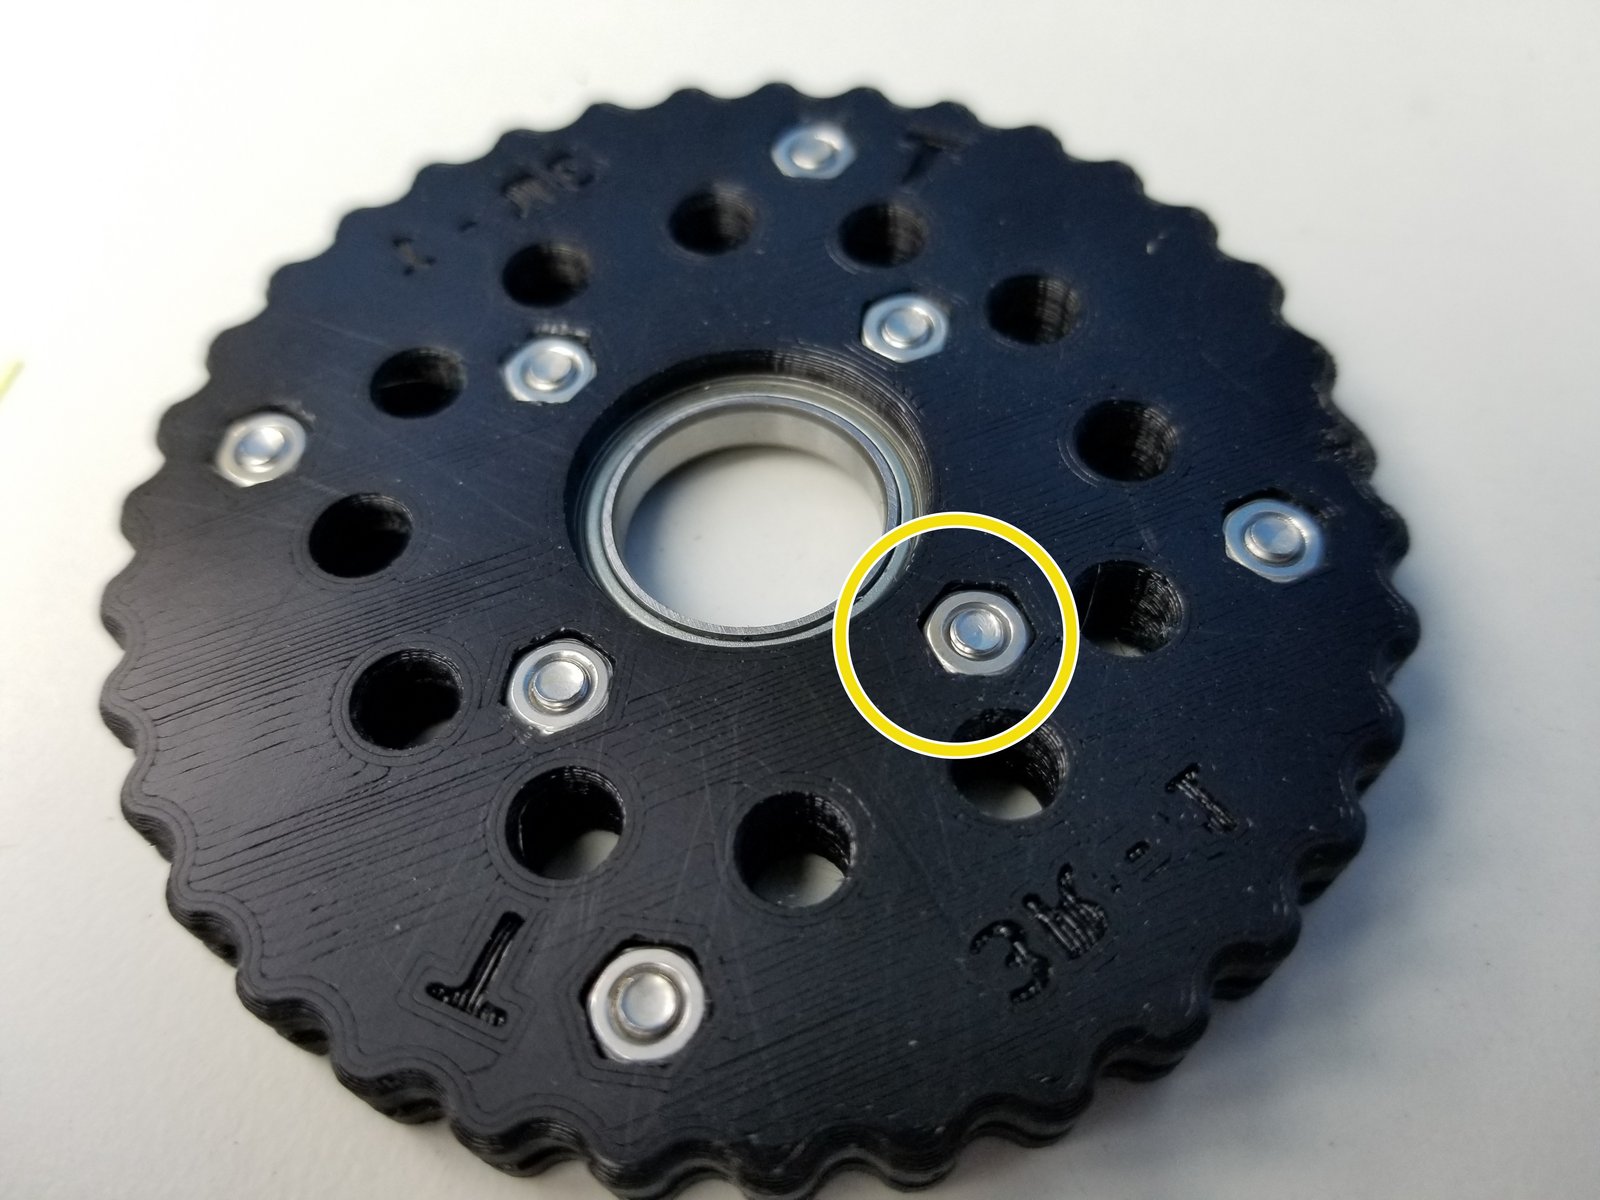
Click the large image to open full size.
- Note:
The process for "T" Rotor and "B" Rotor is the same. We will use T rotor as our guide and repeat the same process for B rotor
Insert 6702 Bearing on one half of the T Rotor
Place the other half and clamp the Bearing together
- Warning:
Make sure to align the T labels, The holes and the teeth won't line up if this isn't done correctly.
Insert M3x5mm Screws and Hex nuts on each half of the Rotor and tighten all the Screws.
- Note:
Repeat the same Process for B Rotor
Step 4 Eccentric Input Shaft - Parts
Click the large image to open full size.
- Note:
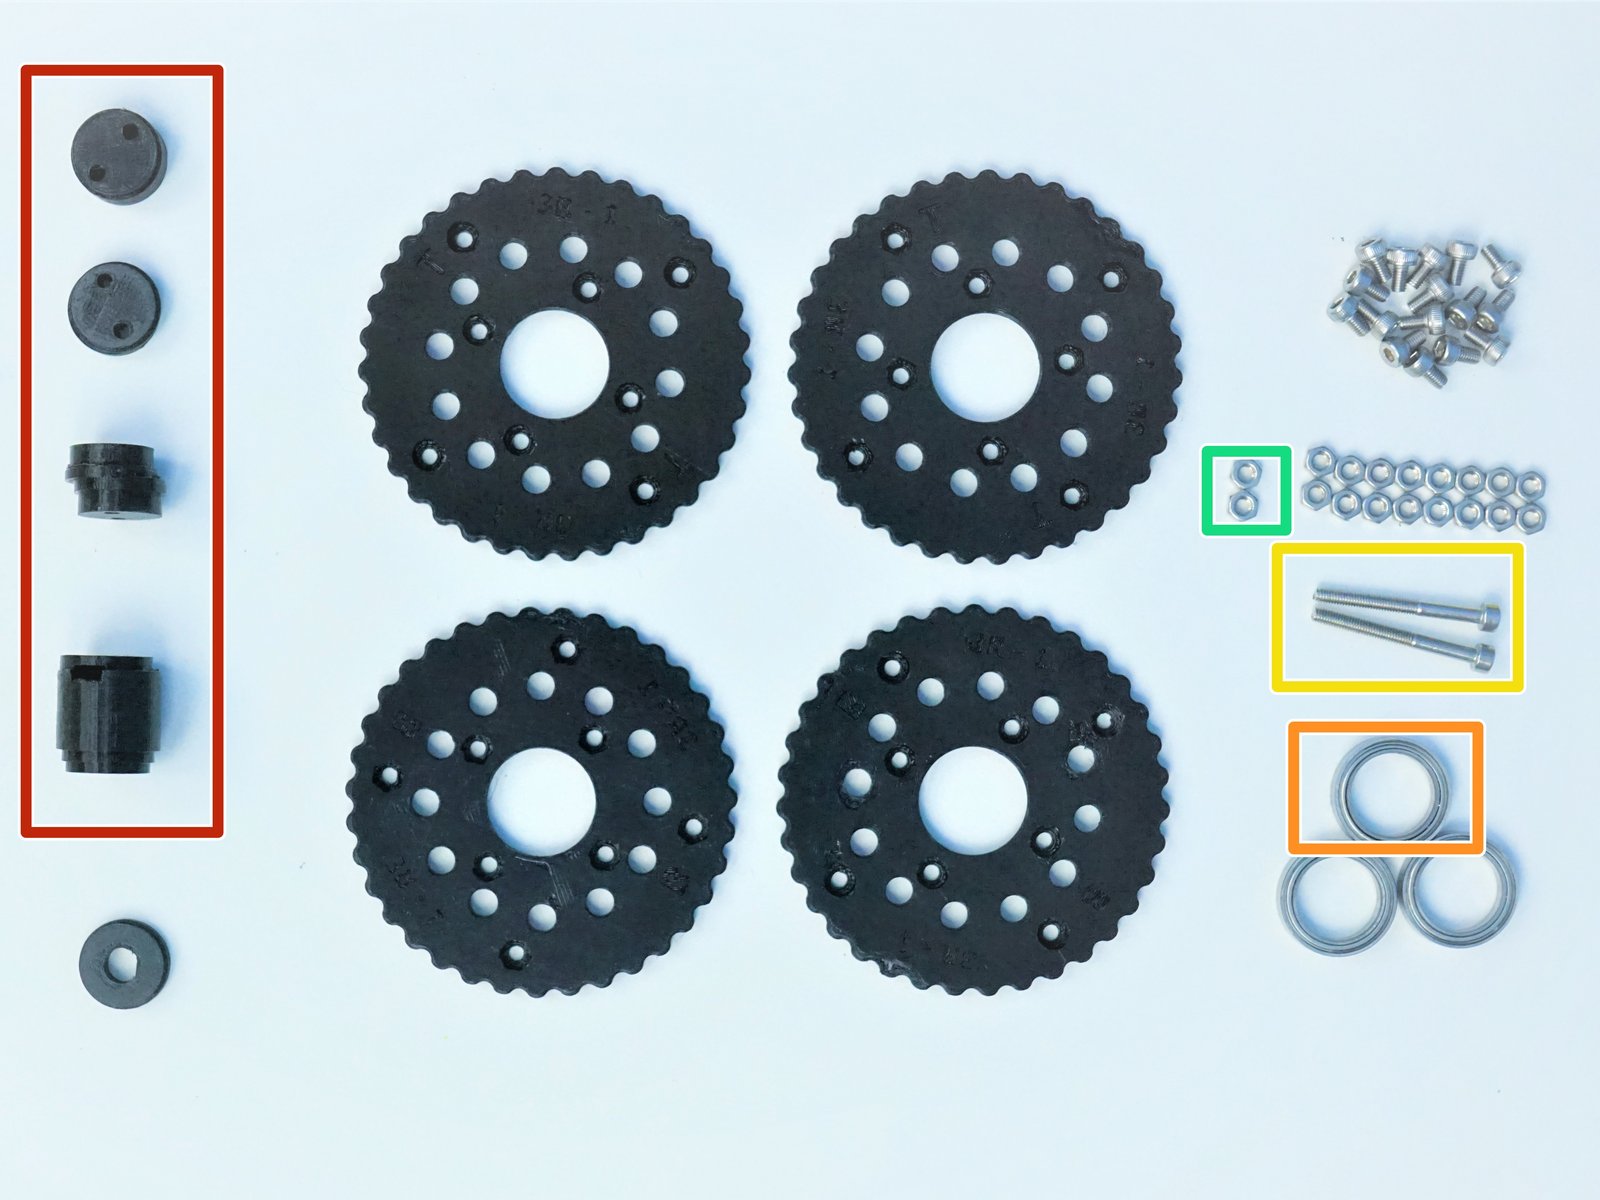
Prepare the following components:
Assembled Rotors
[3D] - 3GB Elbow Eccentric Shaft
6702 Bearing [15x21x4mm] (x1)
M3x30mm Screws (x2)
M3 Hex Nuts (x2)
Step 5 Eccentric Input Shaft - Notes
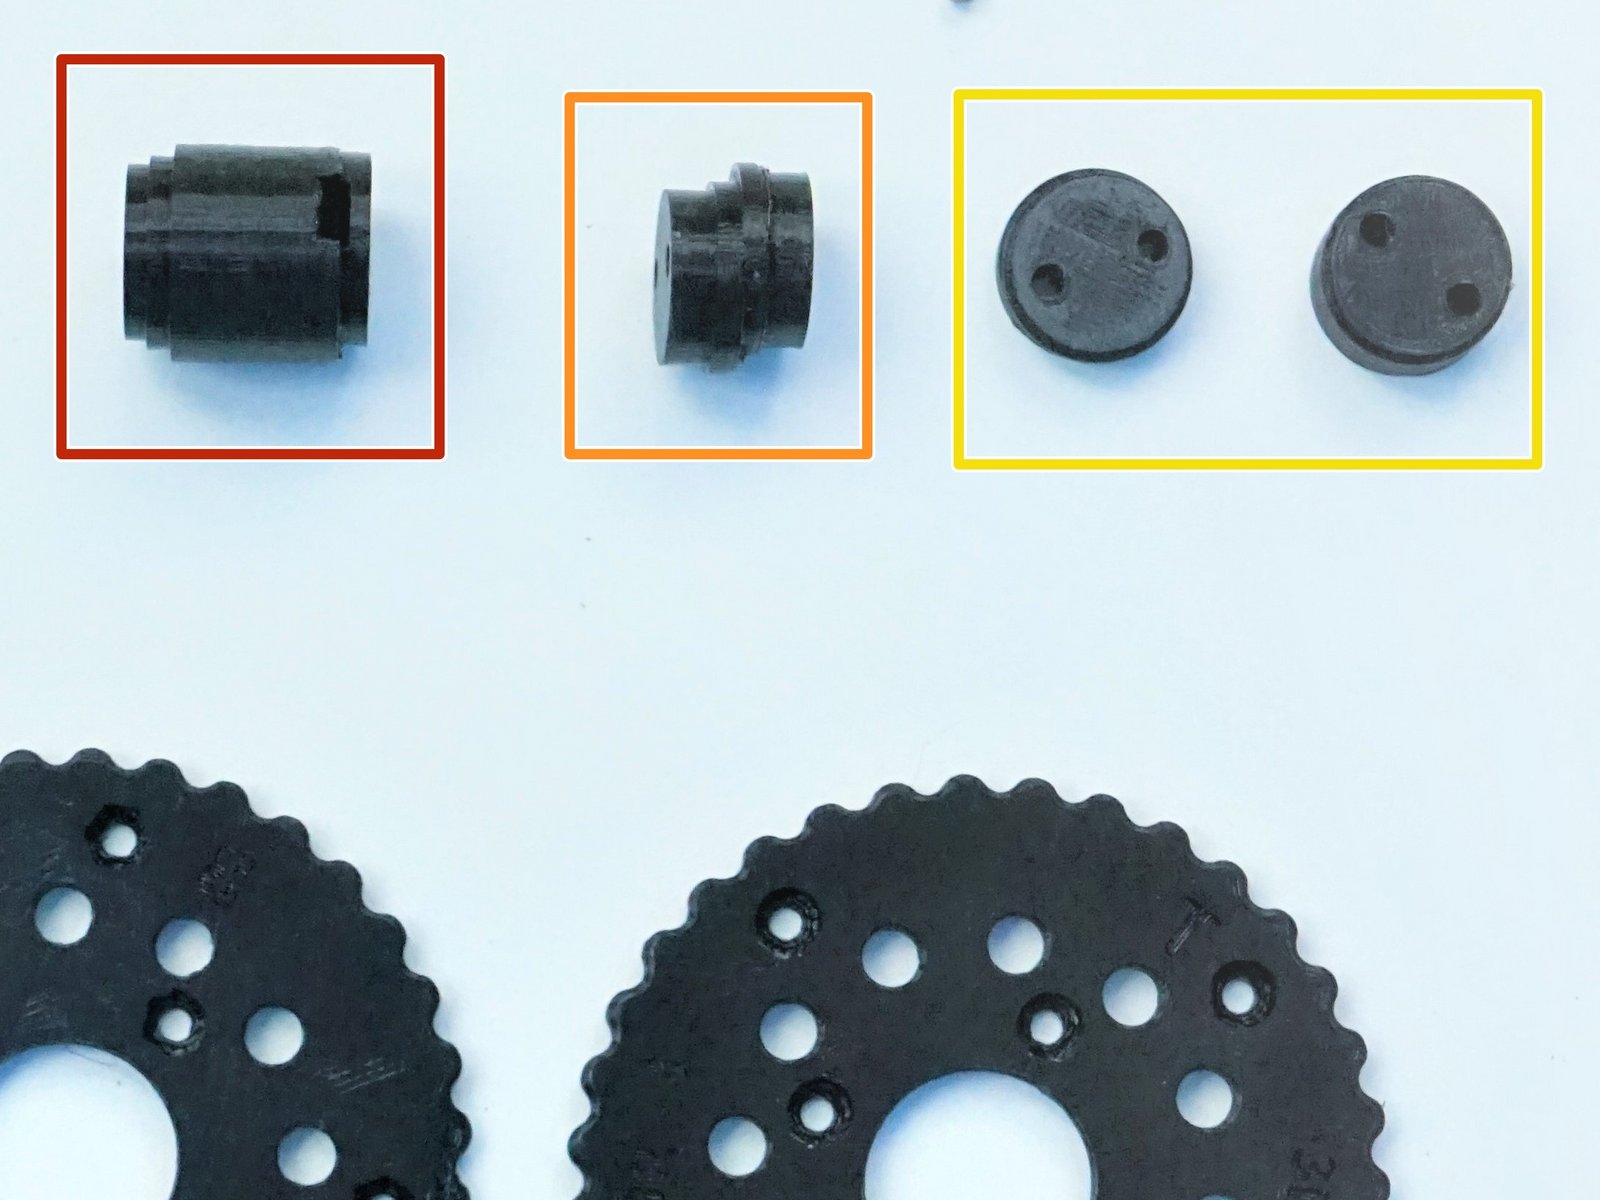
Click the large image to open full size.
Input Shaft Consist of 4 components:
Motor Shaft Coupler
Eccentric Cam
Shaft Holder Cams
- Note:
For Anti-Twist purposes, these cam holds the bearing. Thinner cam piece holds the Eccentric Cam Bearing in place as well.
Step 6 Eccentric Input Shaft - 1
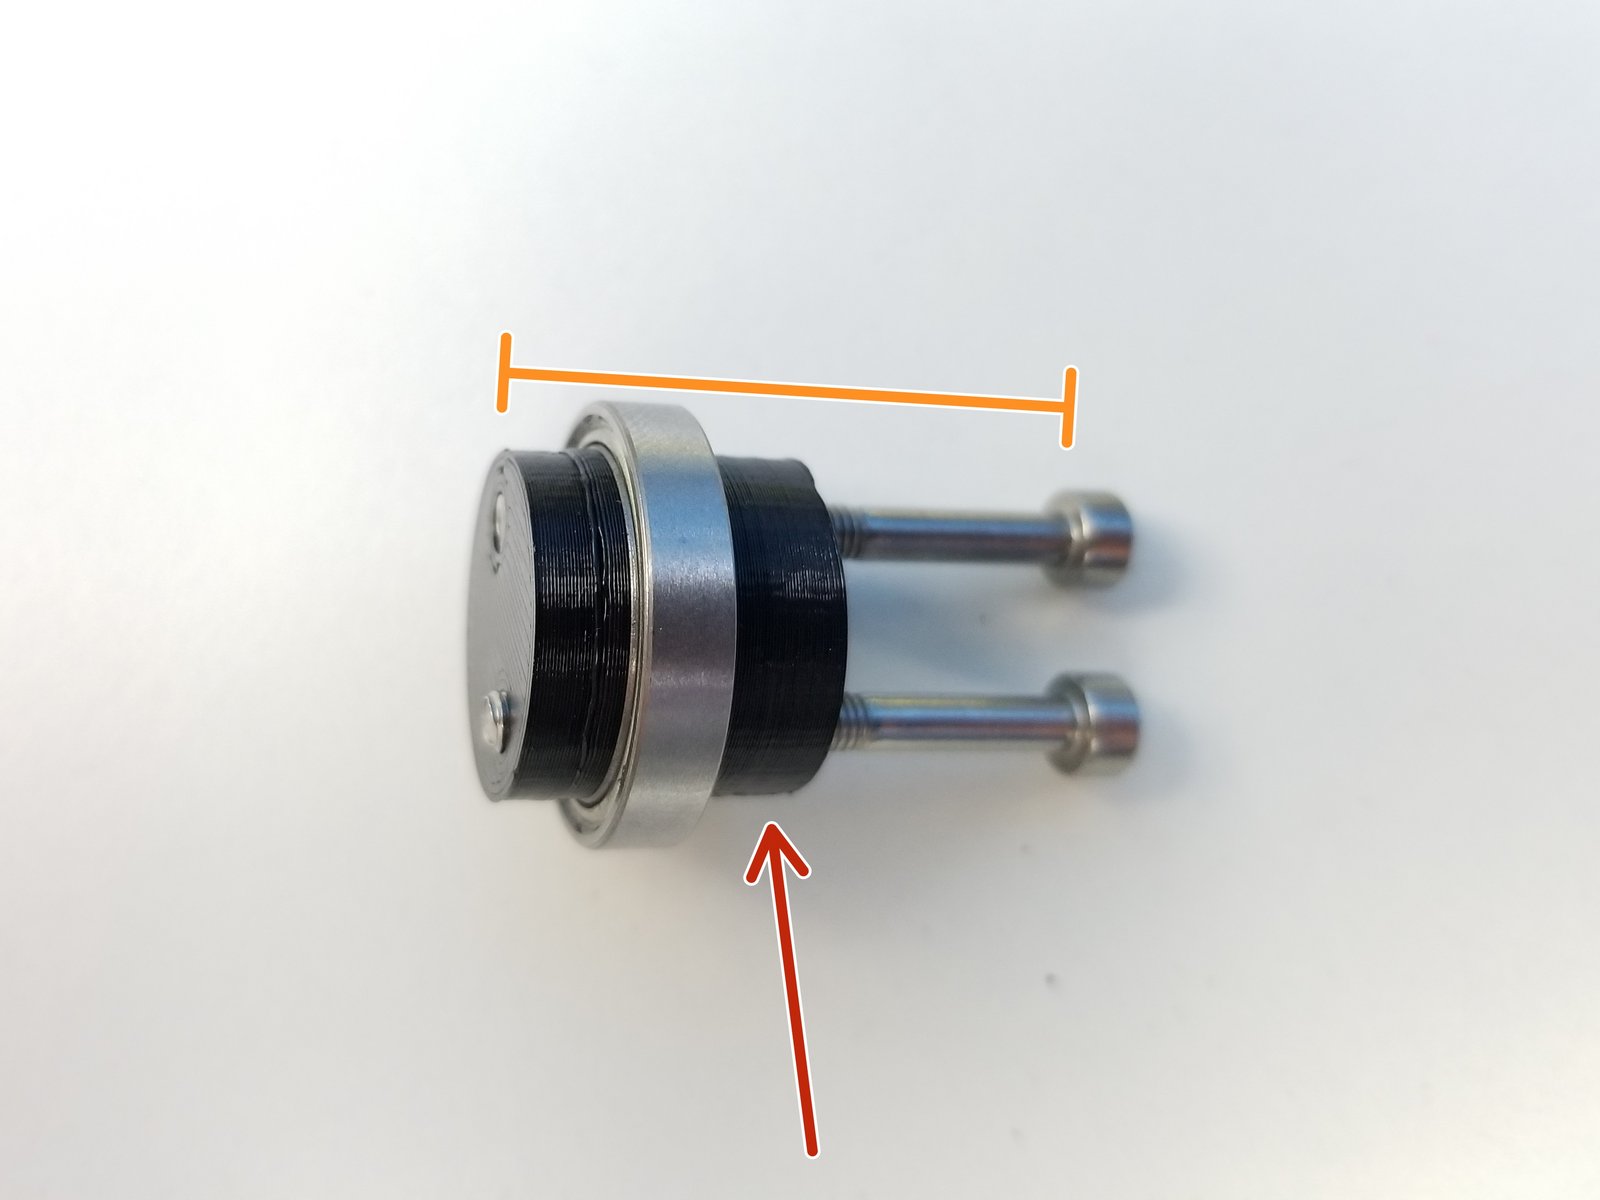
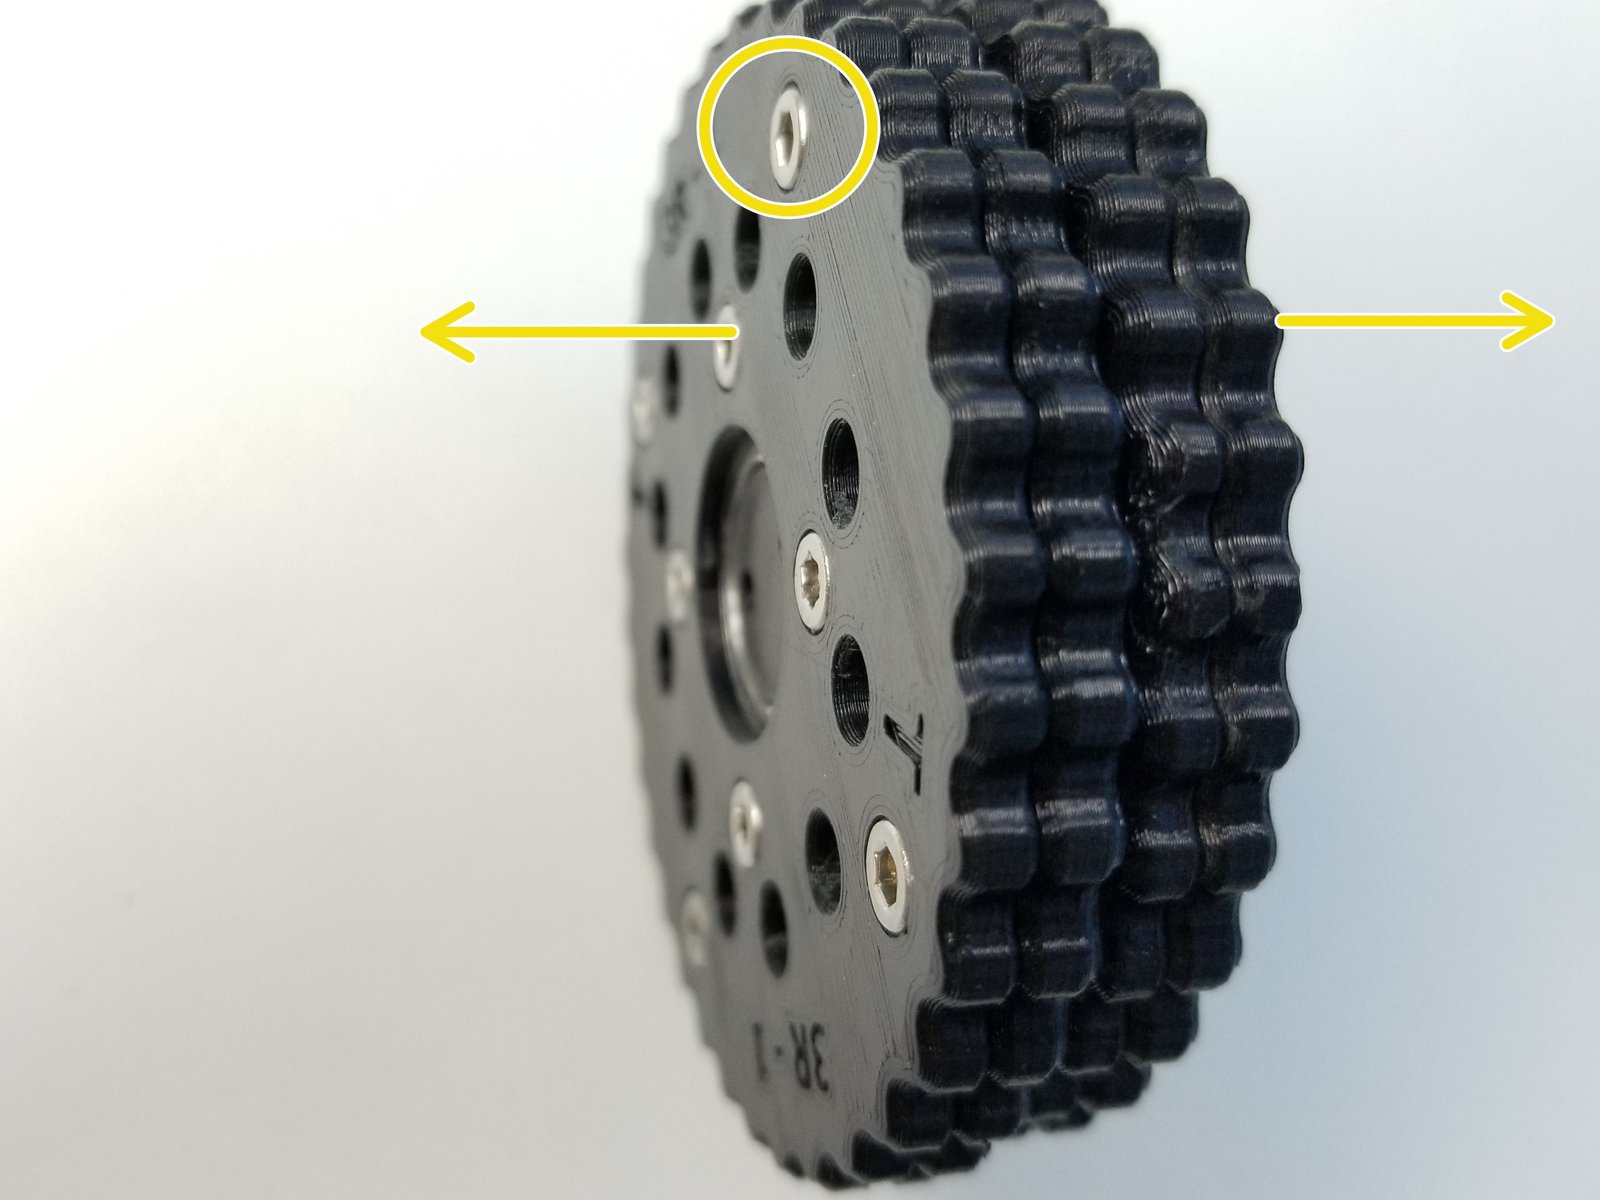
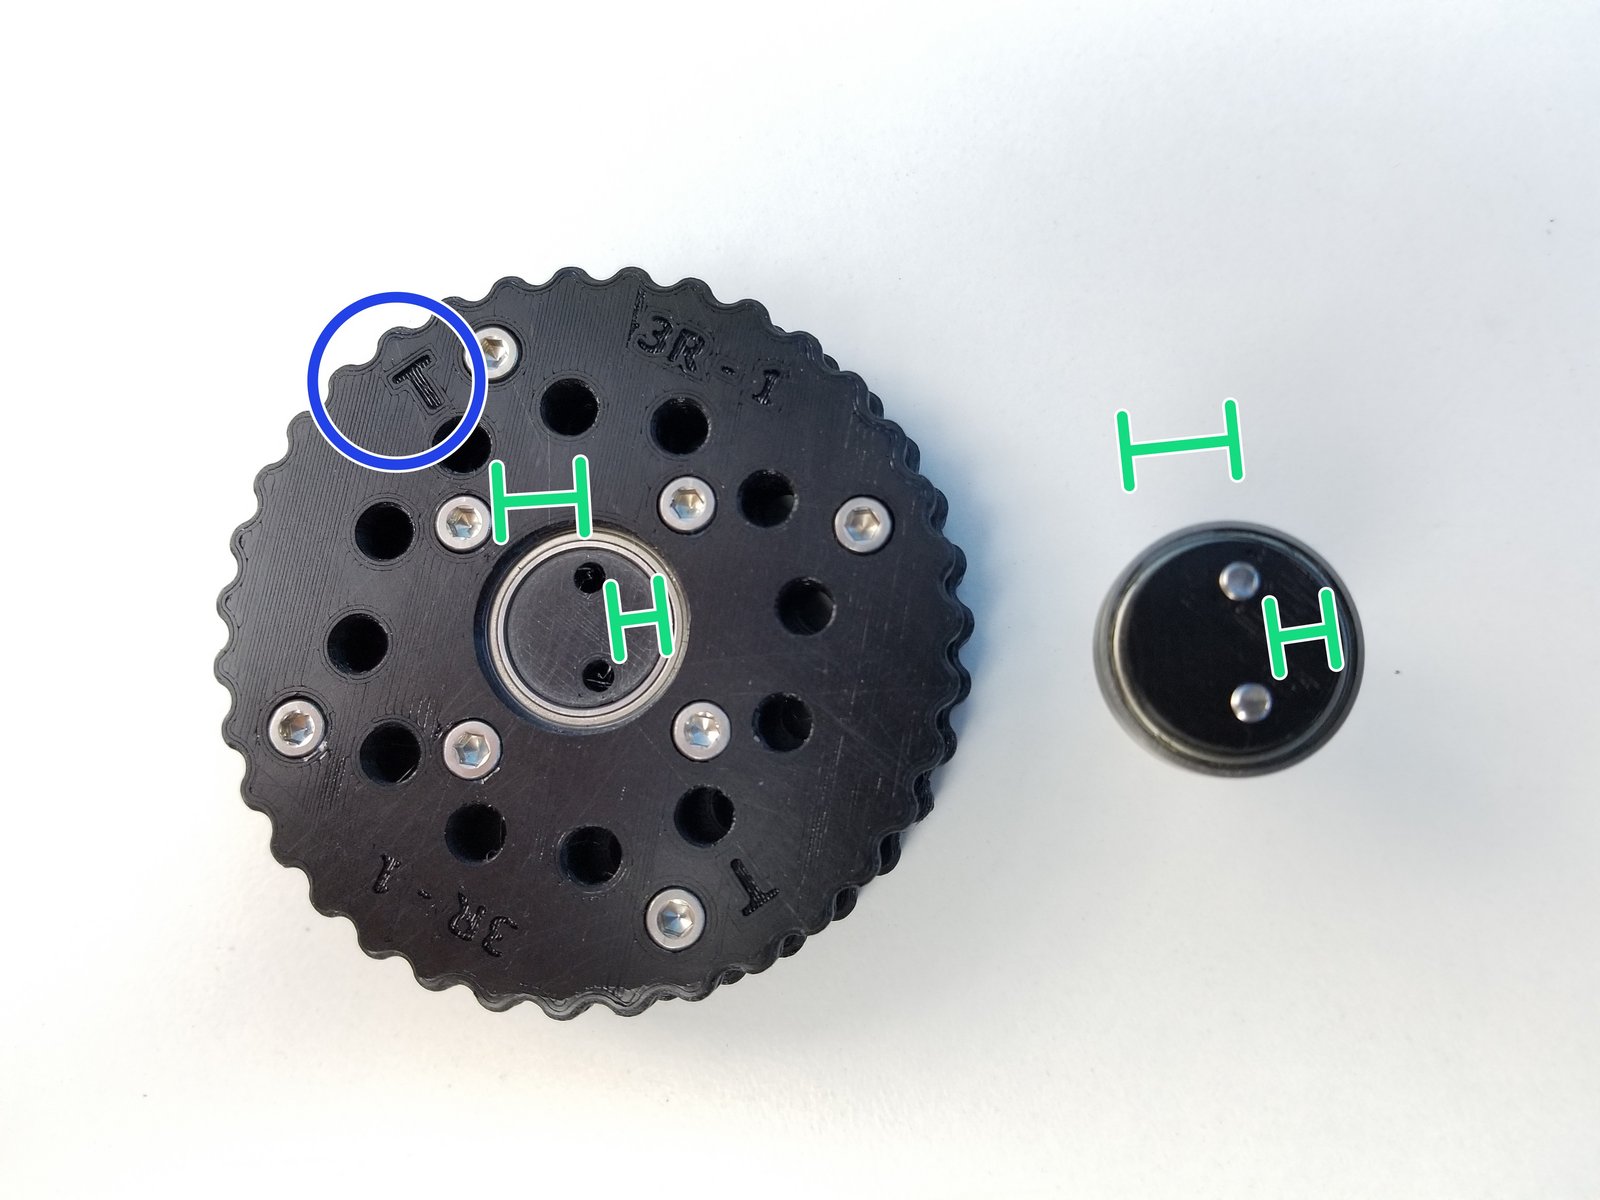
Click the large image to open full size.
Clamp 6702 Bearing with Shaft Holder Cams using M3x30mm Screws
Thicker piece is the Screw Head side,
Only screw in until the tip of the screw is flushed with the face of the thinner piece
Insert both Rotors on the Eccentric Cam
- Warning:
The Screw Head side of each rotor is facing away from each other
Align the Eccentric Cam and Shaft Holder Cams and partially screw in the M3x30mm Screws.
Check that the T Rotor is facing the Shaft Holder Cam
Step 7 Eccentric Input Shaft - 2
Click the large image to open full size.
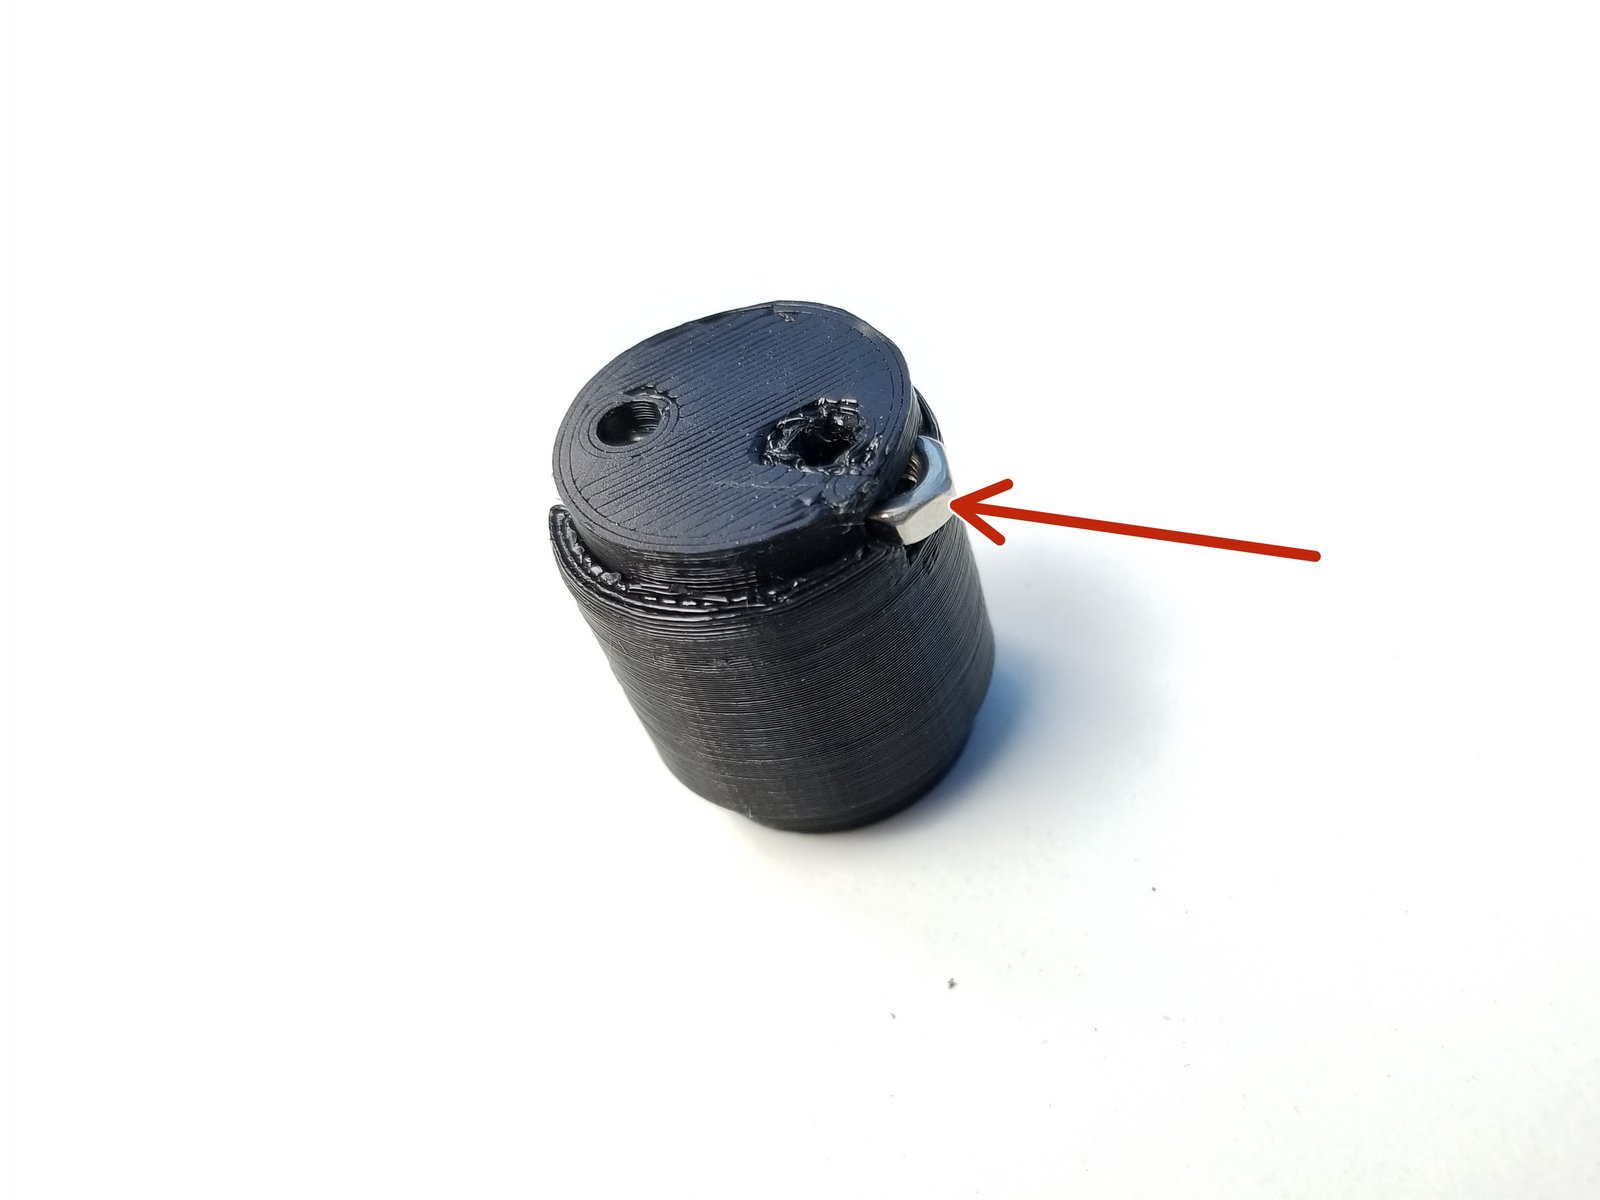
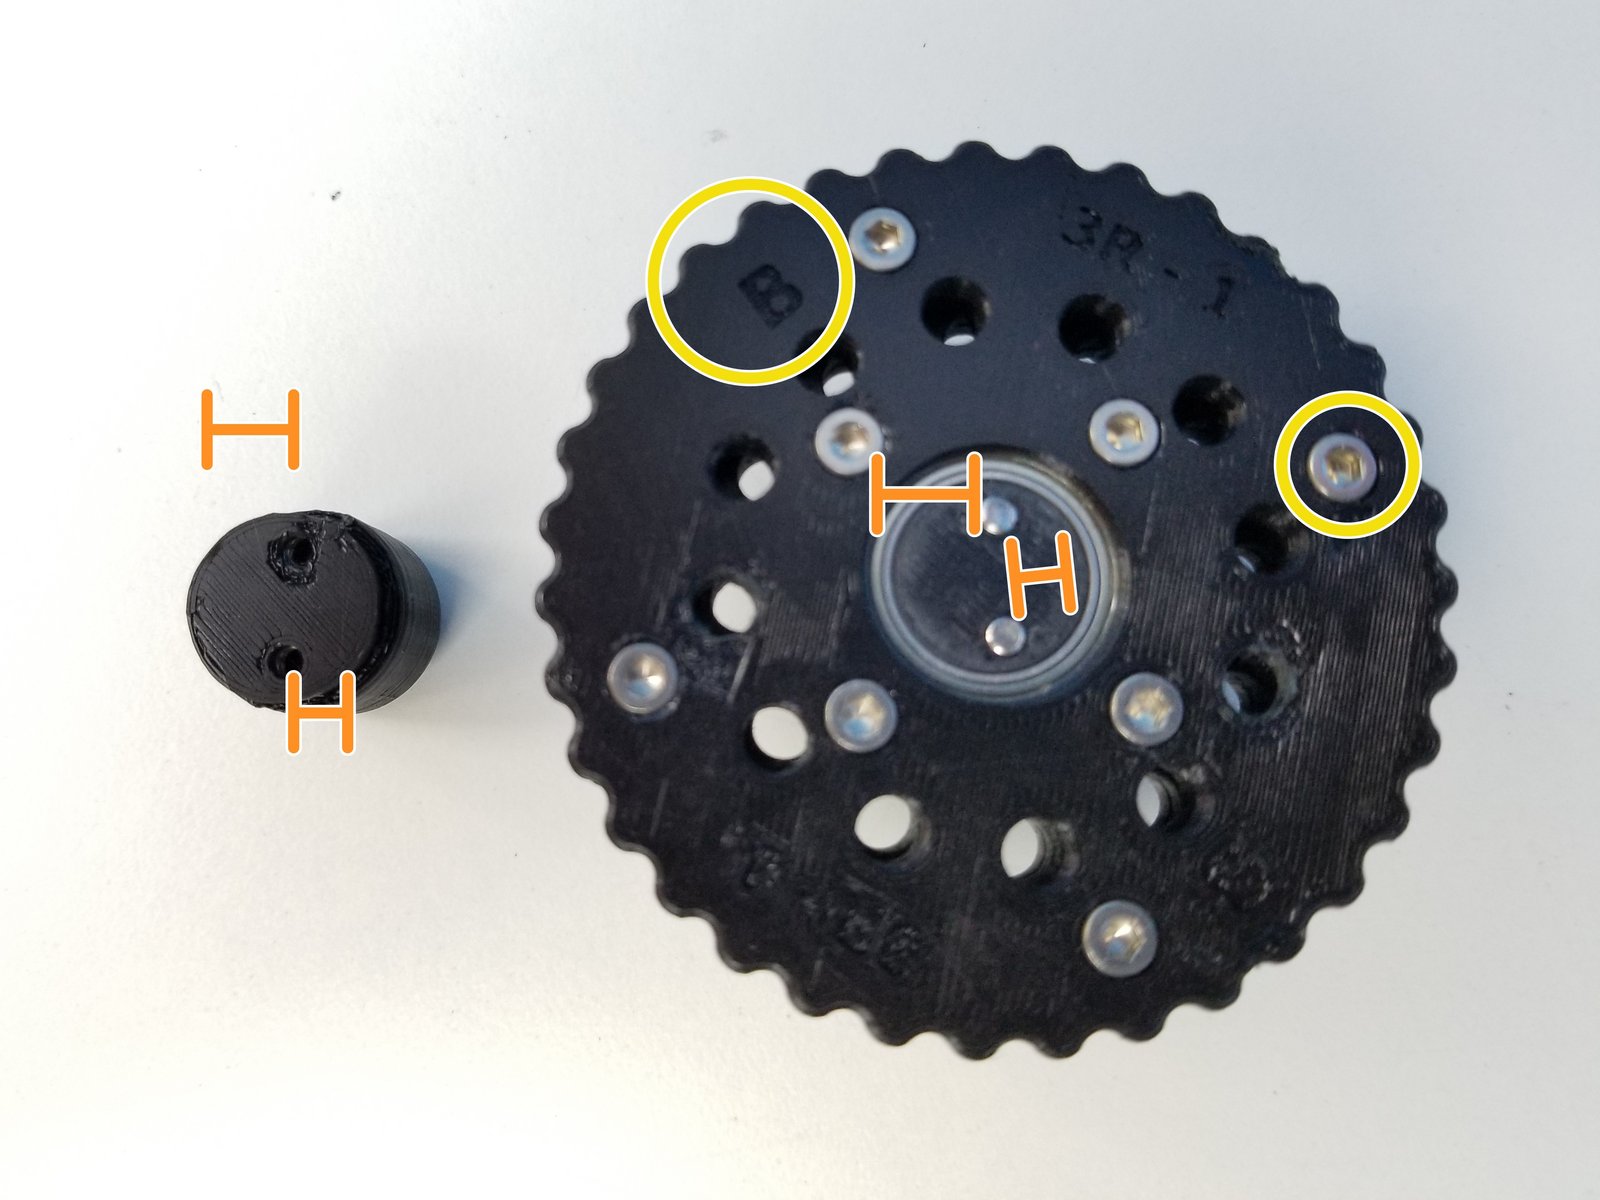
Insert M3 Hex Nuts on the side of the Motor Shaft Coupler
Align the Coupler offset and Eccentric Cam offset
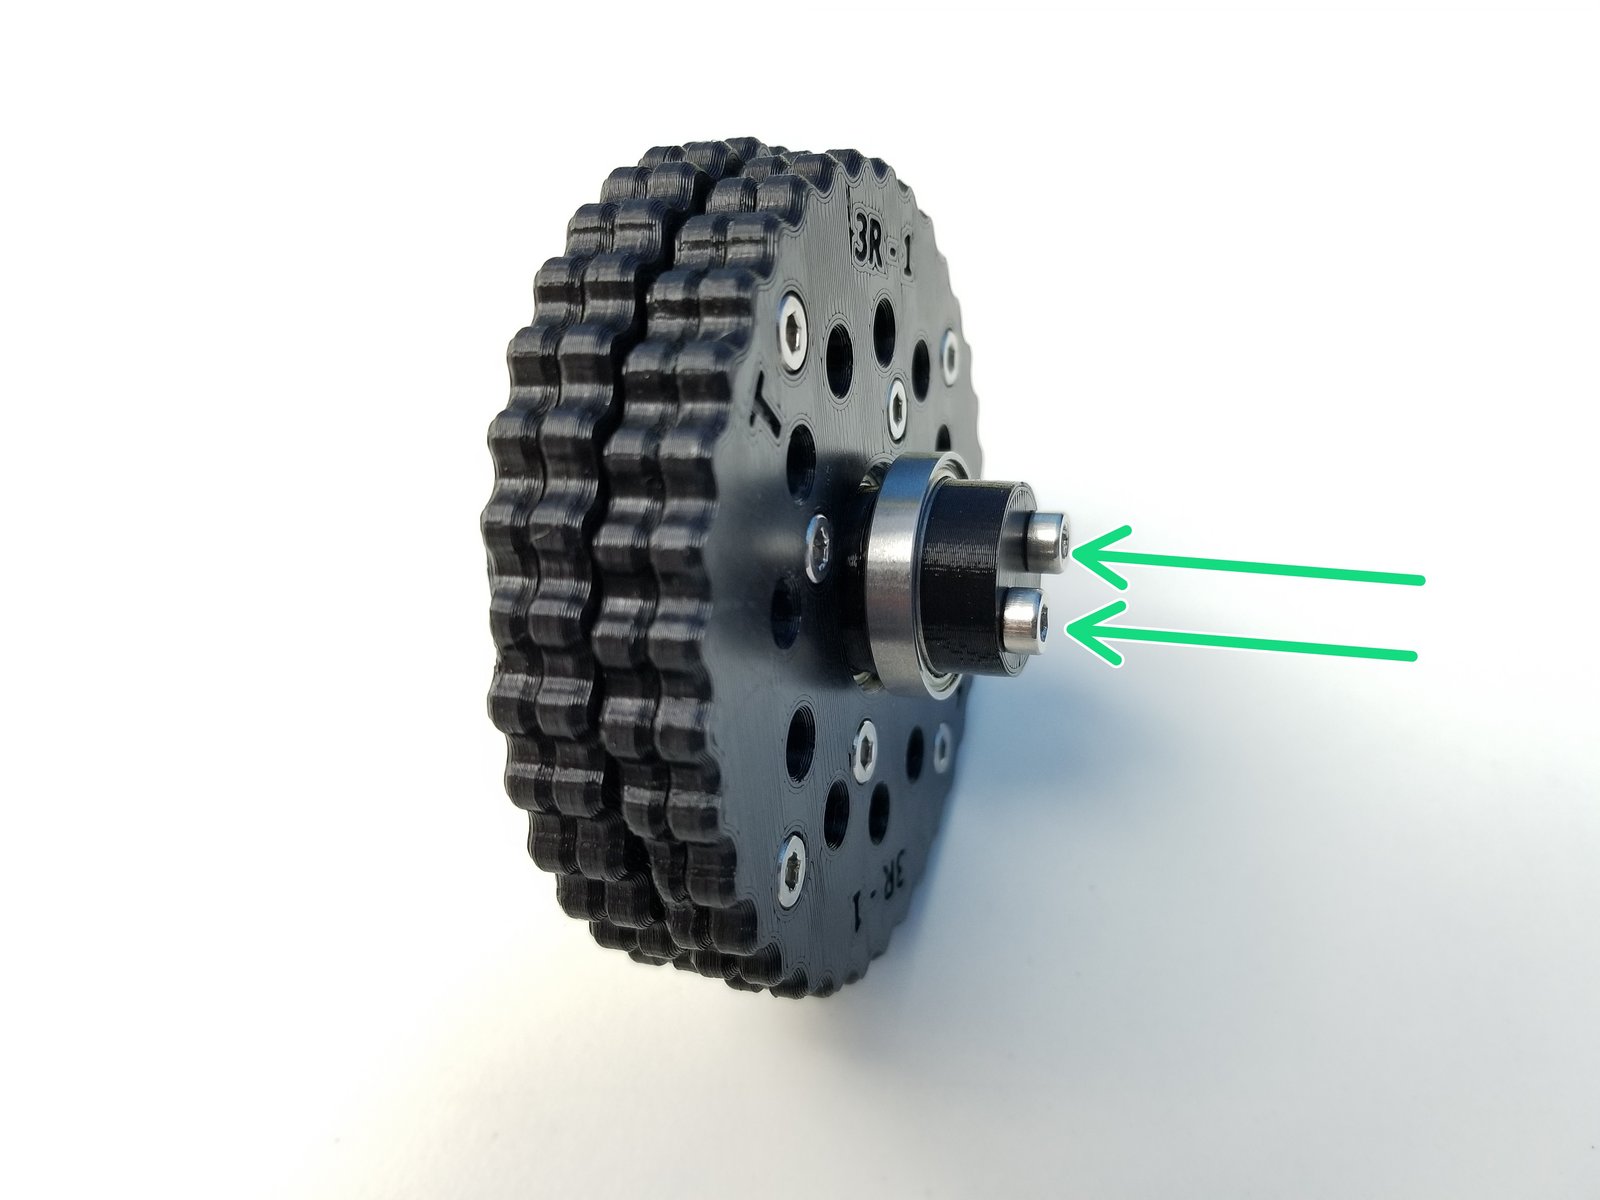
Make sure the B Rotor and its Screw Head side facing the Coupler
Screw in the rest and Tighten it
Step 8 Elbow Gearbox Housing - Parts
Click the large image to open full size.
- Note:
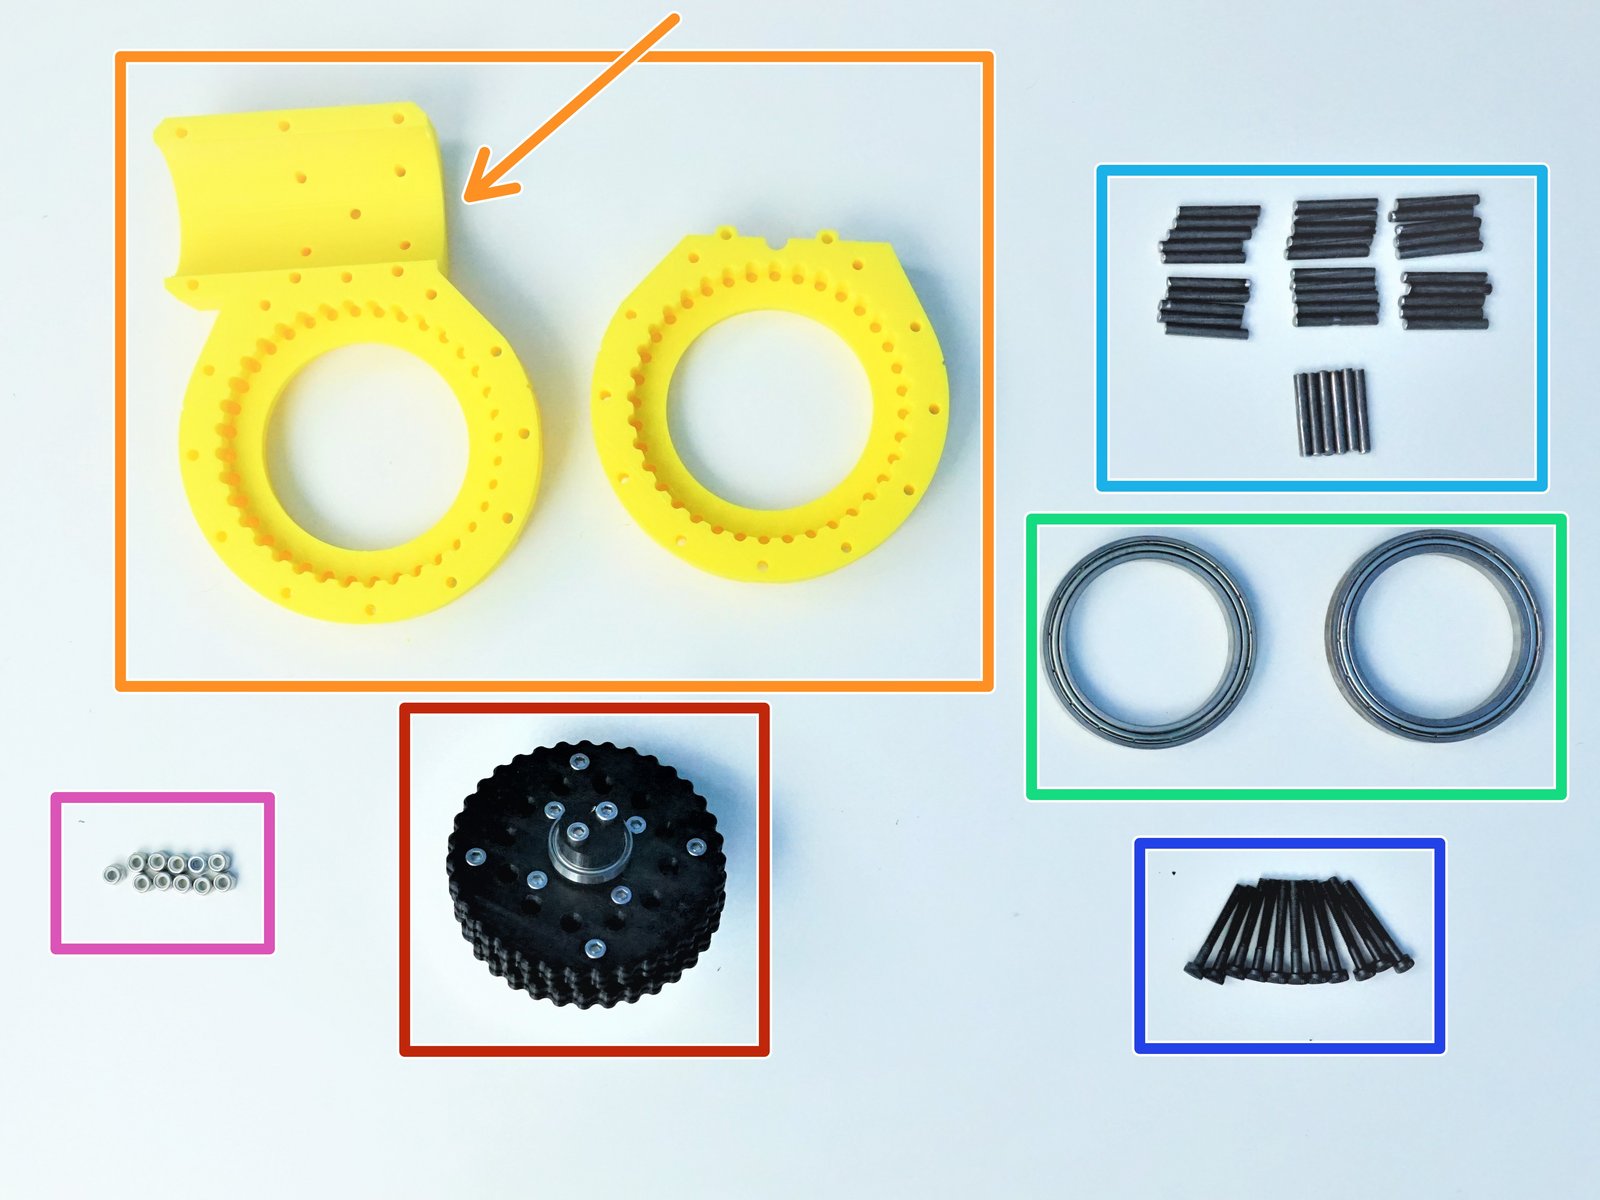
Prepare the following components:
Assembled Input Shaft and Rotors
[3D] - 3GB Elbow GB Housing Top Halves
- Warning:
NOTE that the one of the Housing Halves has extra extrusion on top, this is the Sensor Side
6809 Bearings [45x58x7mm] (x2)
Steel dowel pin - [3x24mm] (x36)
M3x25mm Screws (x11)
M3 Nylock Nuts (x11)
Step 9 Elbow Gearbox Housing - Housing Preparation
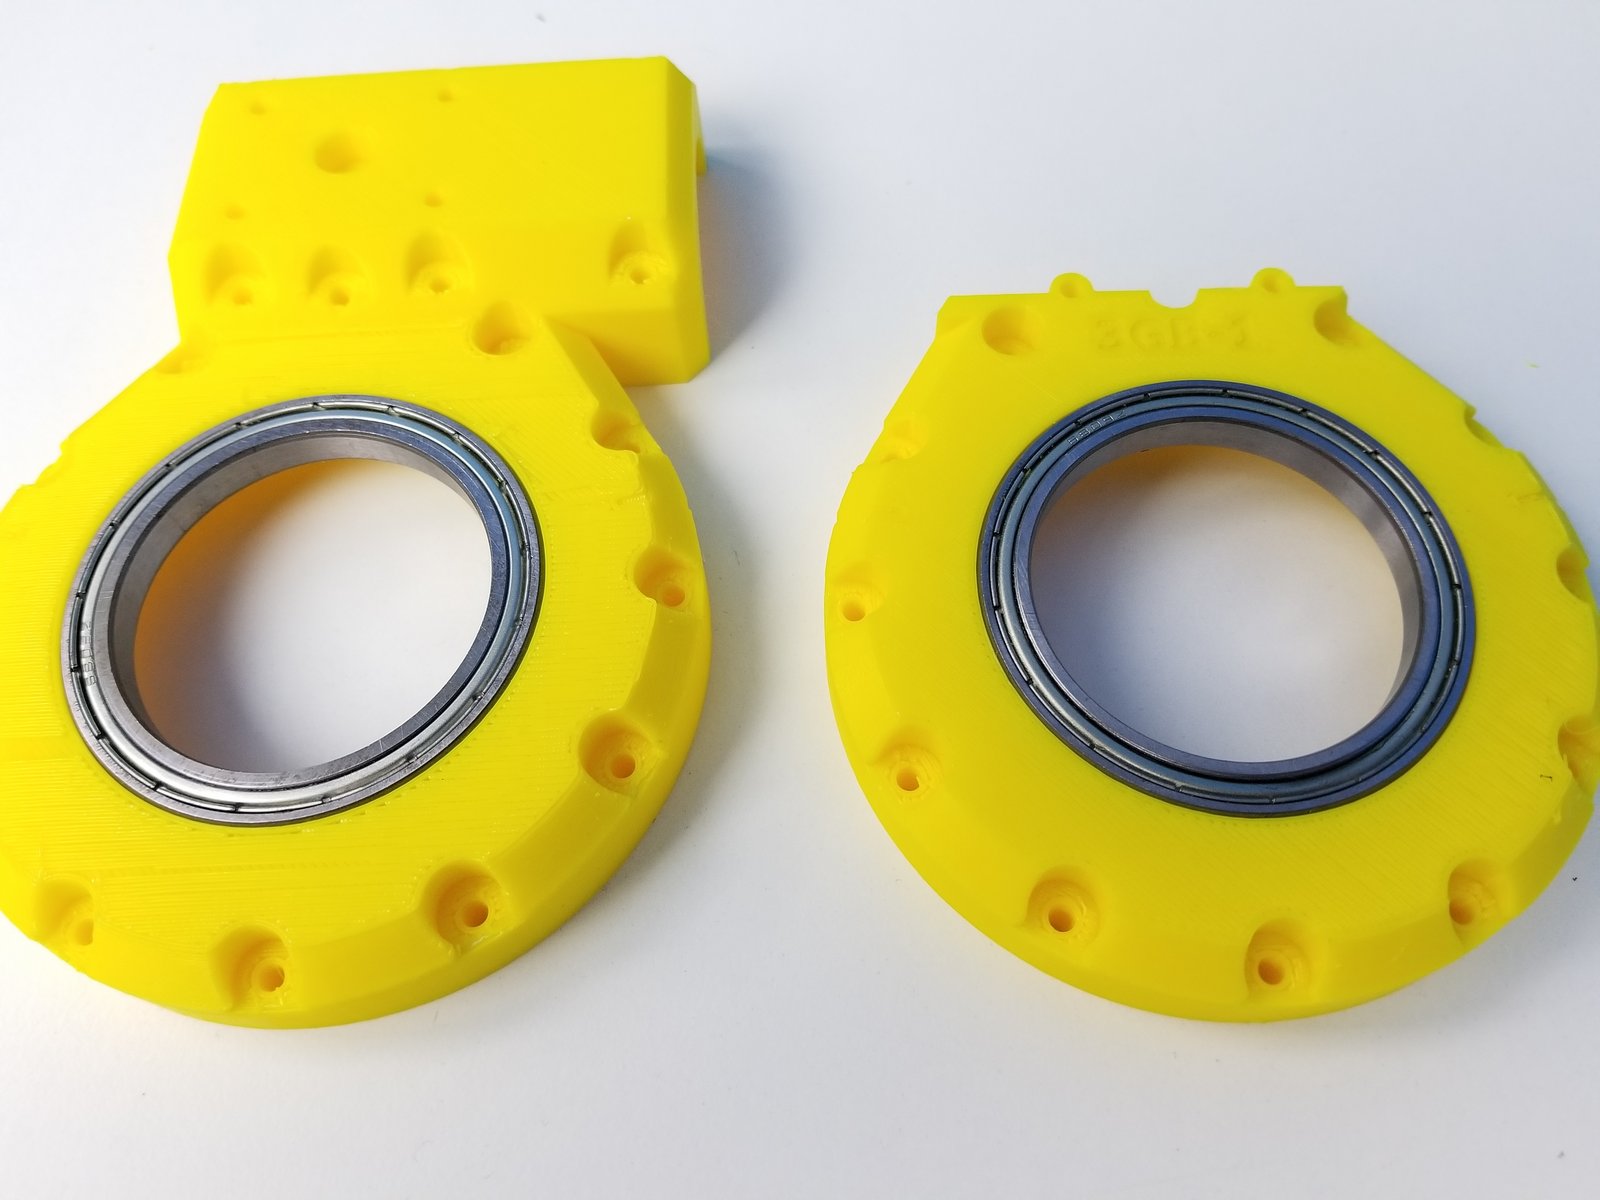
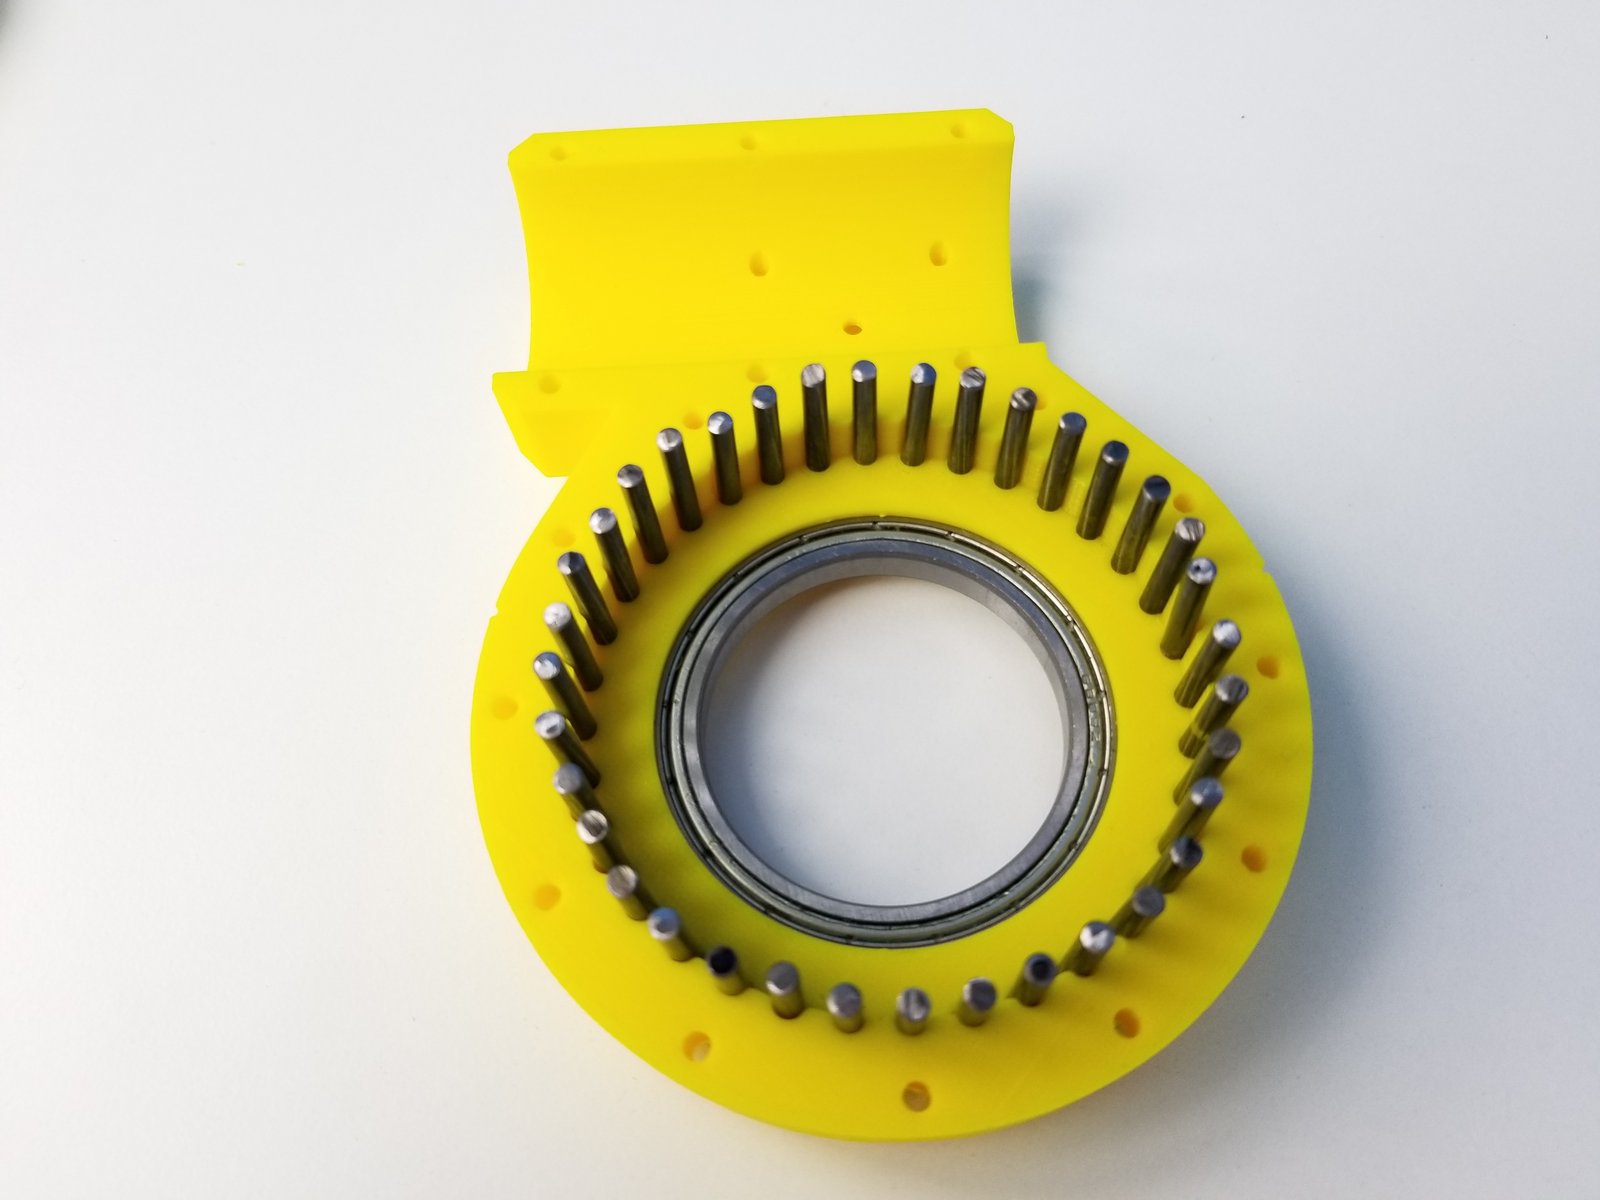
Click the large image to open full size.
Insert 6809 Bearings on the Housings
Insert all 36 Steel Pins on the Sensor Side Half of the Housing
Step 10 Elbow Gearbox Housing - Rotor Alignment
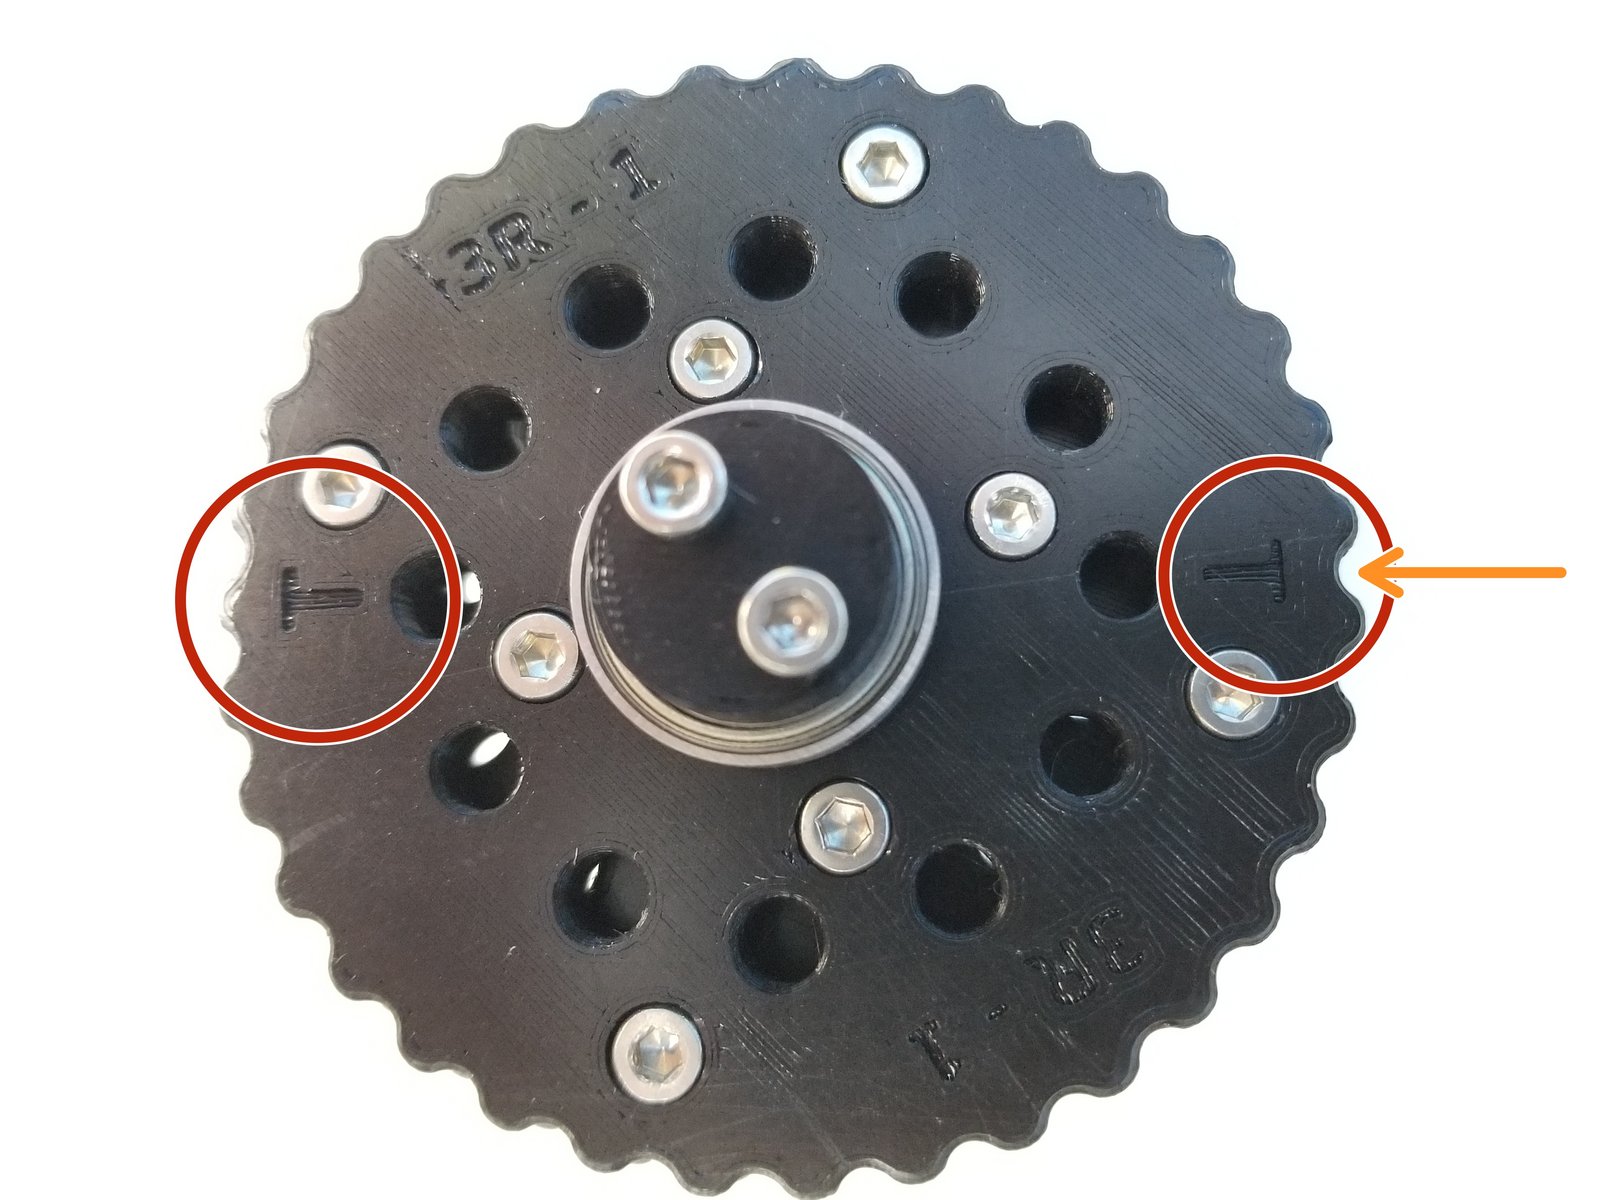
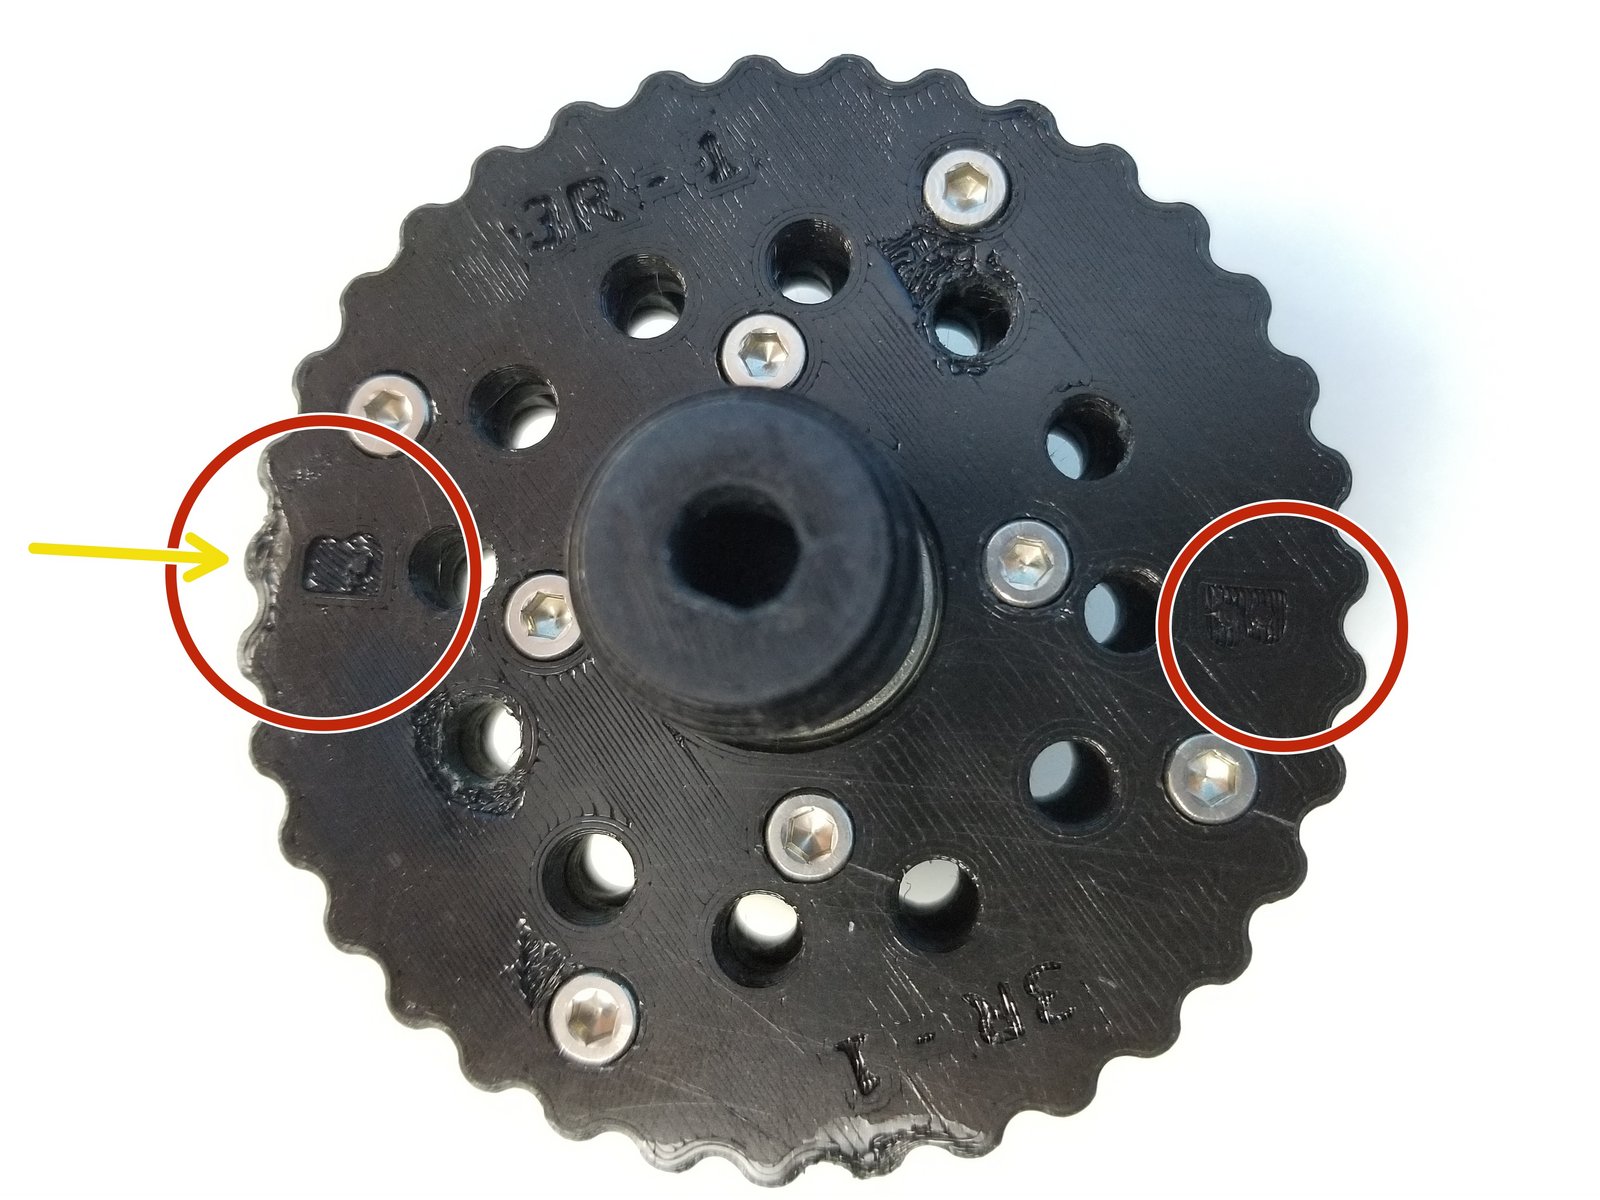
Click the large image to open full size.
- Warning:
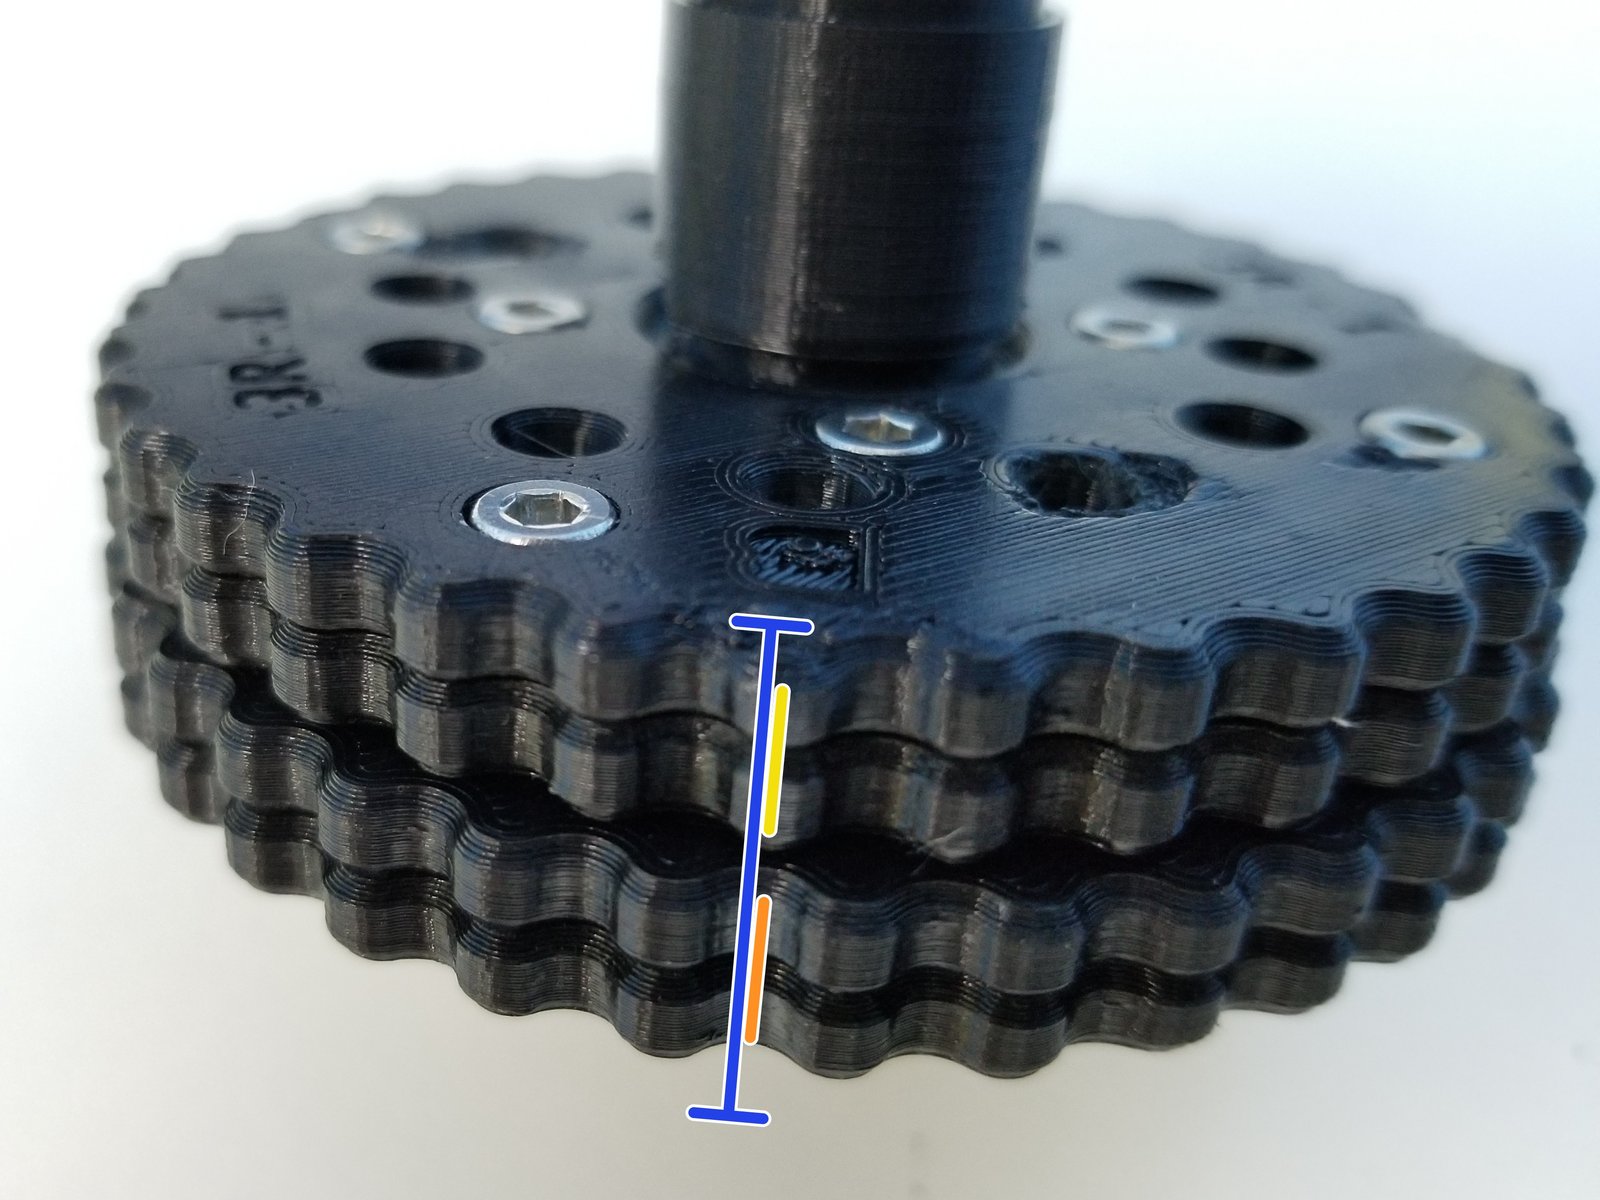
Alignment of the rotor is critical for these gearbox to work.
- Note:
Notice that there are 2 "T" Labels on the T rotor, and same with B rotor with "B" Labels
One "T" is on the Tooth and the other "T" is in between 2 Teeth, This is also the same with B rotor
Make a Sharpie Mark in between the teeth of "T" Rotor Where the "T" is Labeled
For B Rotor, Make a sharpie mark on the tooth where the "B" is Labeled.
The Correct Alignment will look something like the Third Picture
Step 11 Elbow Gearbox Housing - Housing Clamp
Click the large image to open full size.
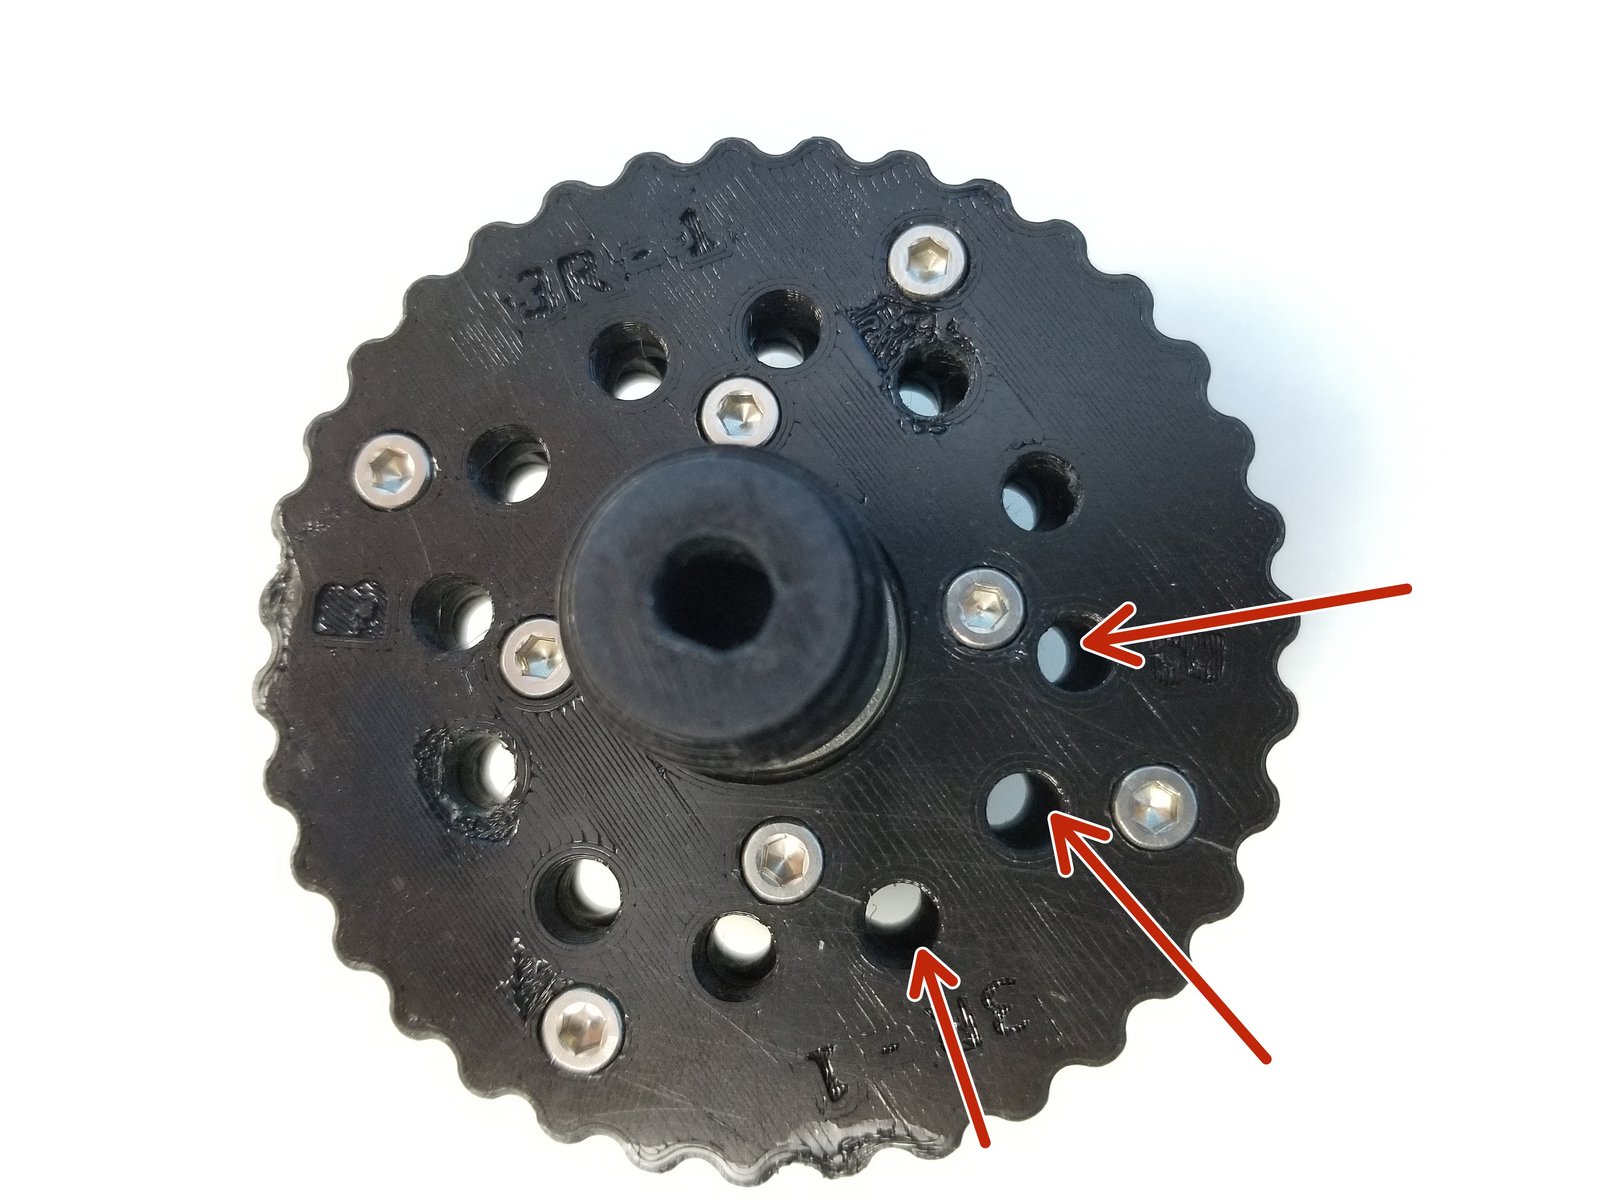
Once the Rotor is Properly aligned, all 12 inner holes will have the same space between them when looking directly above it
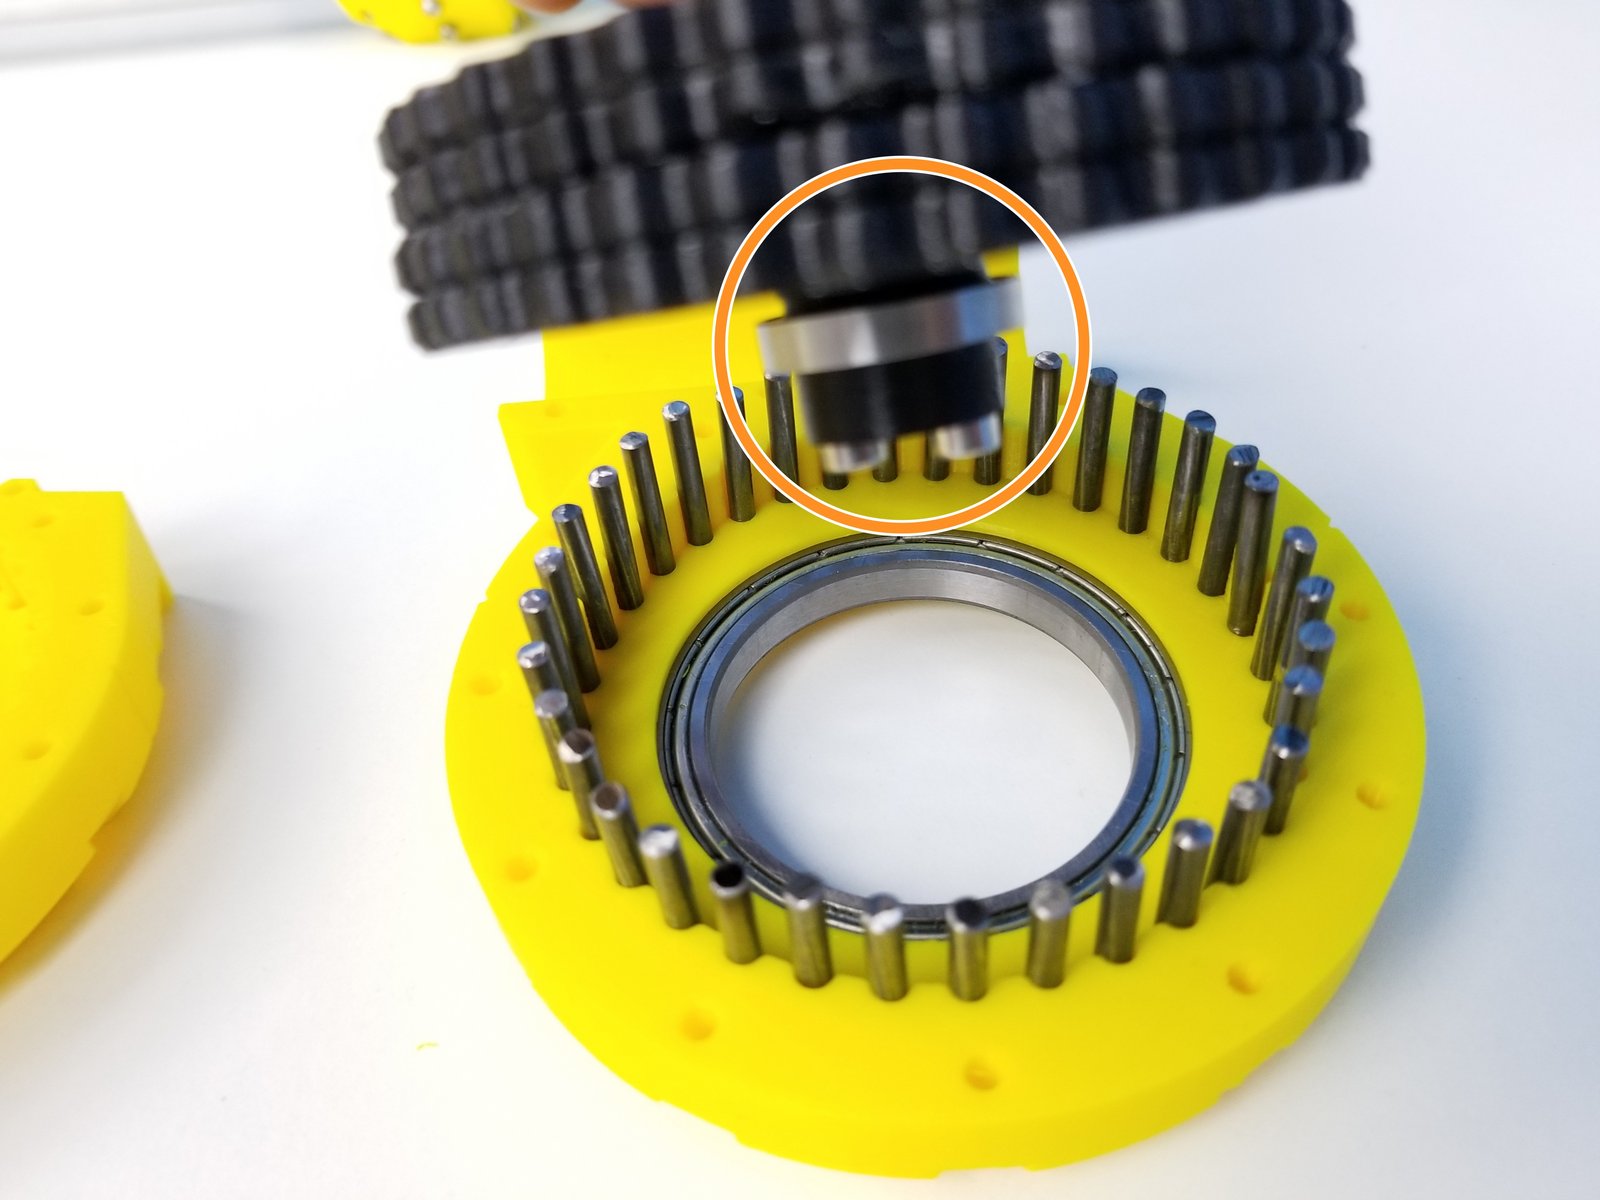
Carefully insert the Rotor while maintaining this position on the Housing with the pins.
- Warning:
Make sure the Shaft Holder Cam side of the shaft is going in first
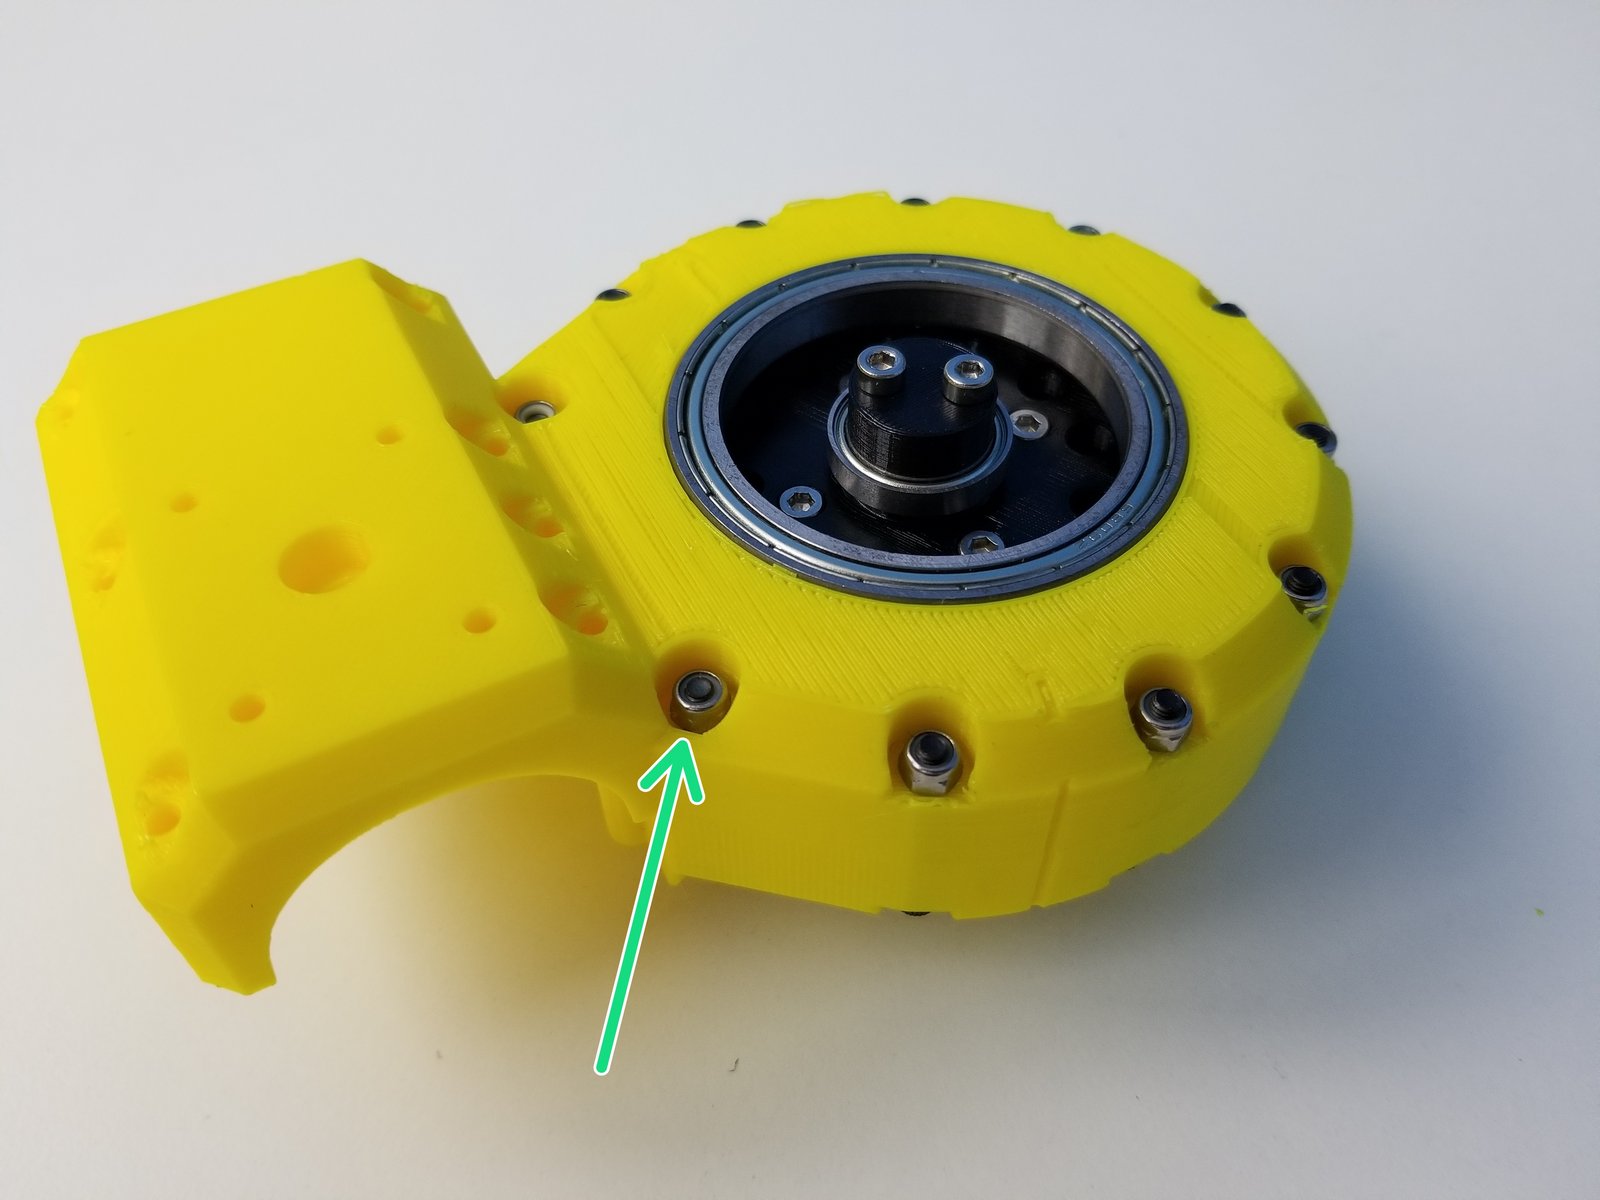
Press the second half of the gearbox into place.
- Note:
Verify that you can manually turn the eccentric shaft in the center and that the rotors smoothly turn inside the housing. Tight printing and misaligned rotors can cause the gearbox to jam.
Clamp the other half of the Housing using M3x25mm Screws and Nylock Nuts
- Note:
Secure tightly using the 5.5mm Socket Driver to hold the Nuts.
Step 12 Elbow Gearbox Bottom - Parts
Click the large image to open full size.
- Note:
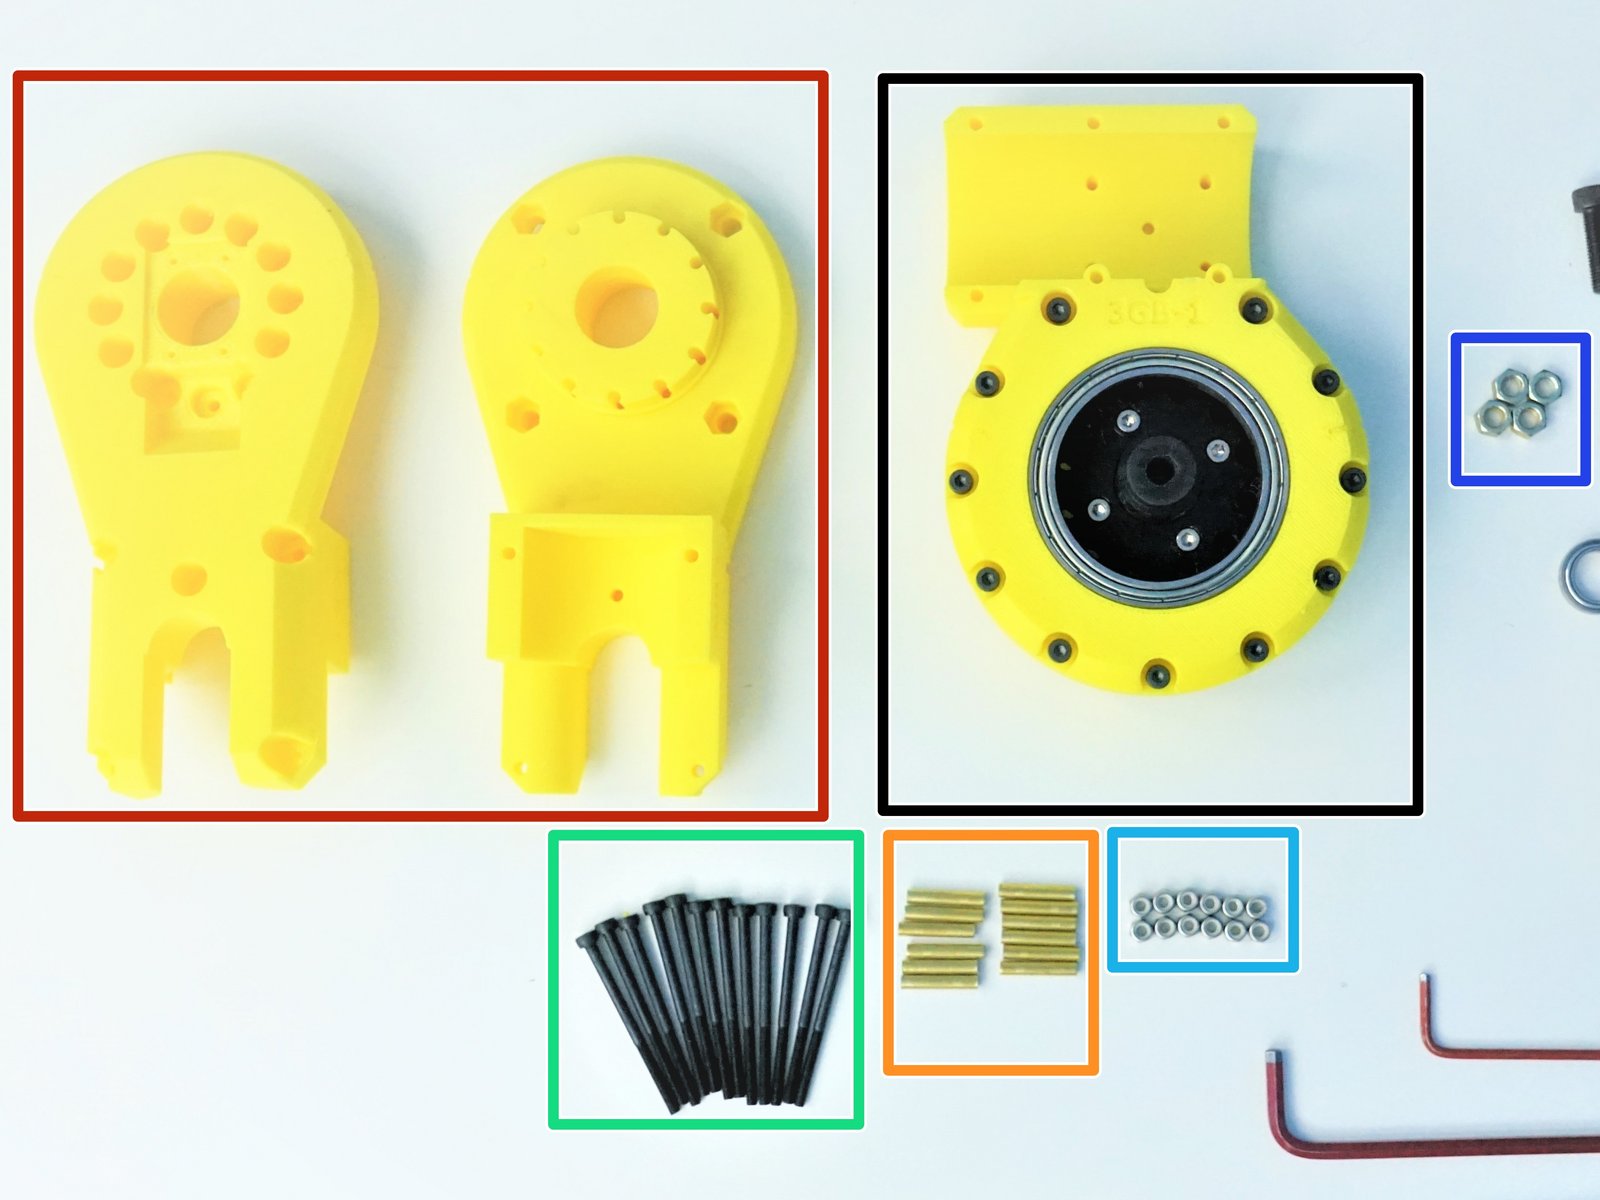
Prepare the following components:
Assembled Elbow Gearbox Top
[3D] - 3GB Elbow GB Bottom Halves
Brass Tubes [3.5mmx18.5mm] (x12)
M3x45mm Screws (x12)
M3 Nylock Nuts (x12)
M5 Hex Nuts (x4)
Step 13 Elbow Gearbox Bottom - 1
Click the large image to open full size.
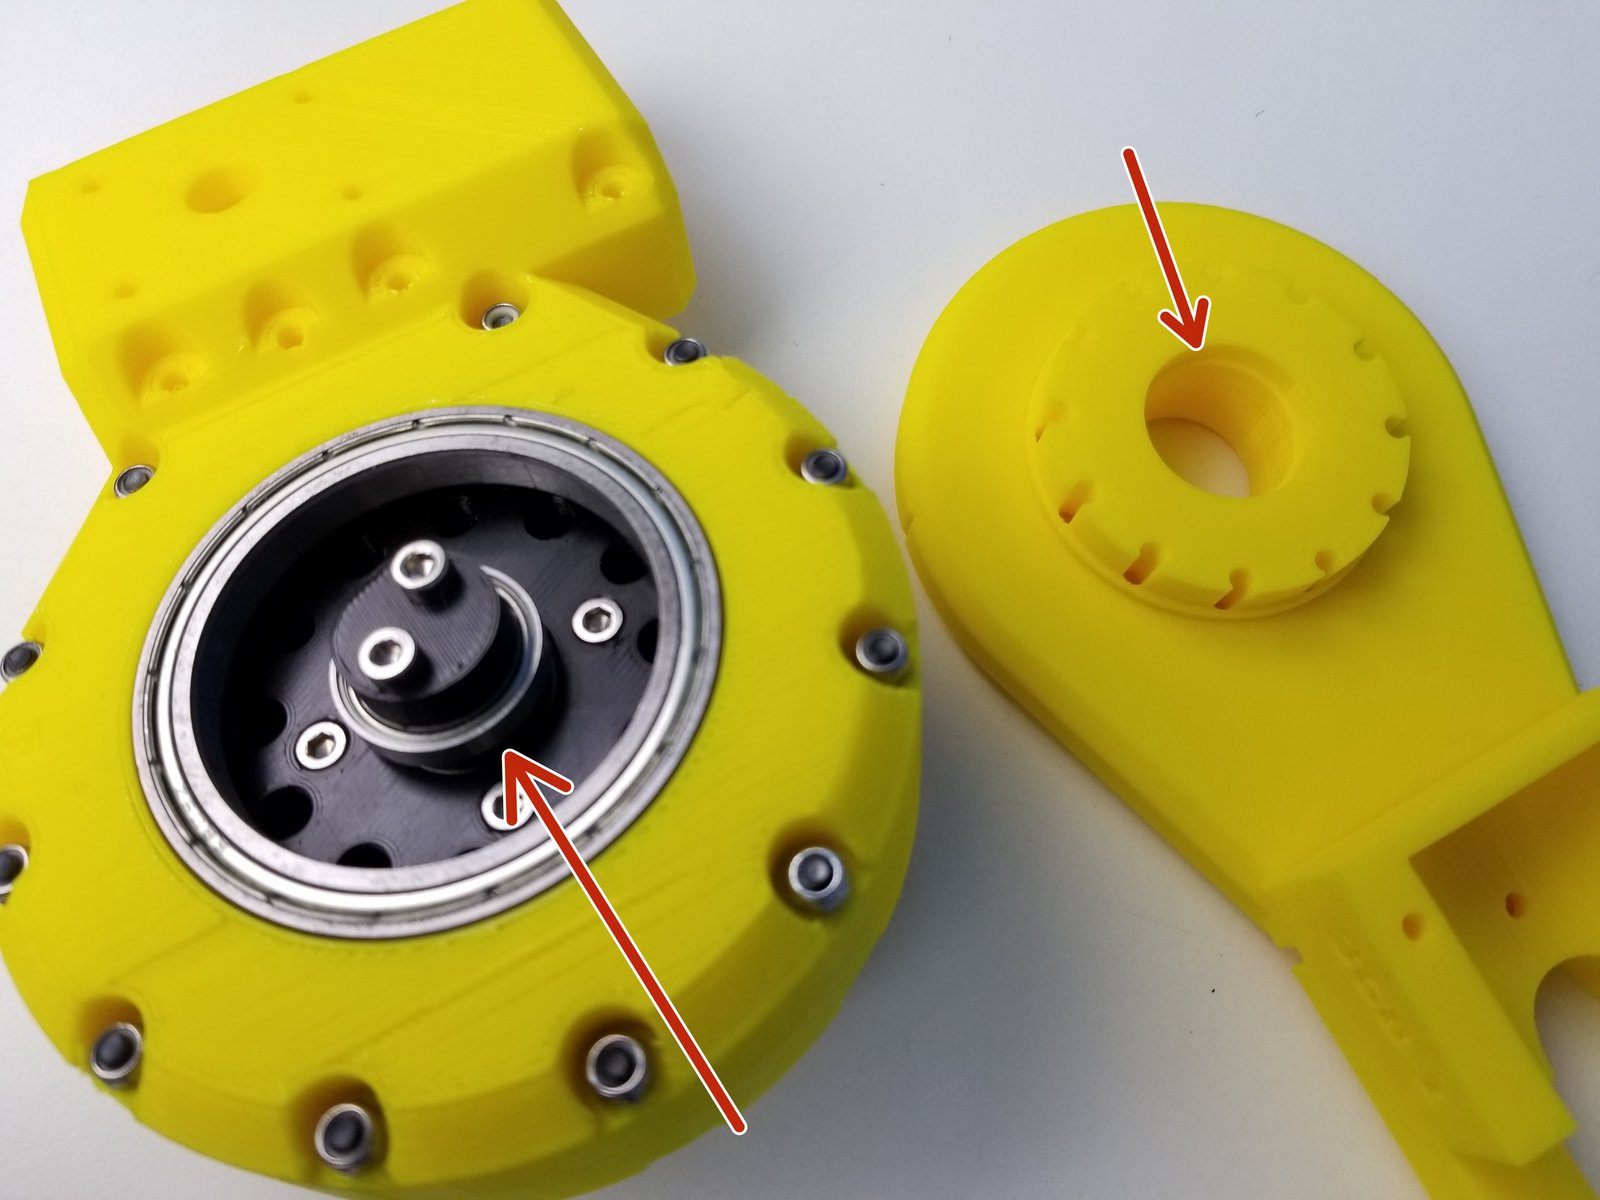
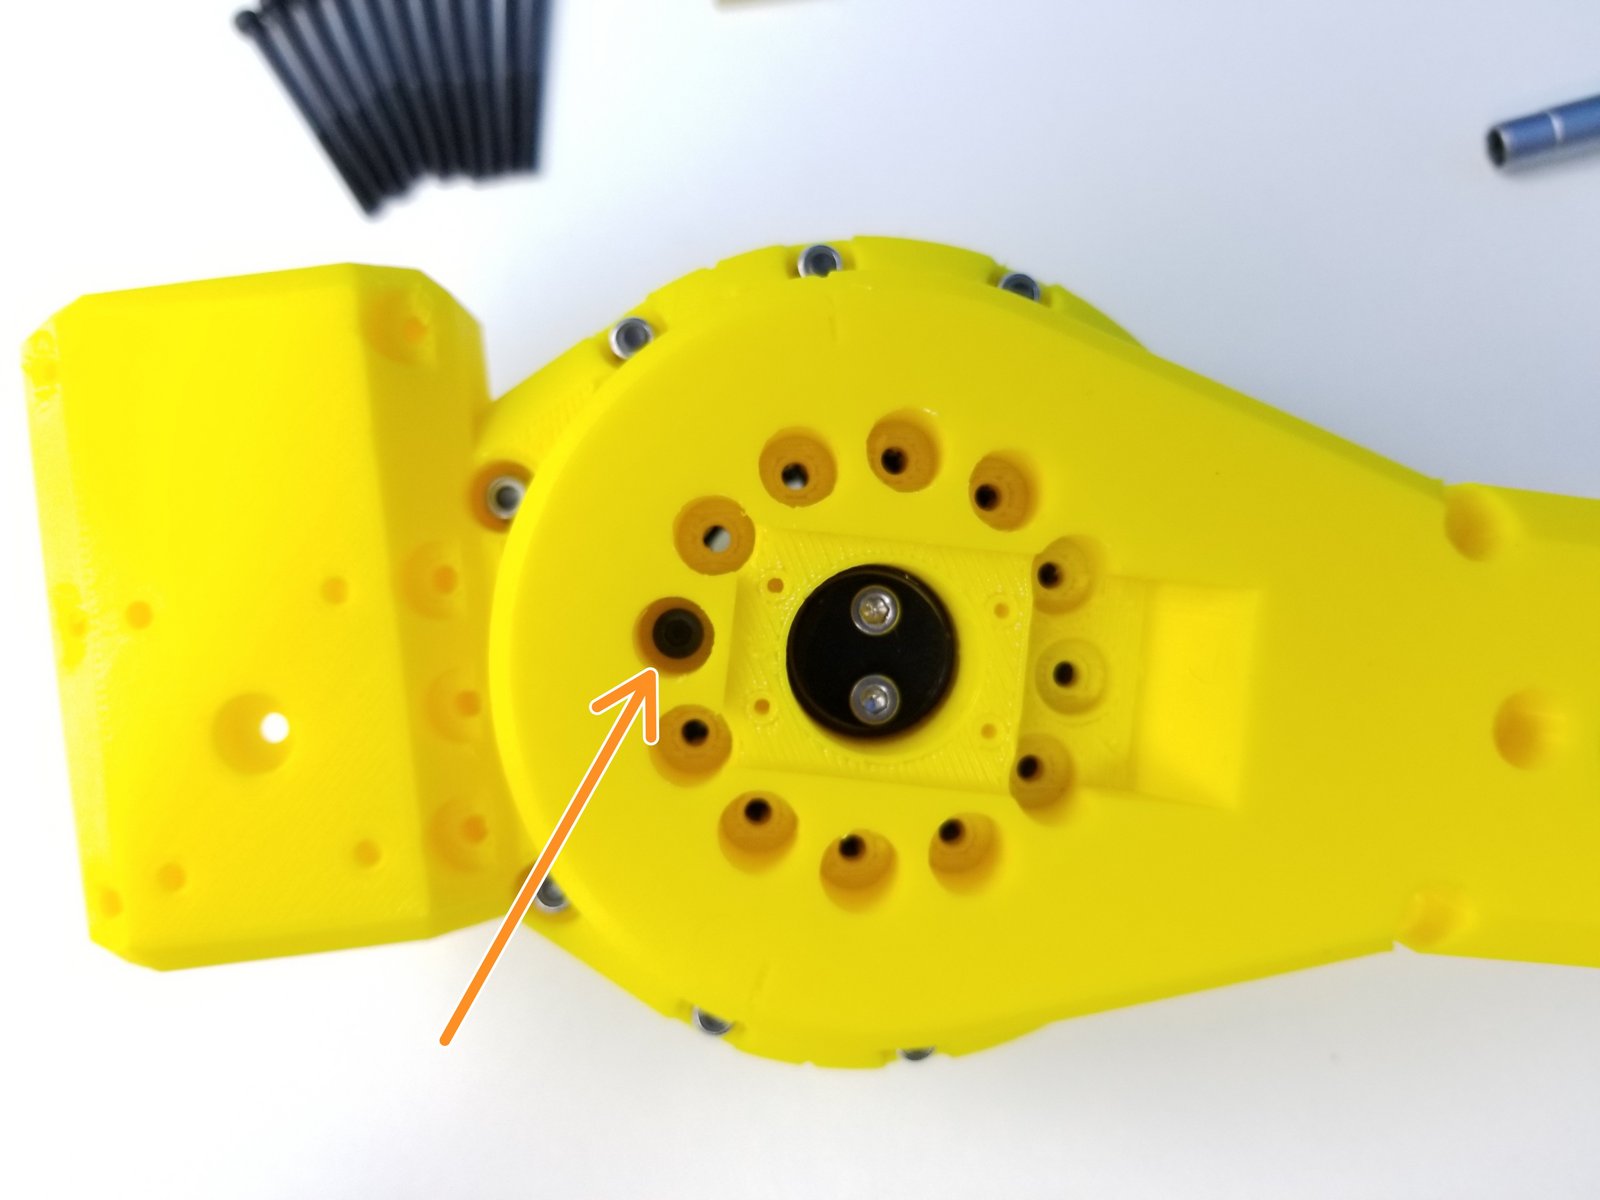
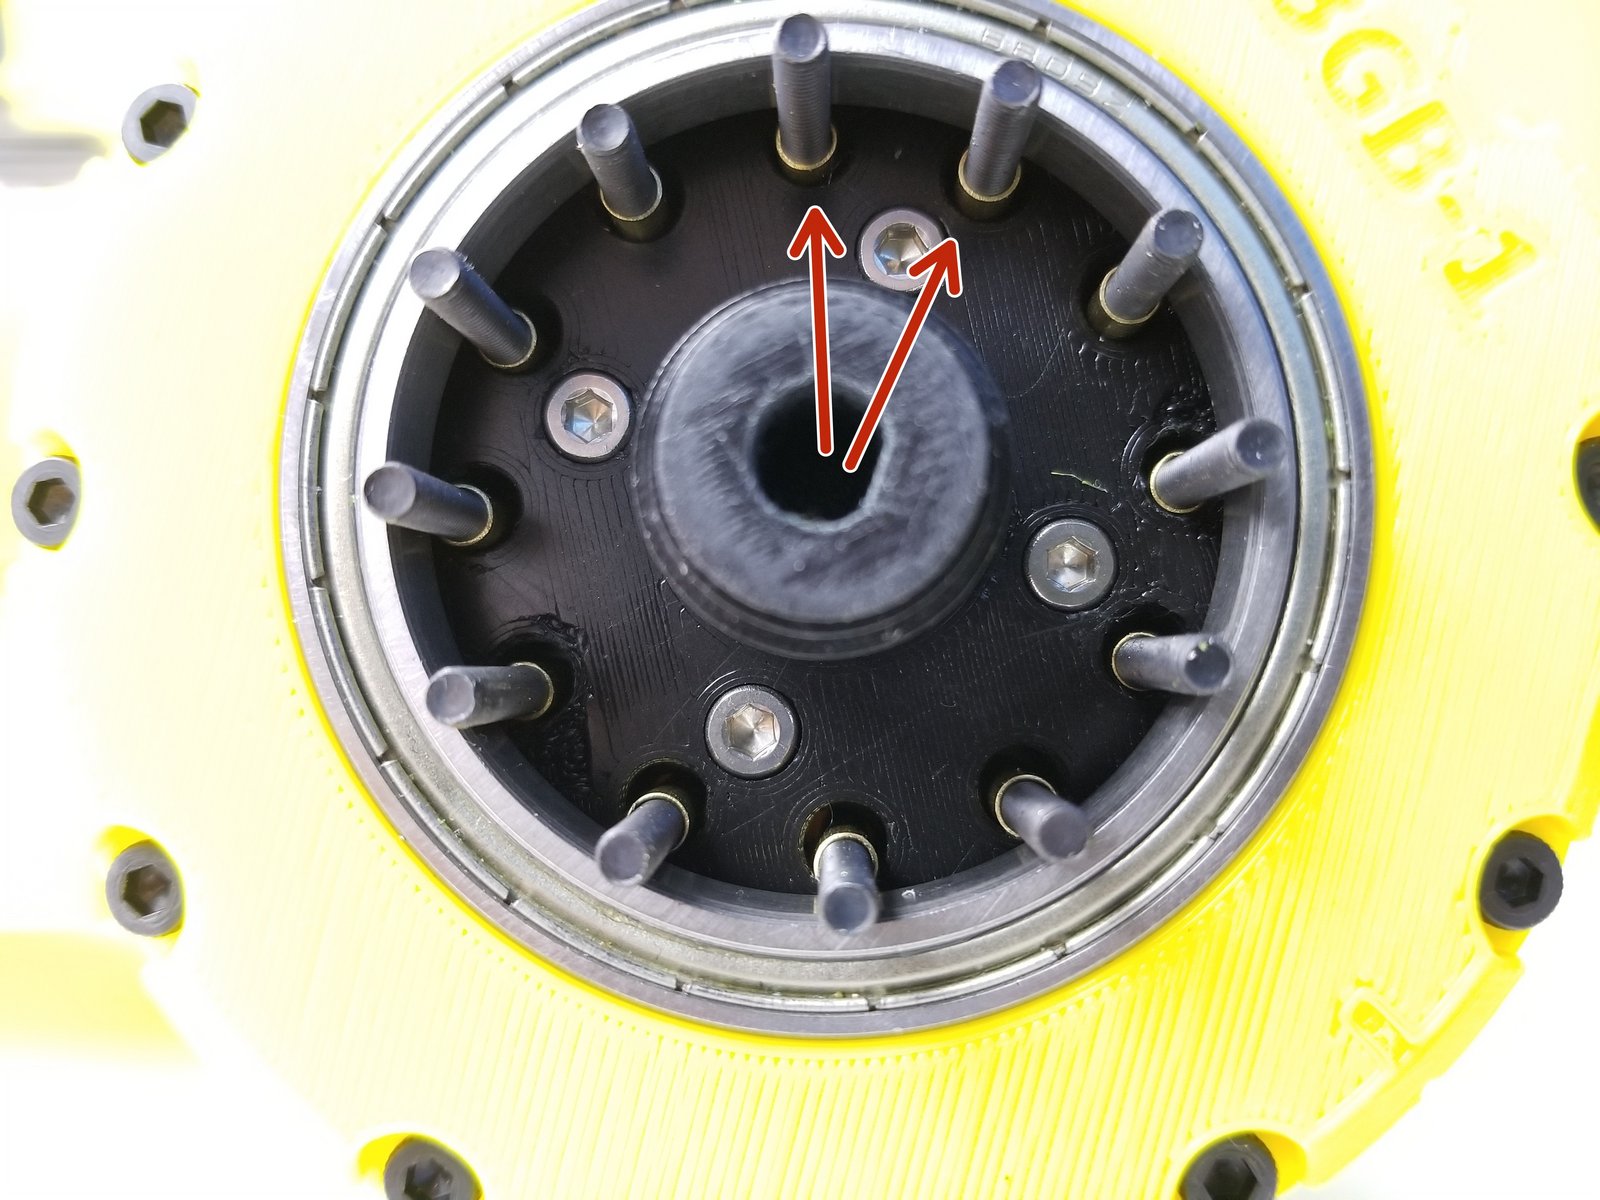
Align the Bearing Insert of the Gearbox Bottom Sensor Side Piece to the Shaft Holder Cam Bearing of the Input Shaft
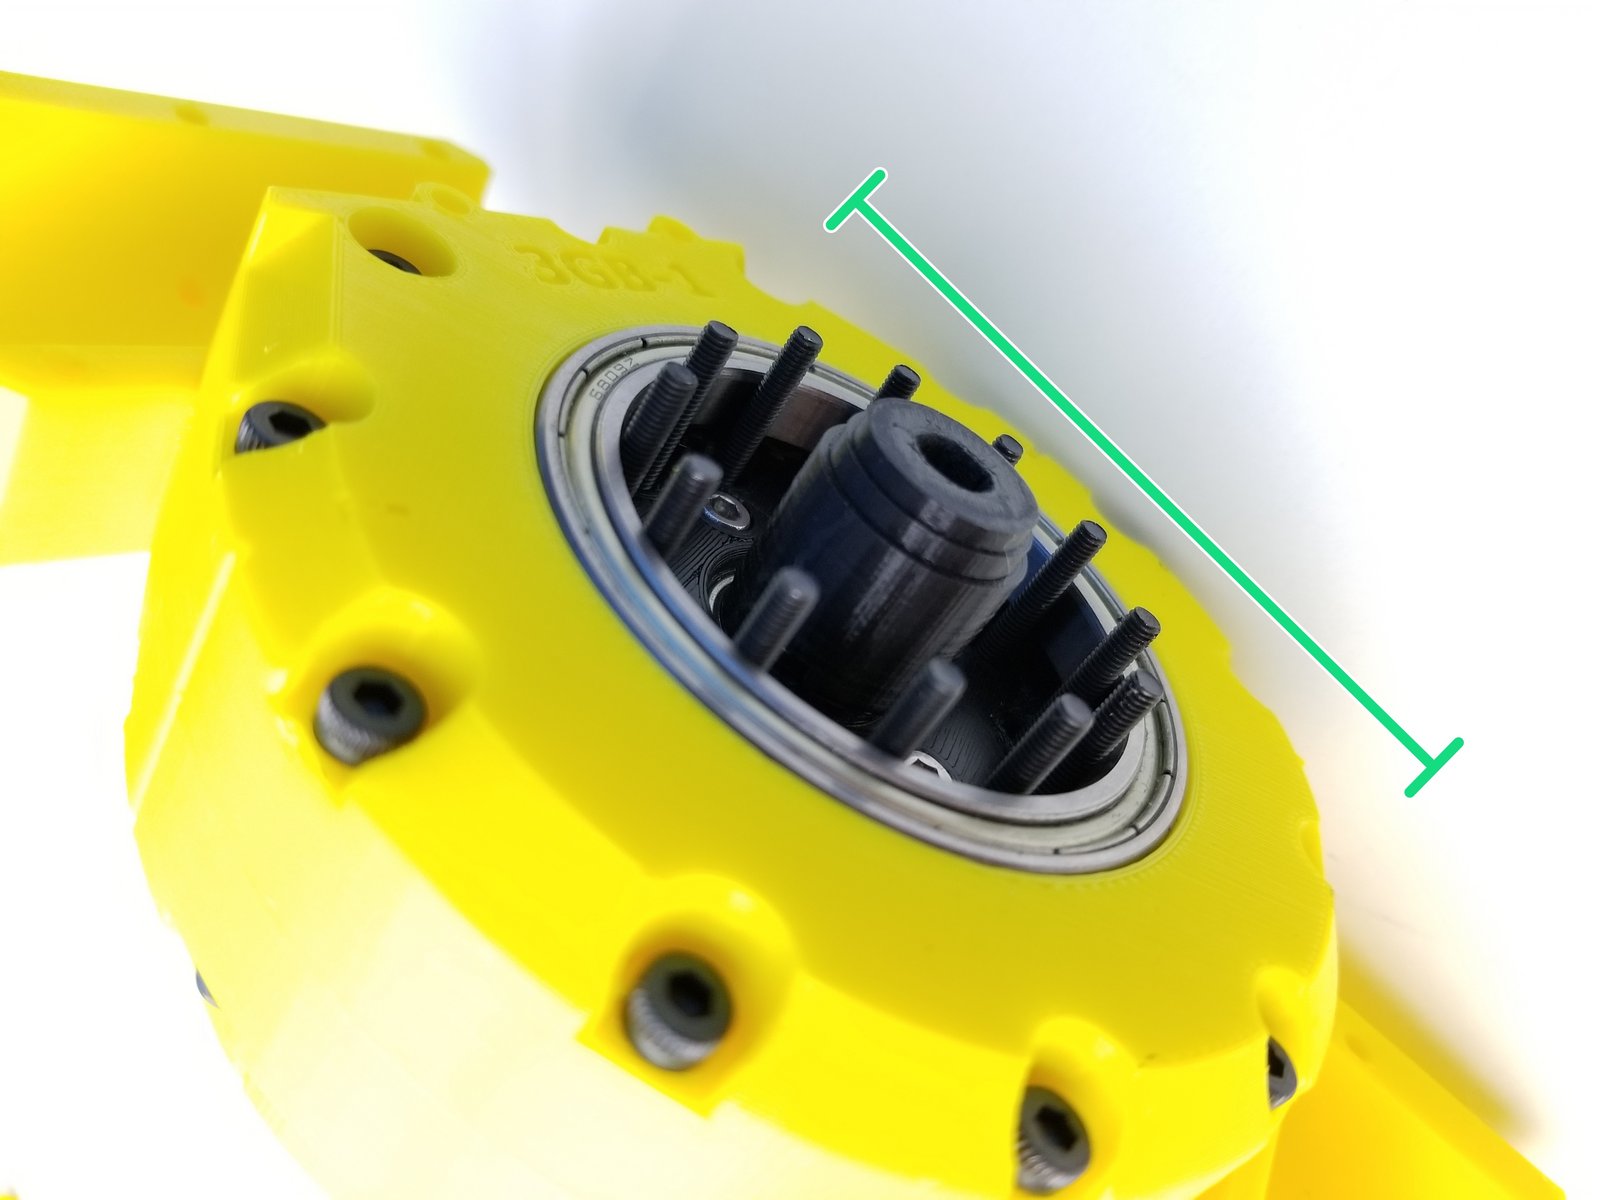
Insert M3x45mm Screws all the way through
- Warning:
If Screws aren't going in correctly, you will have to re do the steps, go to aligning the Rotor Step
Keep the Gearbox laying on its side for easier assembly
Step 14 Elbow Gearbox Bottom - 2
Click the large image to open full size.
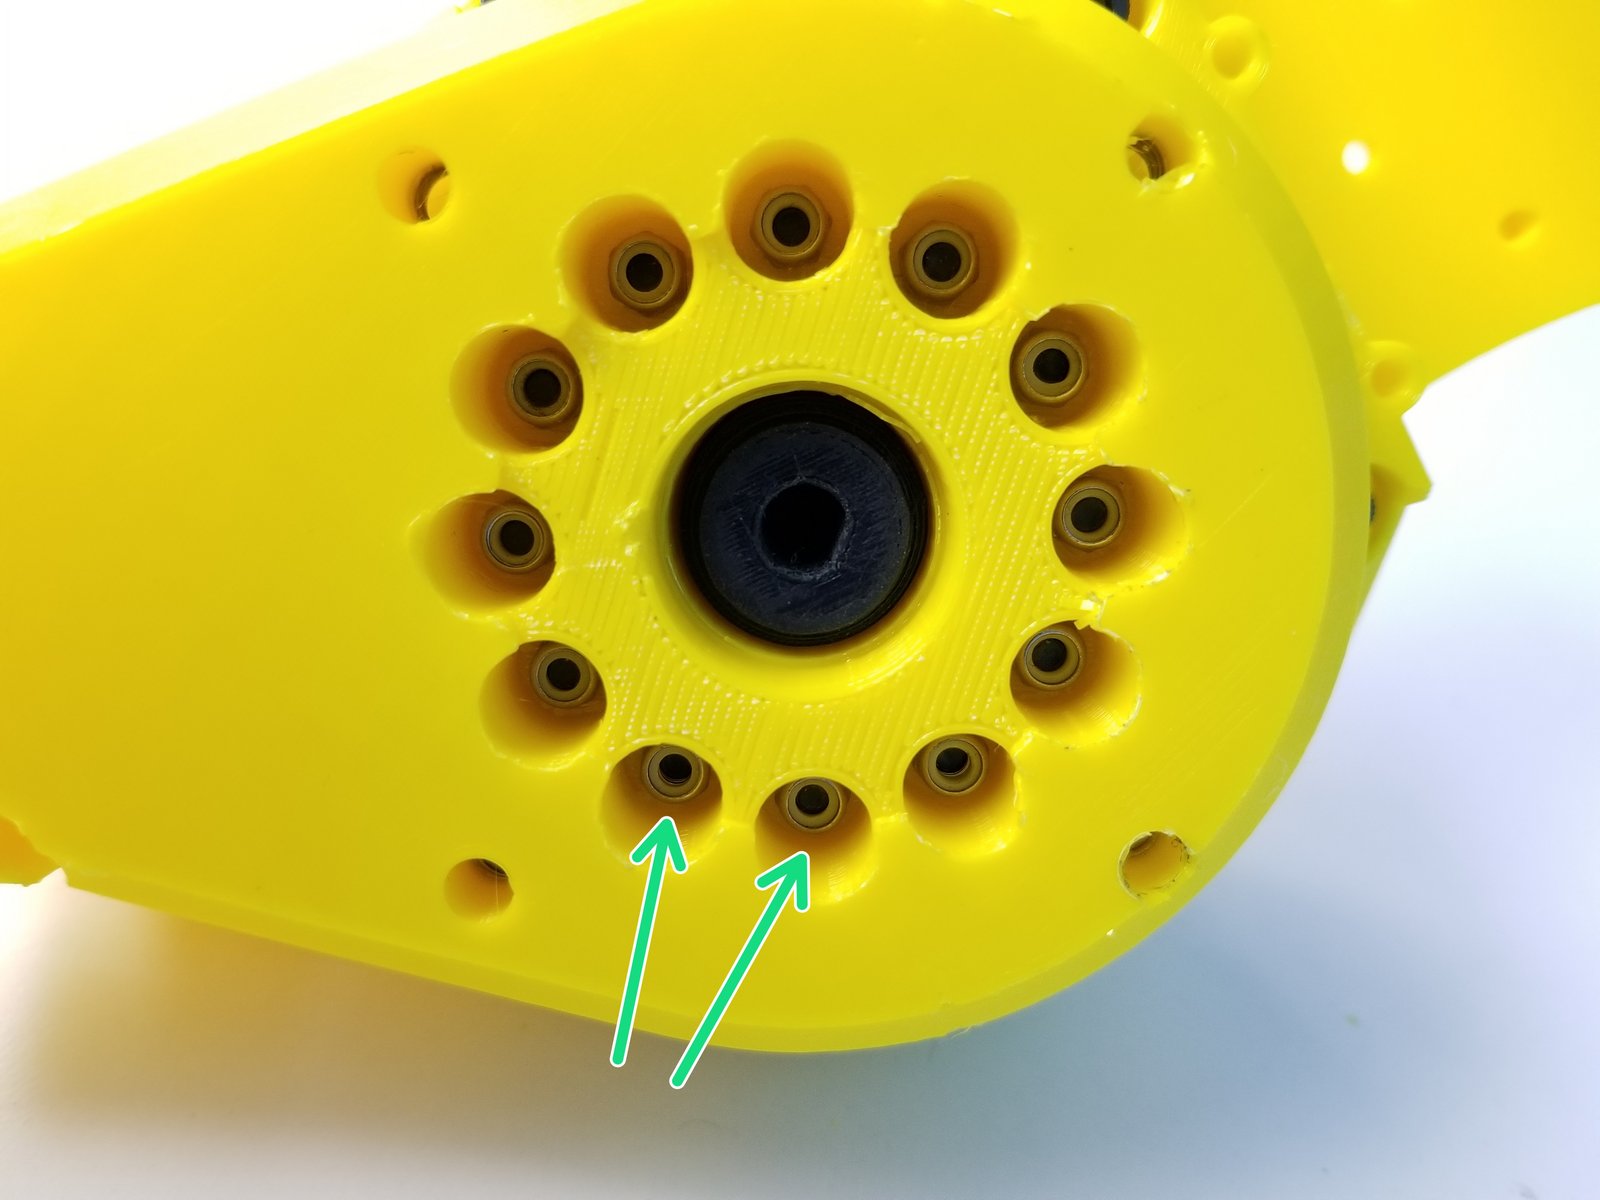
While keeping the Gearbox on its side, insert 3.5x18.5mm Brass Tubes on each Screws
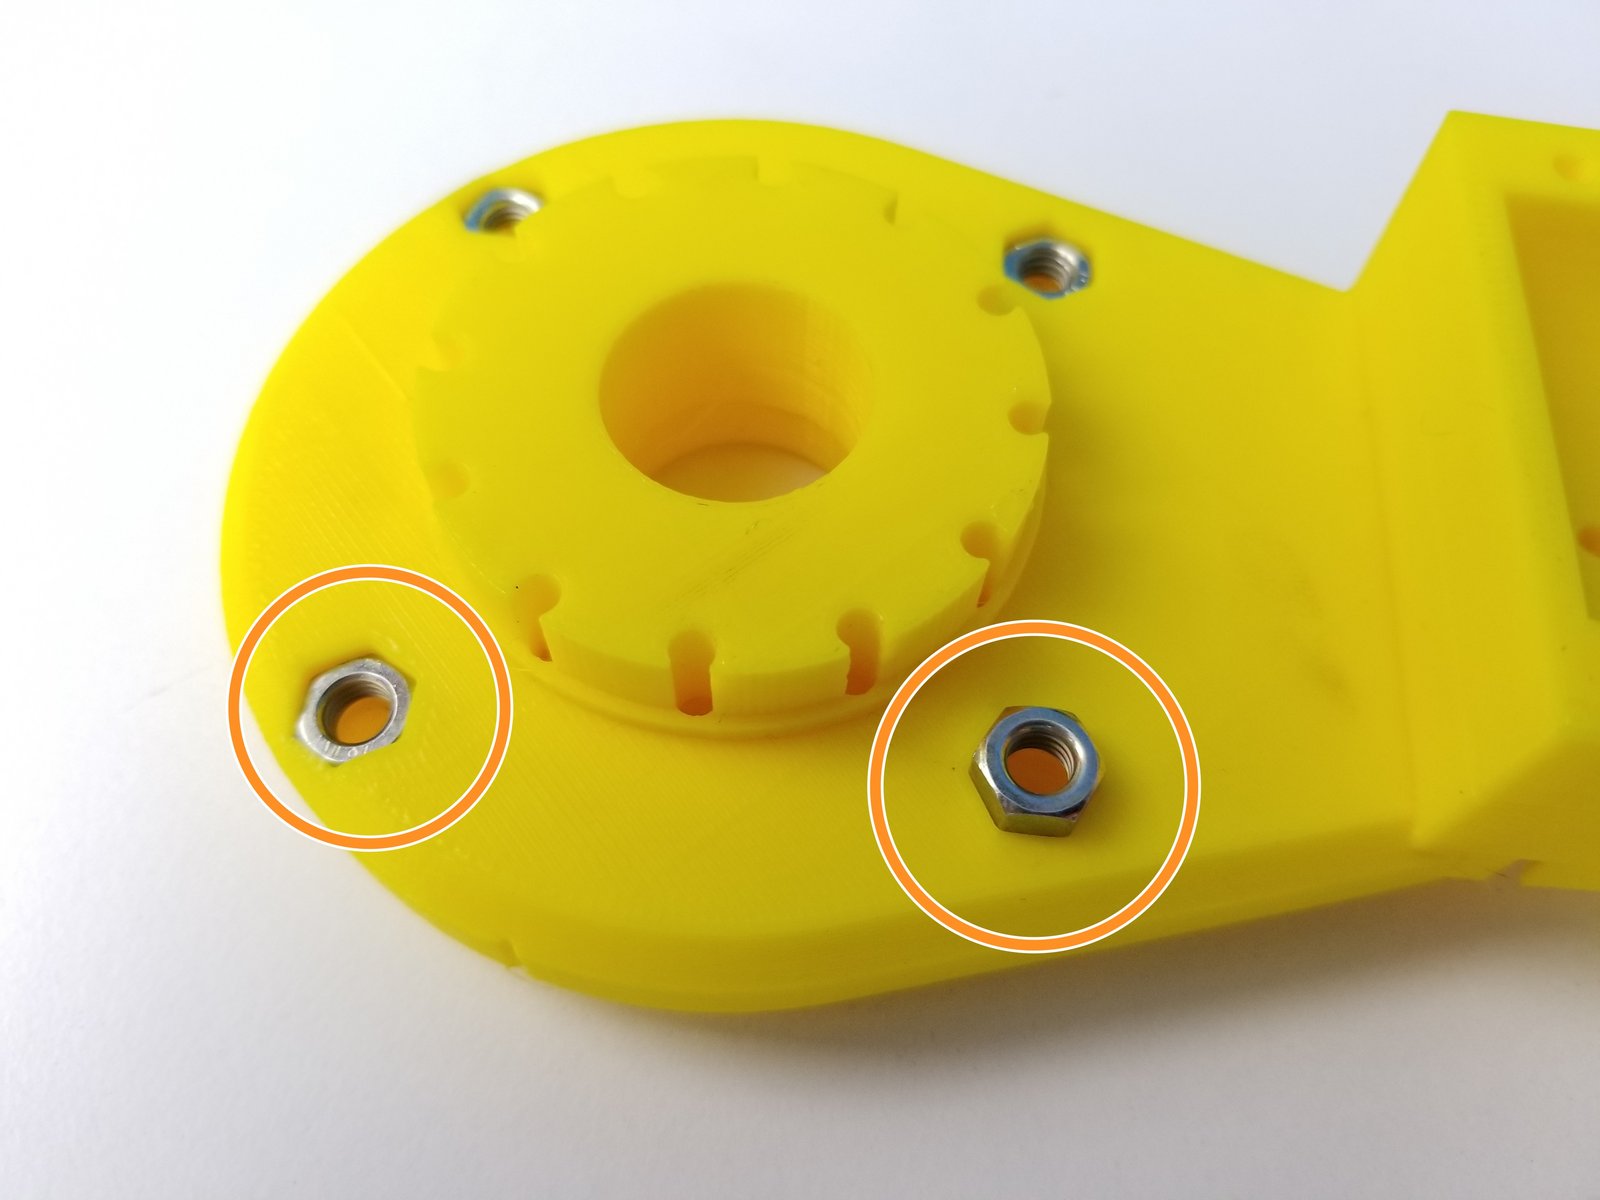
Insert M5 Hex Nuts on the Motor Side of the Elbow Gearbox Bottom
Insert the other Half of the Elbow Gearbox Bottom and secure it with M3 Nylock Nuts using the Alan Key and Socket Driver
Step 15 Elbow Gearbox Motor and Sensor - Parts
Click the large image to open full size.
- Note:
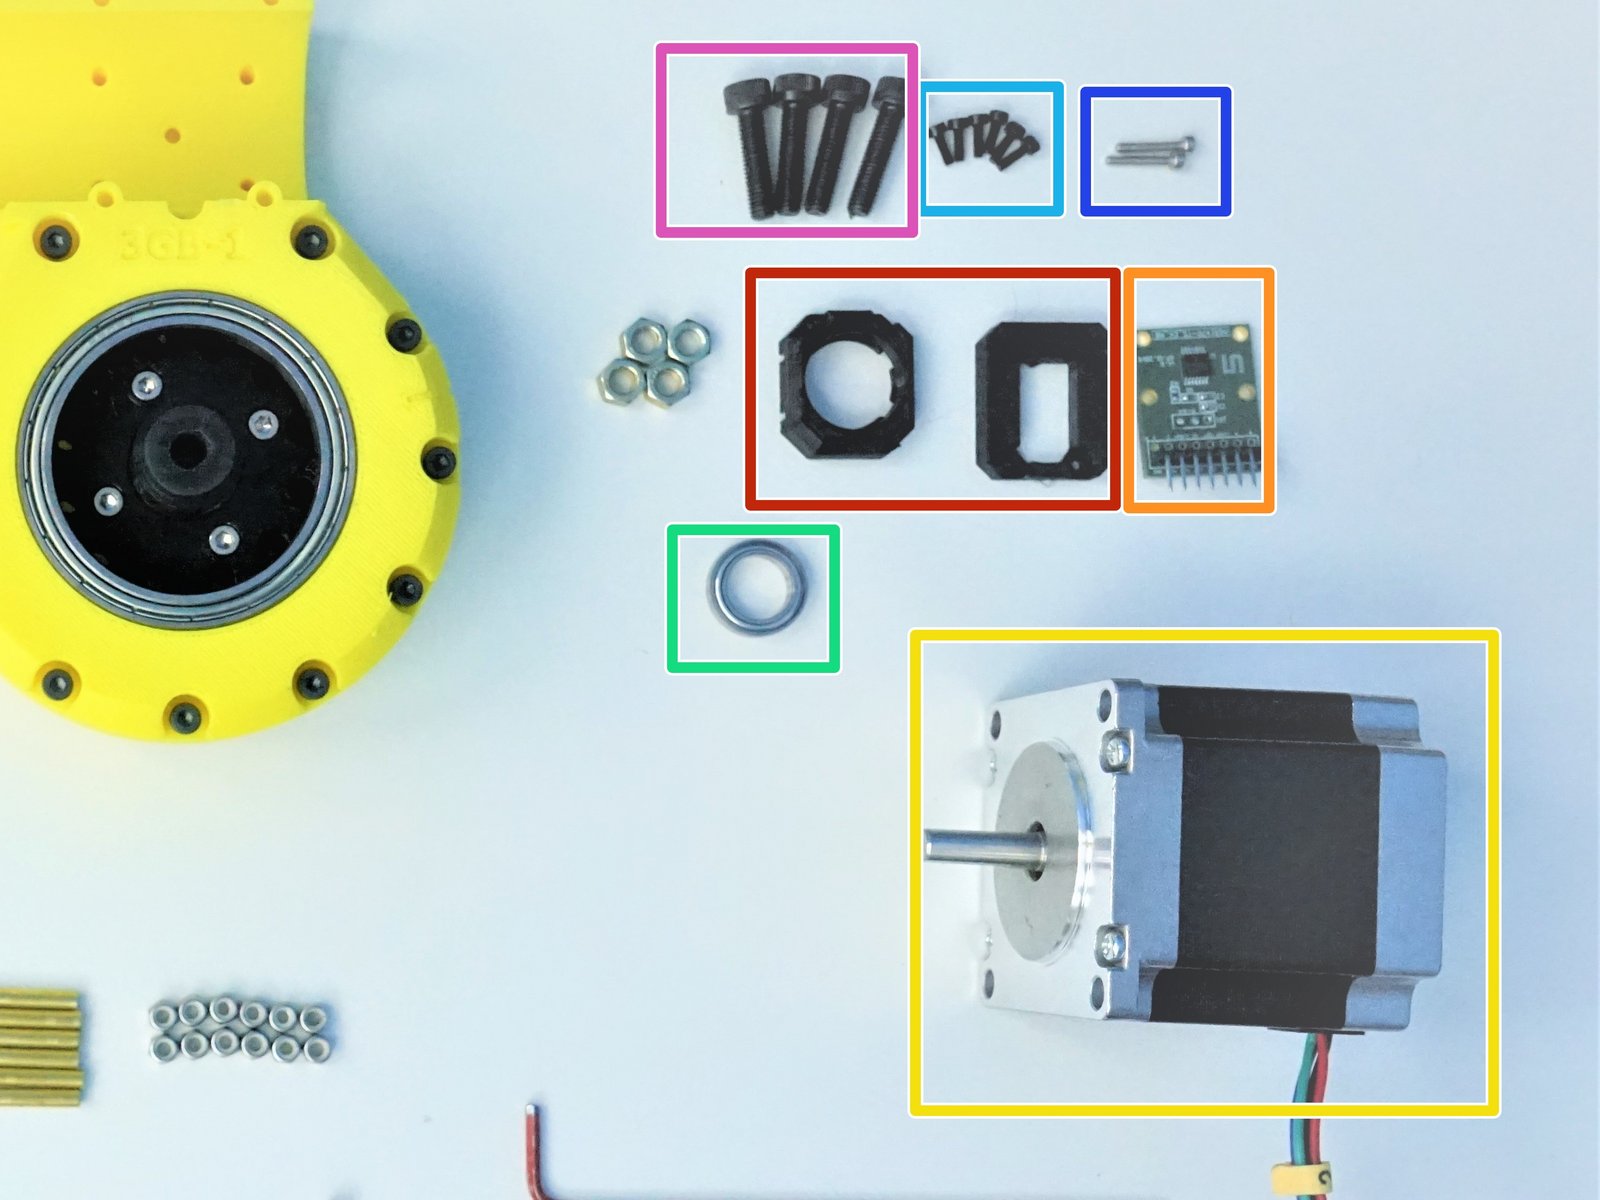
Prepare the following components:
[3D] - Sensor Adapter Parts
AS5147 Sensor [right angle headers on chip side]
NEMA23 56mm Motor
6701 Bearing [12x18x4mm] (x1)
M2x6mm Screws (x6)
M2x10mm Screws (x2)
M5x20mm Screws (x4)
Step 16 Elbow Gearbox Motor and Sensor - 1
Click the large image to open full size.
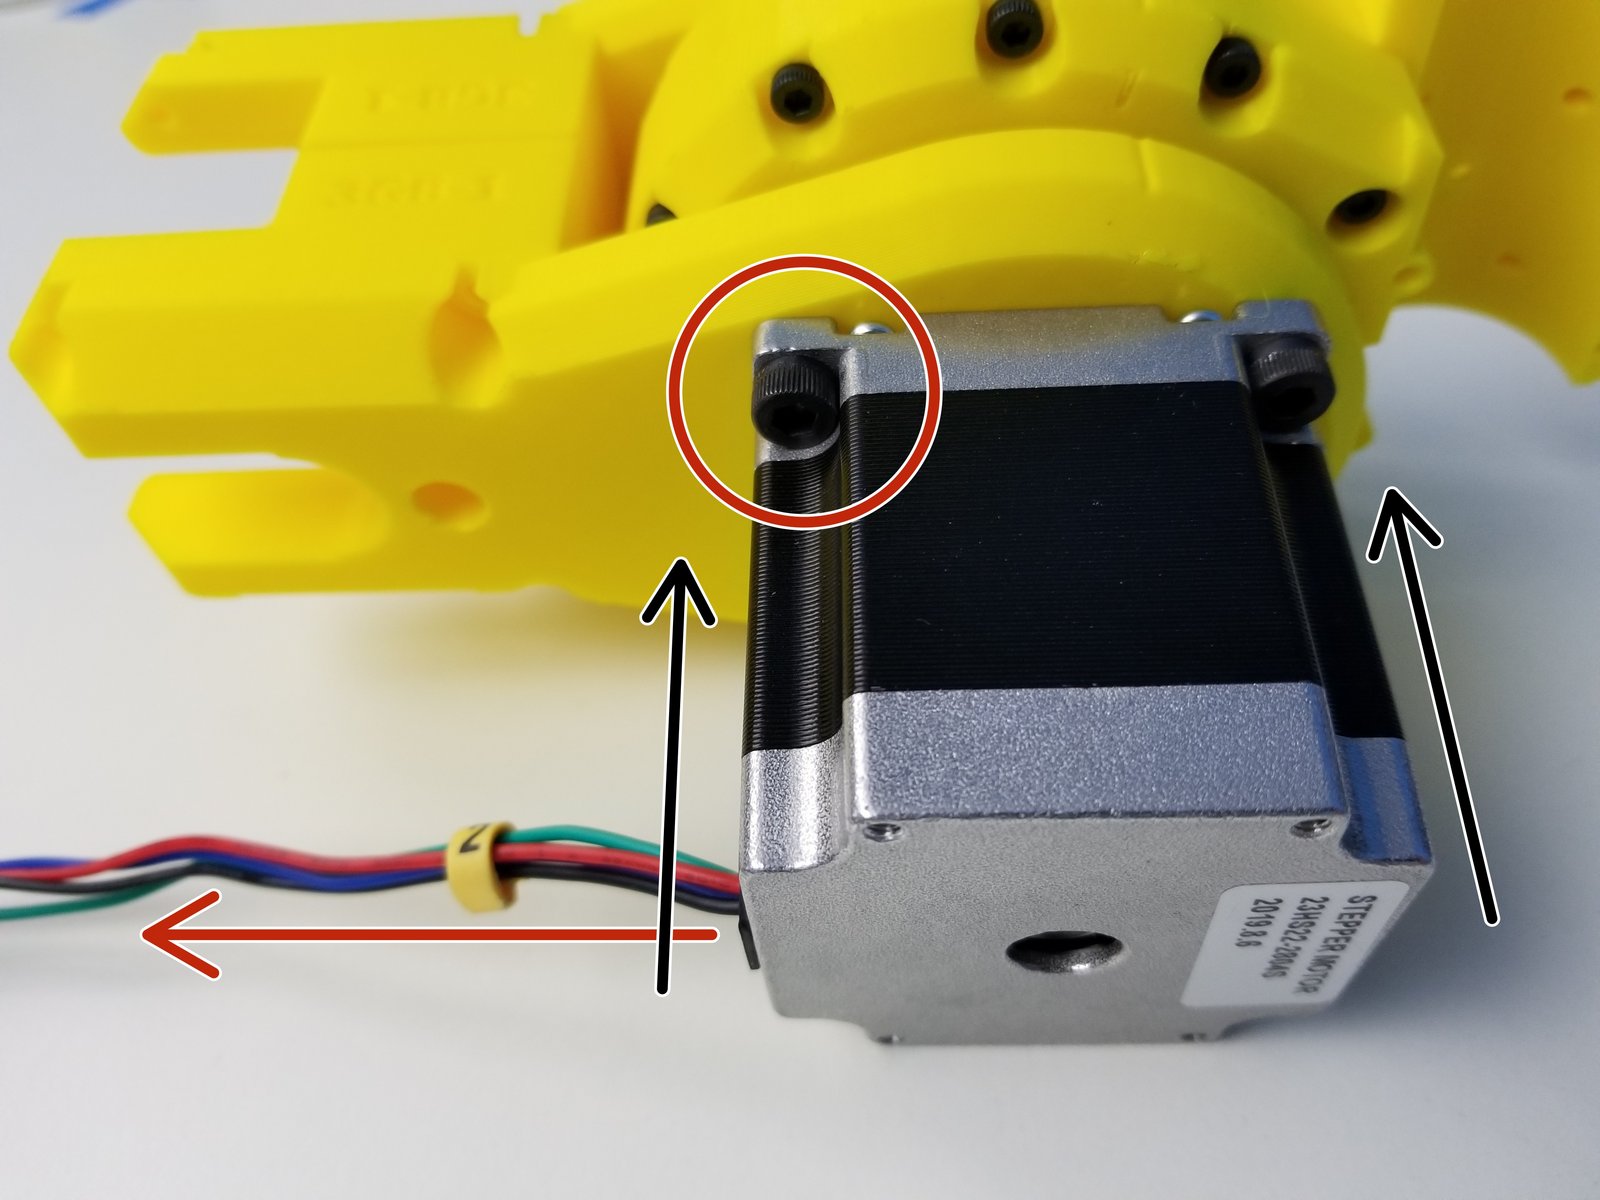
Align the D-Cut of the Motor Shaft to the Gearbox Input Shaft and insert the motor all the way through.
Rotate the motor body so the cable is pointing towards the bottom and secure the position using M5x20mm Screws
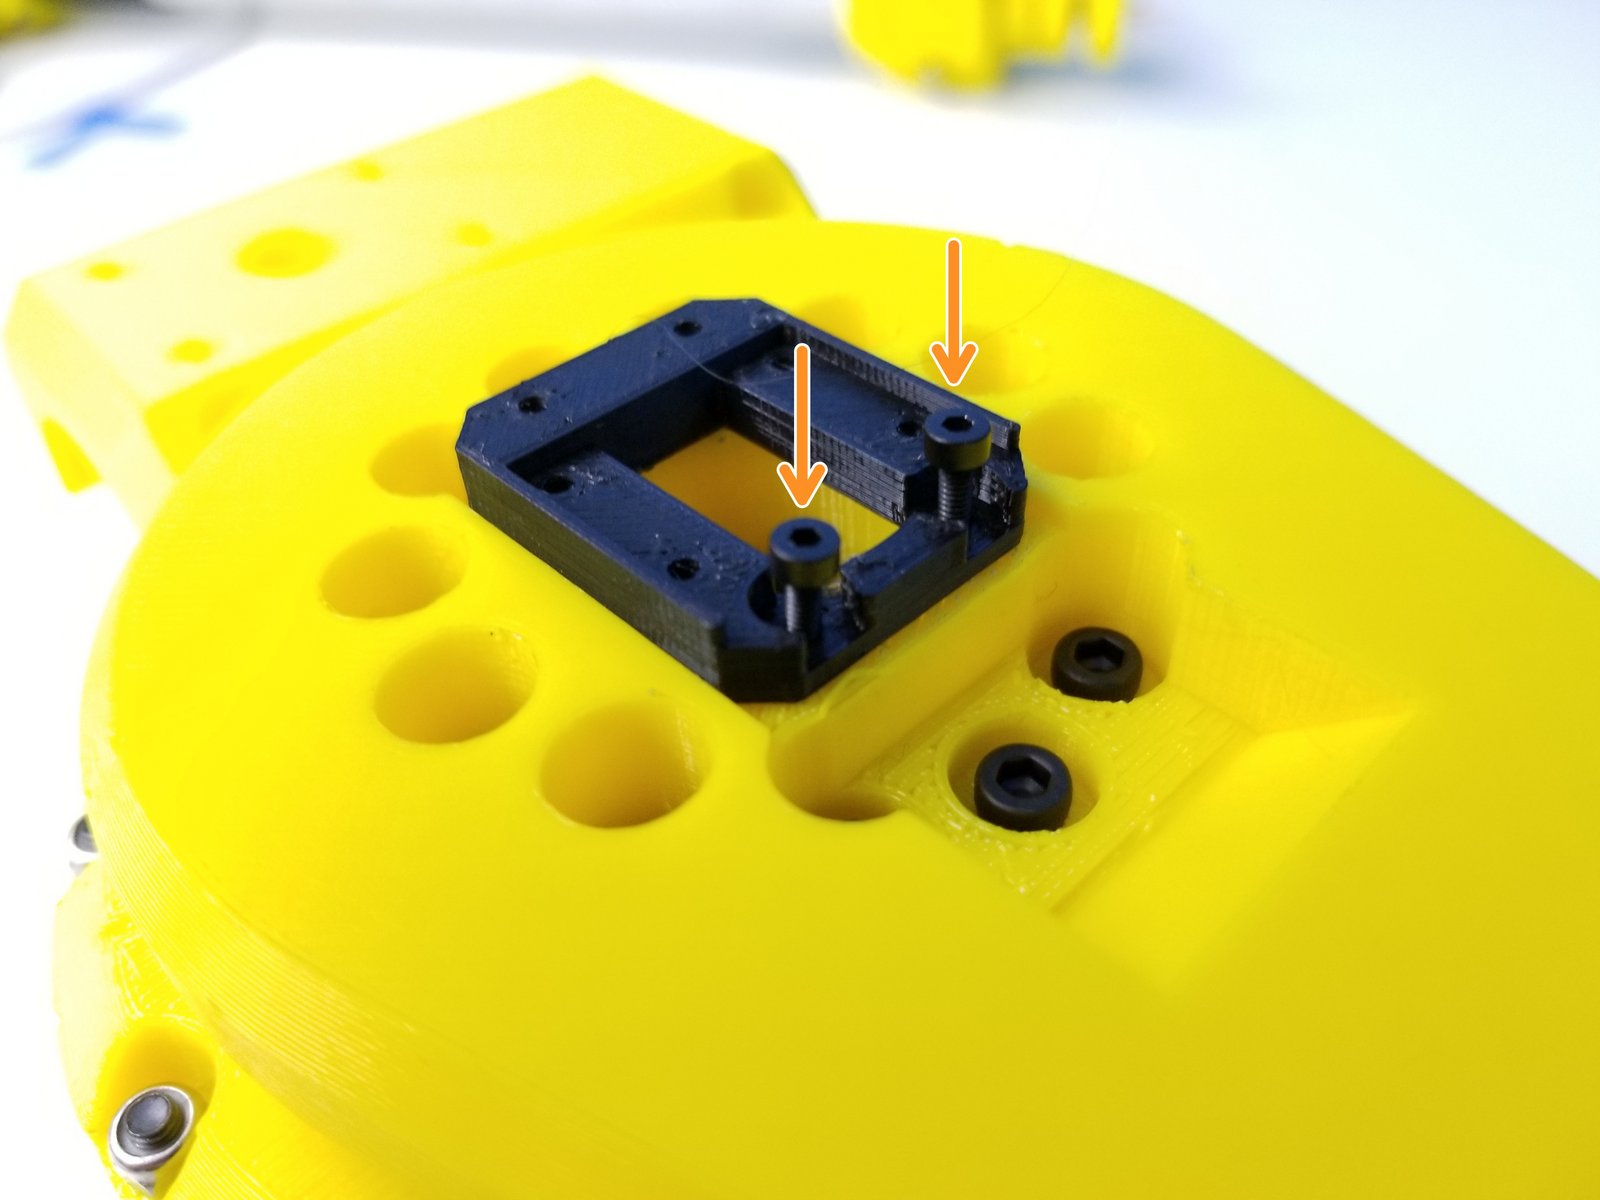
Secure the Sensor Holder using M2x6mm Screws
- Warning:
Notice the position of the Sensor holder
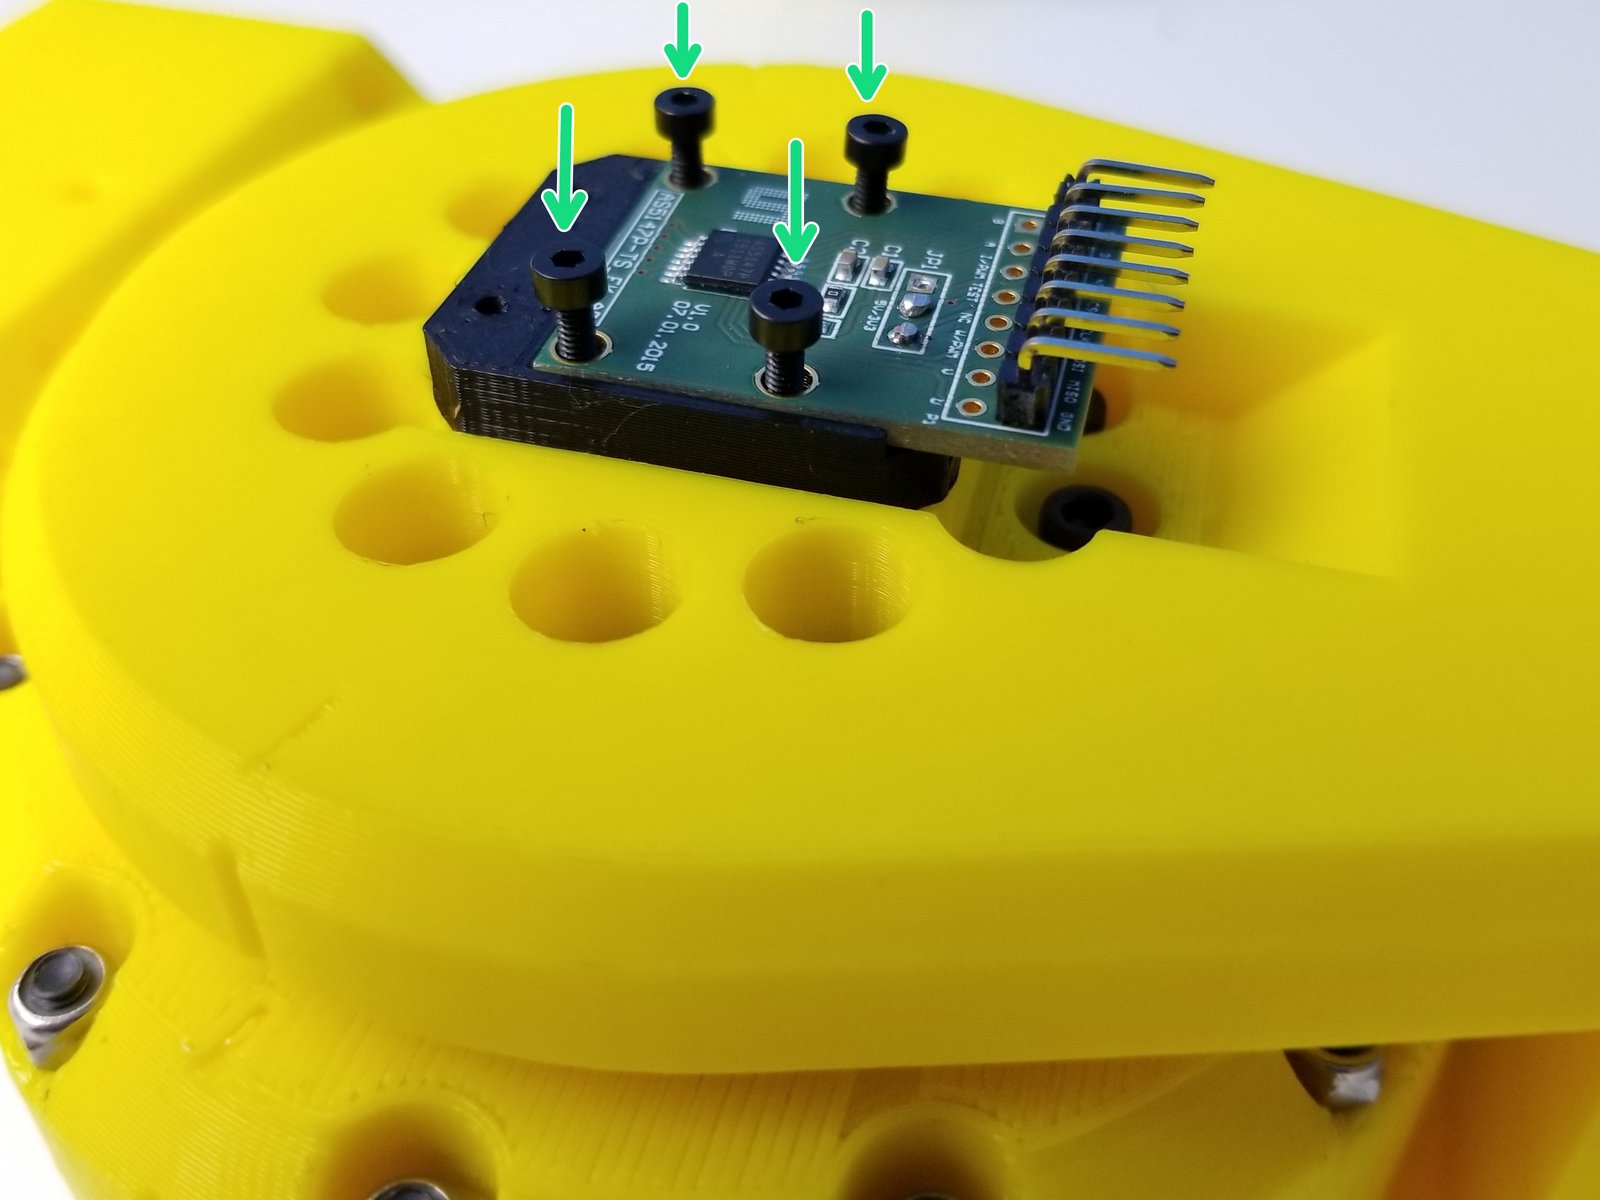
Then use the remaining M2x6mm Screws to secure the AS5147 Sensor.
Step 17 Elbow Gearbox Motor and Sensor - 2
Click the large image to open full size.
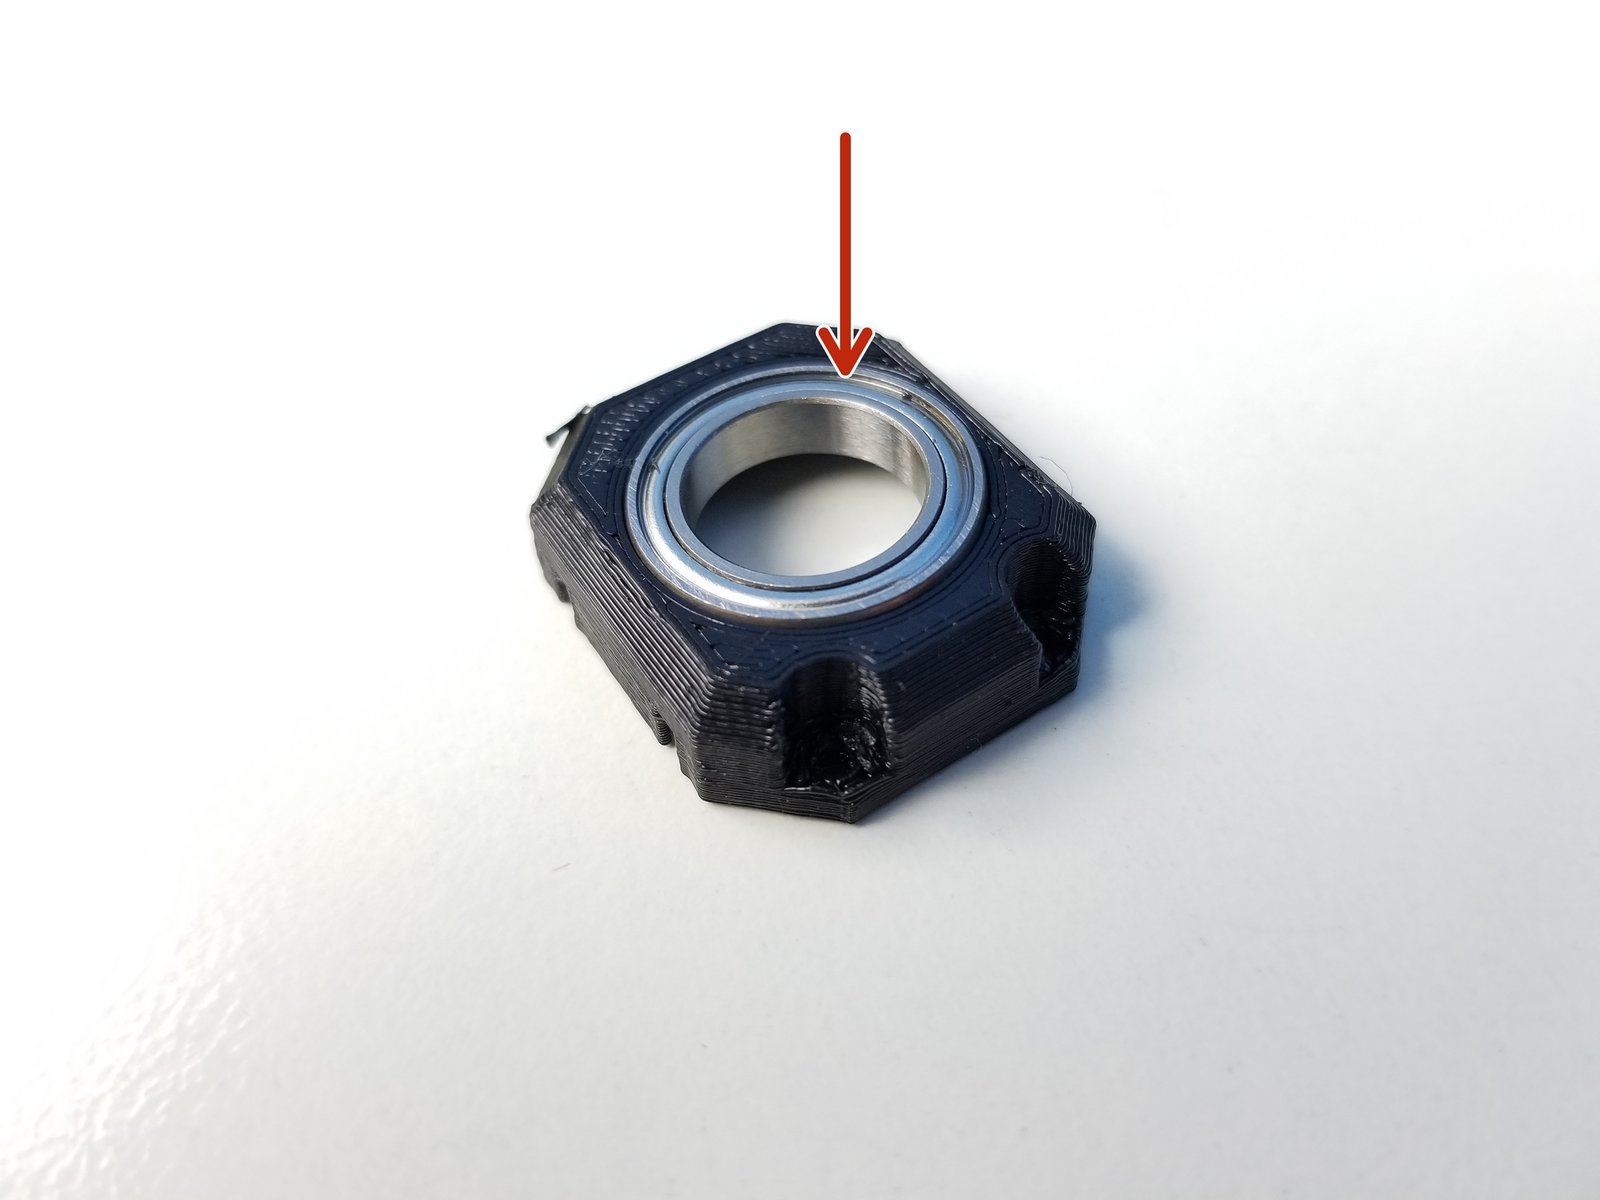
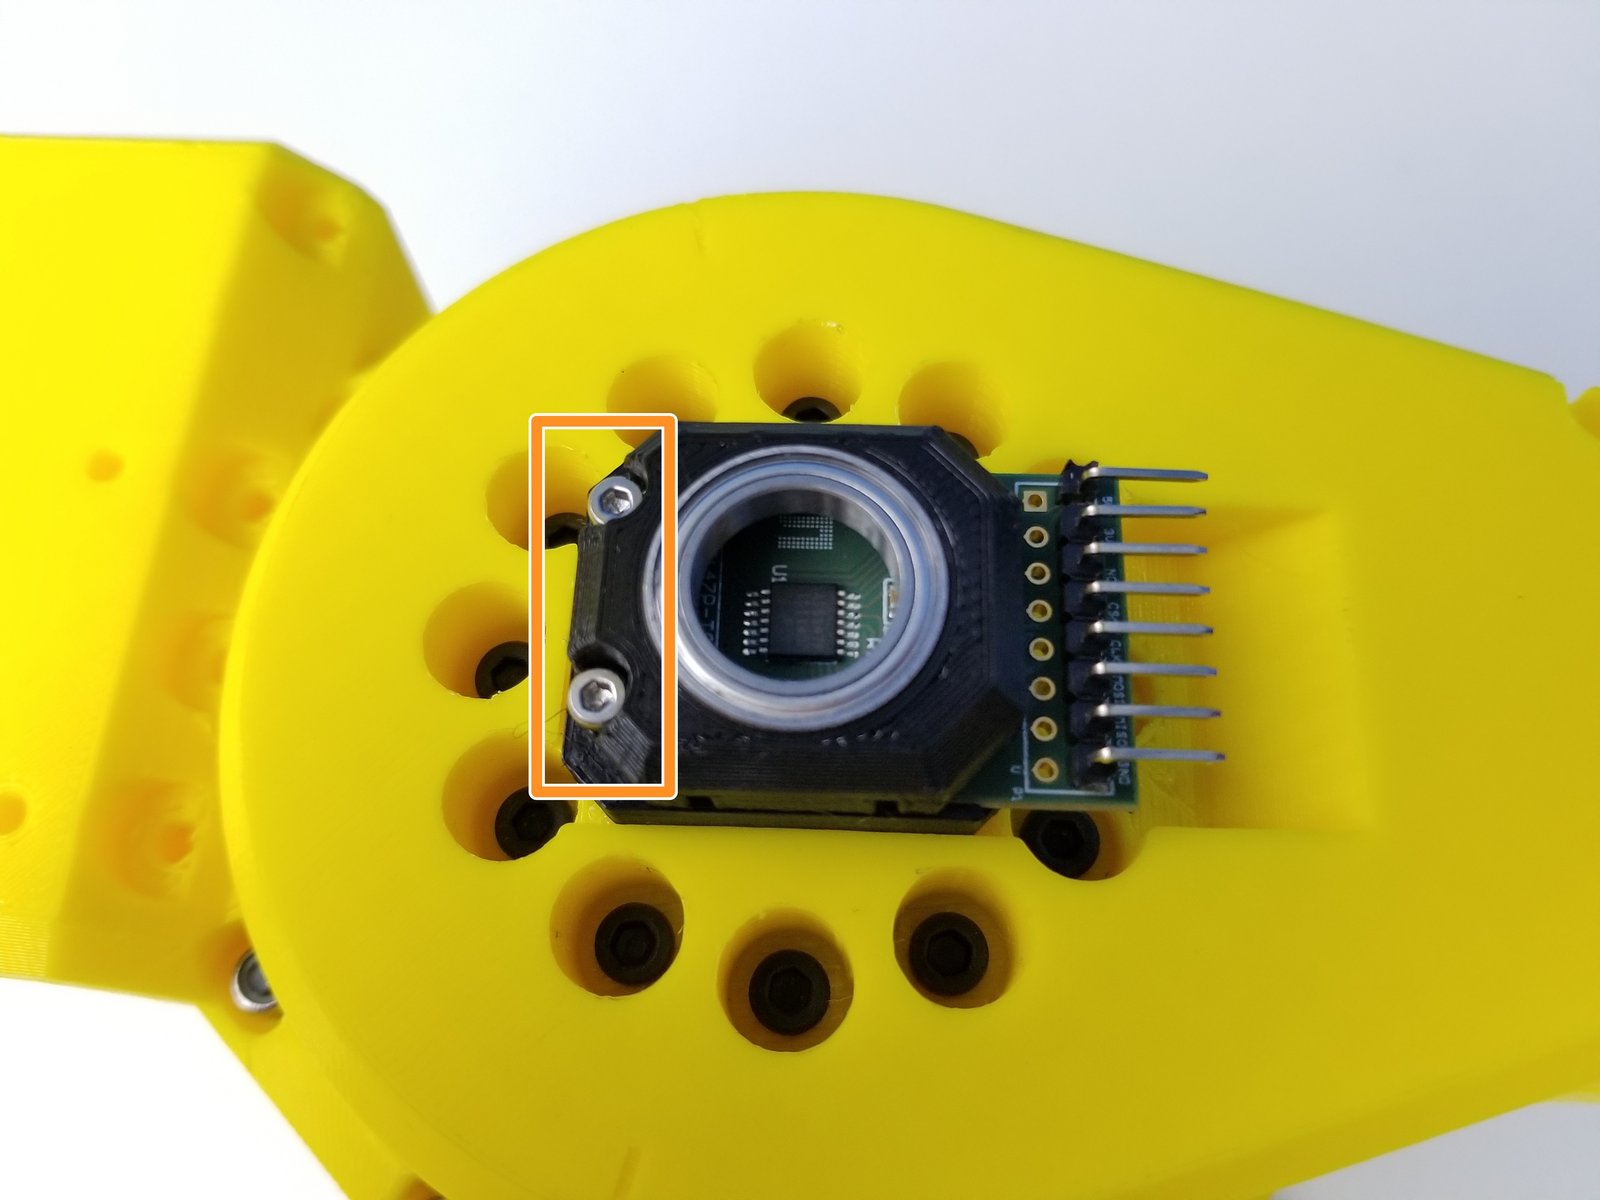
Insert 6702 Bearing in the Sensor Bearing Holder
Secure the Sensor Bearing Holder part using M2x10mm screws
Step 18 Finished!
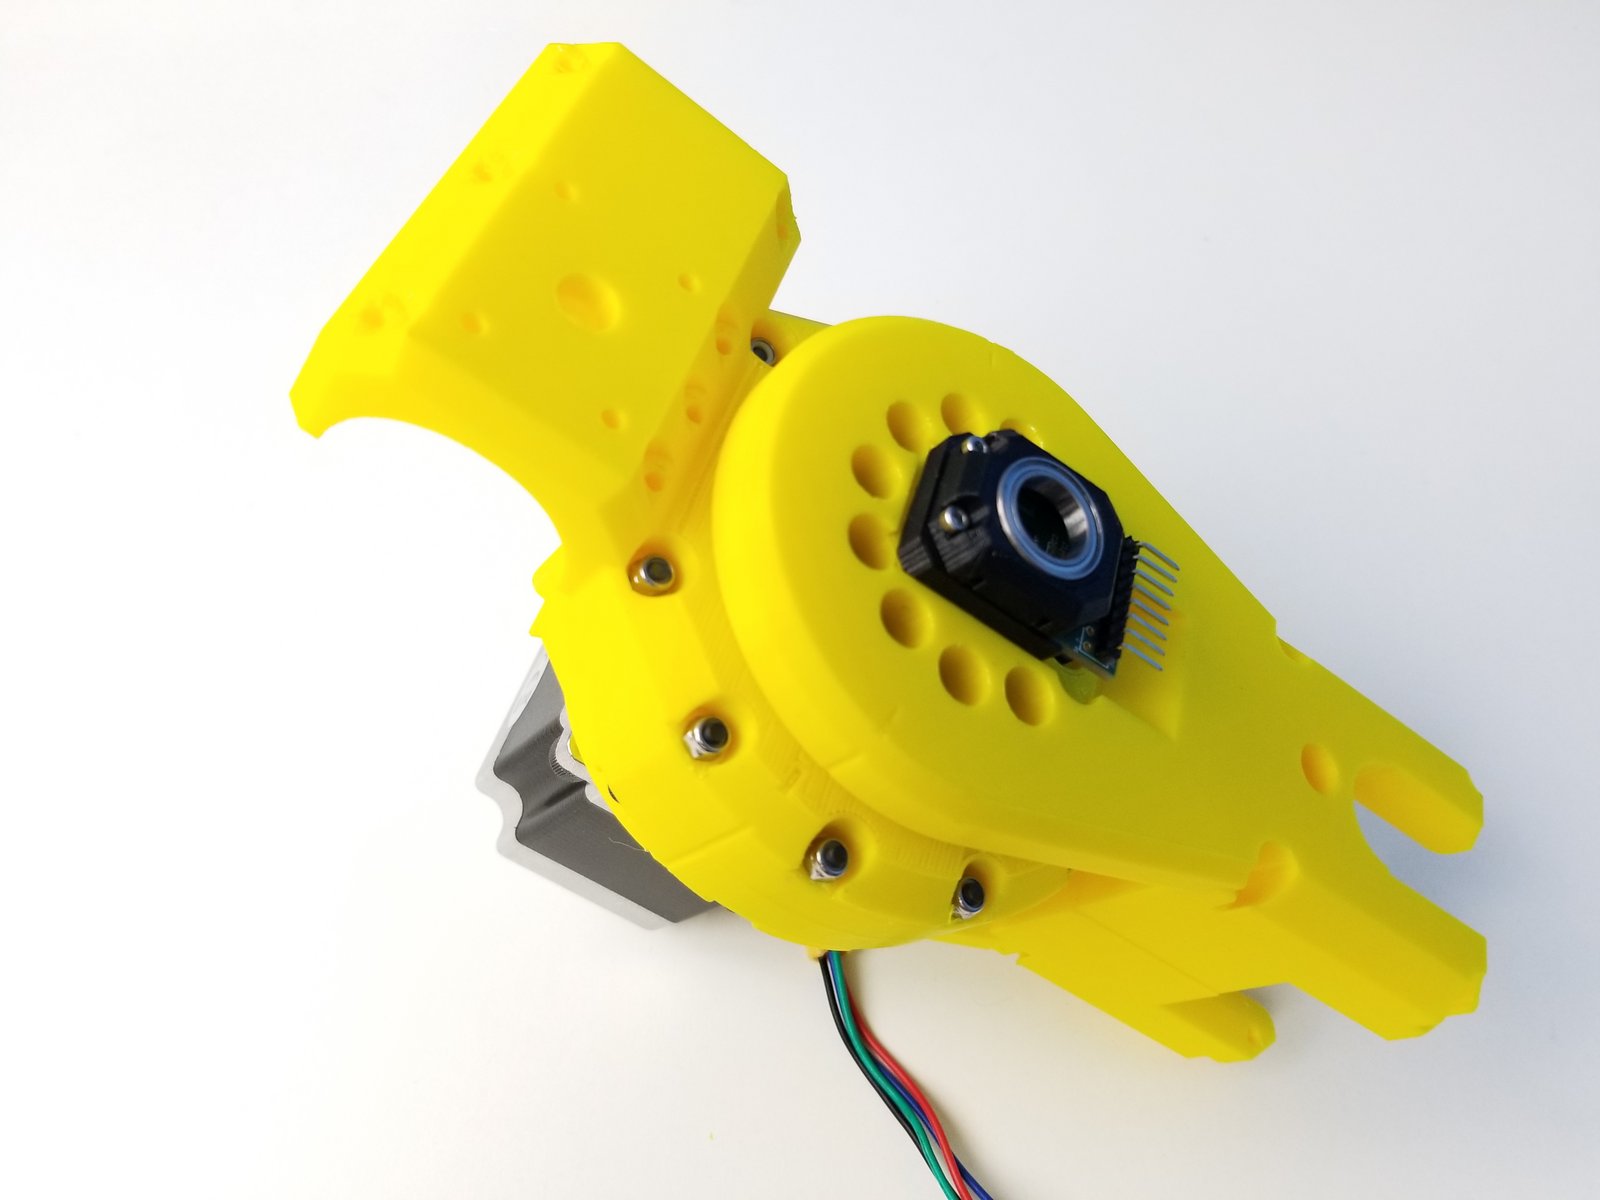
Click the large image to open full size.
Congratulation, give yourself a high five! or the closest living thing near you!